Connecting eGPU to Mac Pro 6,1 (2013)
If you have followed previous guides and your eGPU graphics card is already mounted inside the chassis and prepared Mac Pro 6,1 (2013) to use with NVIDIA eGPU or prepared Mac Pro 6,1 (2013) to use with AMD eGPU, then you can finally connect your eGPU to your Mac Pro 6,1 (2013) and start using it.
Step 1Look at the back of the eGPU chassis. From the left side you will find black power button.
|
 |
|
|
|
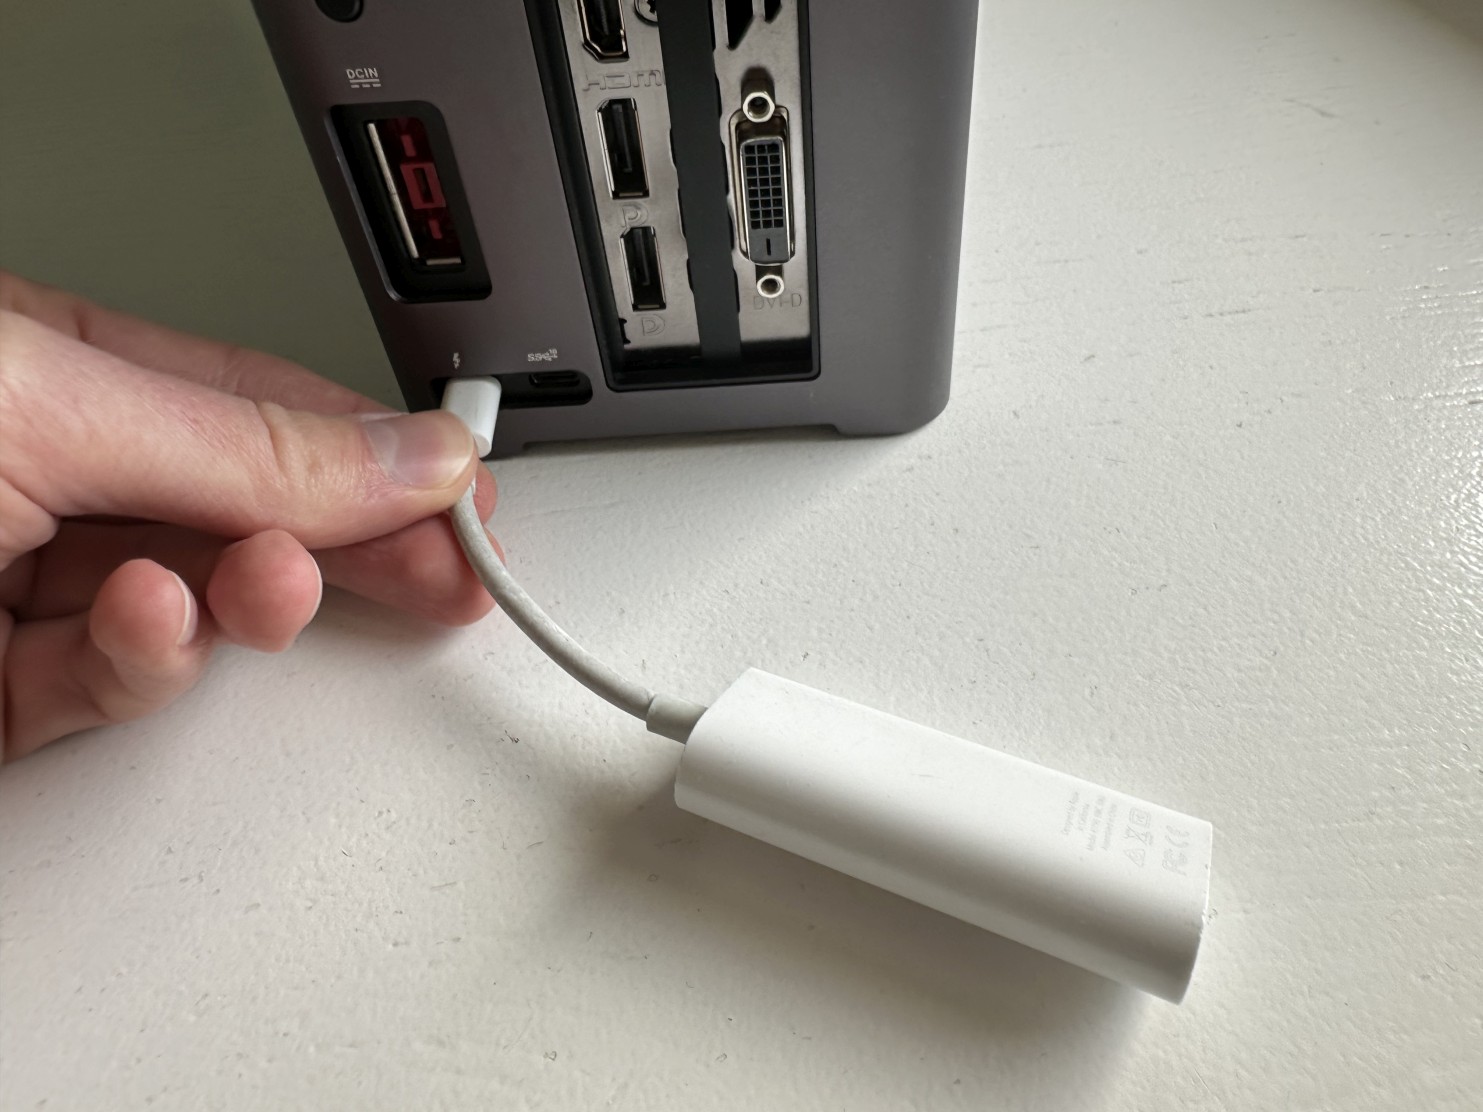
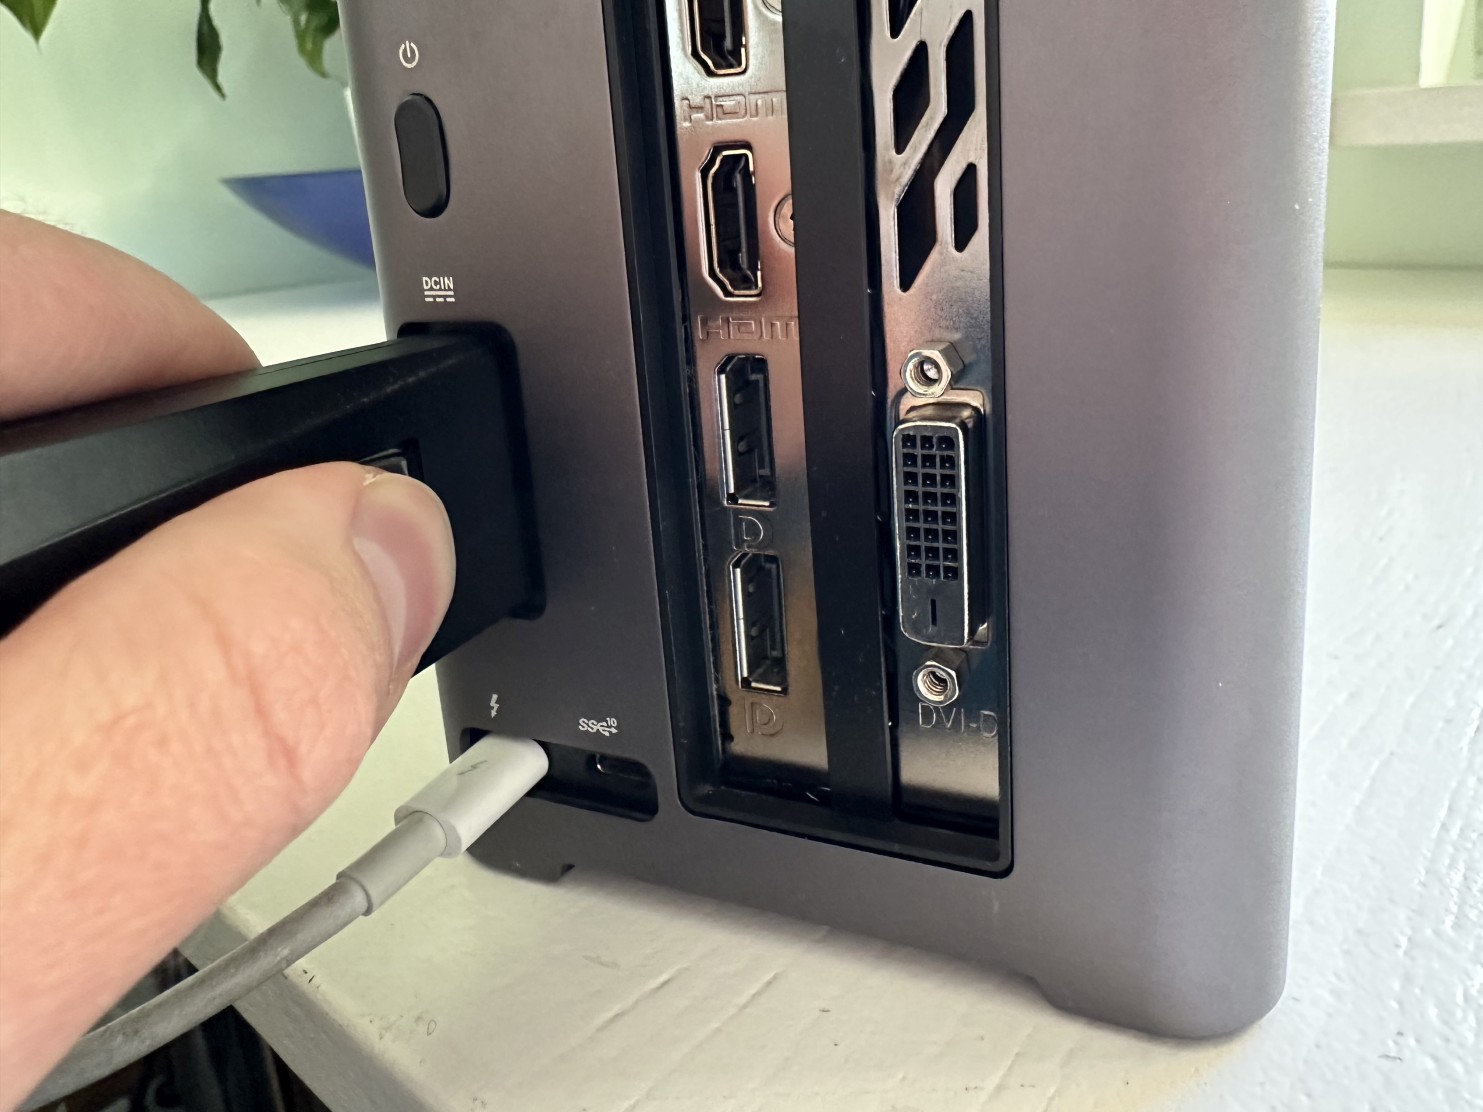
Step 2First connect Apple Thunderbolt 3 to Thunderbolt 2 adapter, which will make your chassis compatible with Thunderbolt 2 in a Mac Pro 6,1 (2013).
If your eGPU chassis is using Thunderbolt 2 you can skip to step 4. |
|
|
|
|
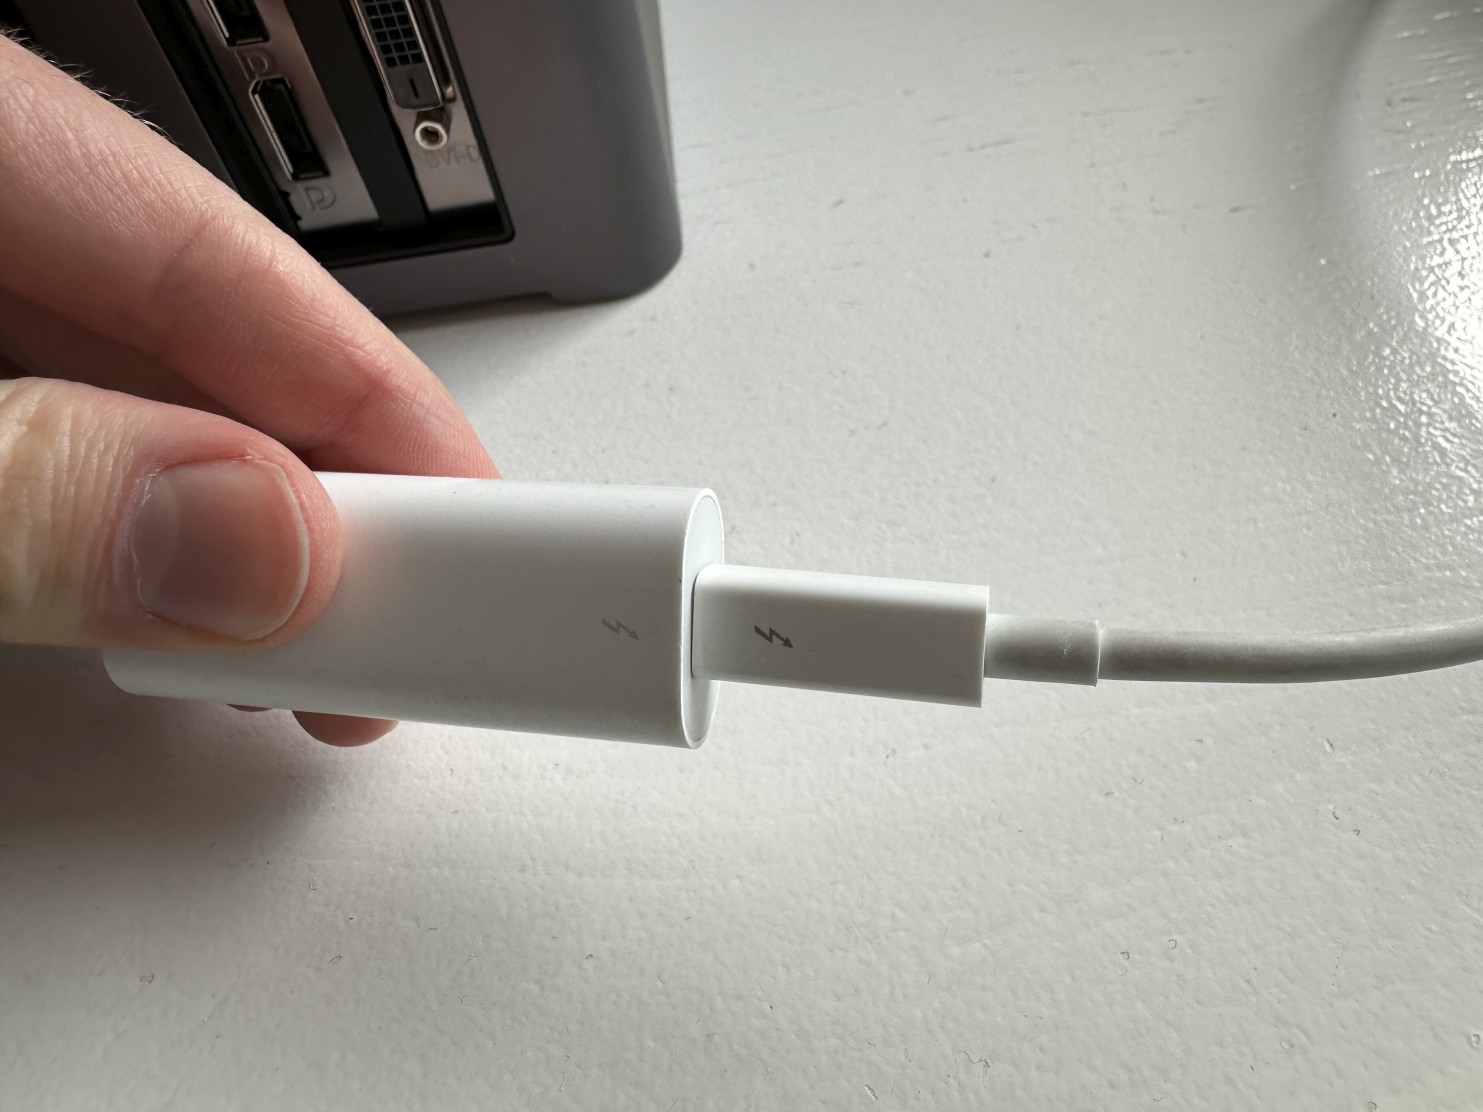
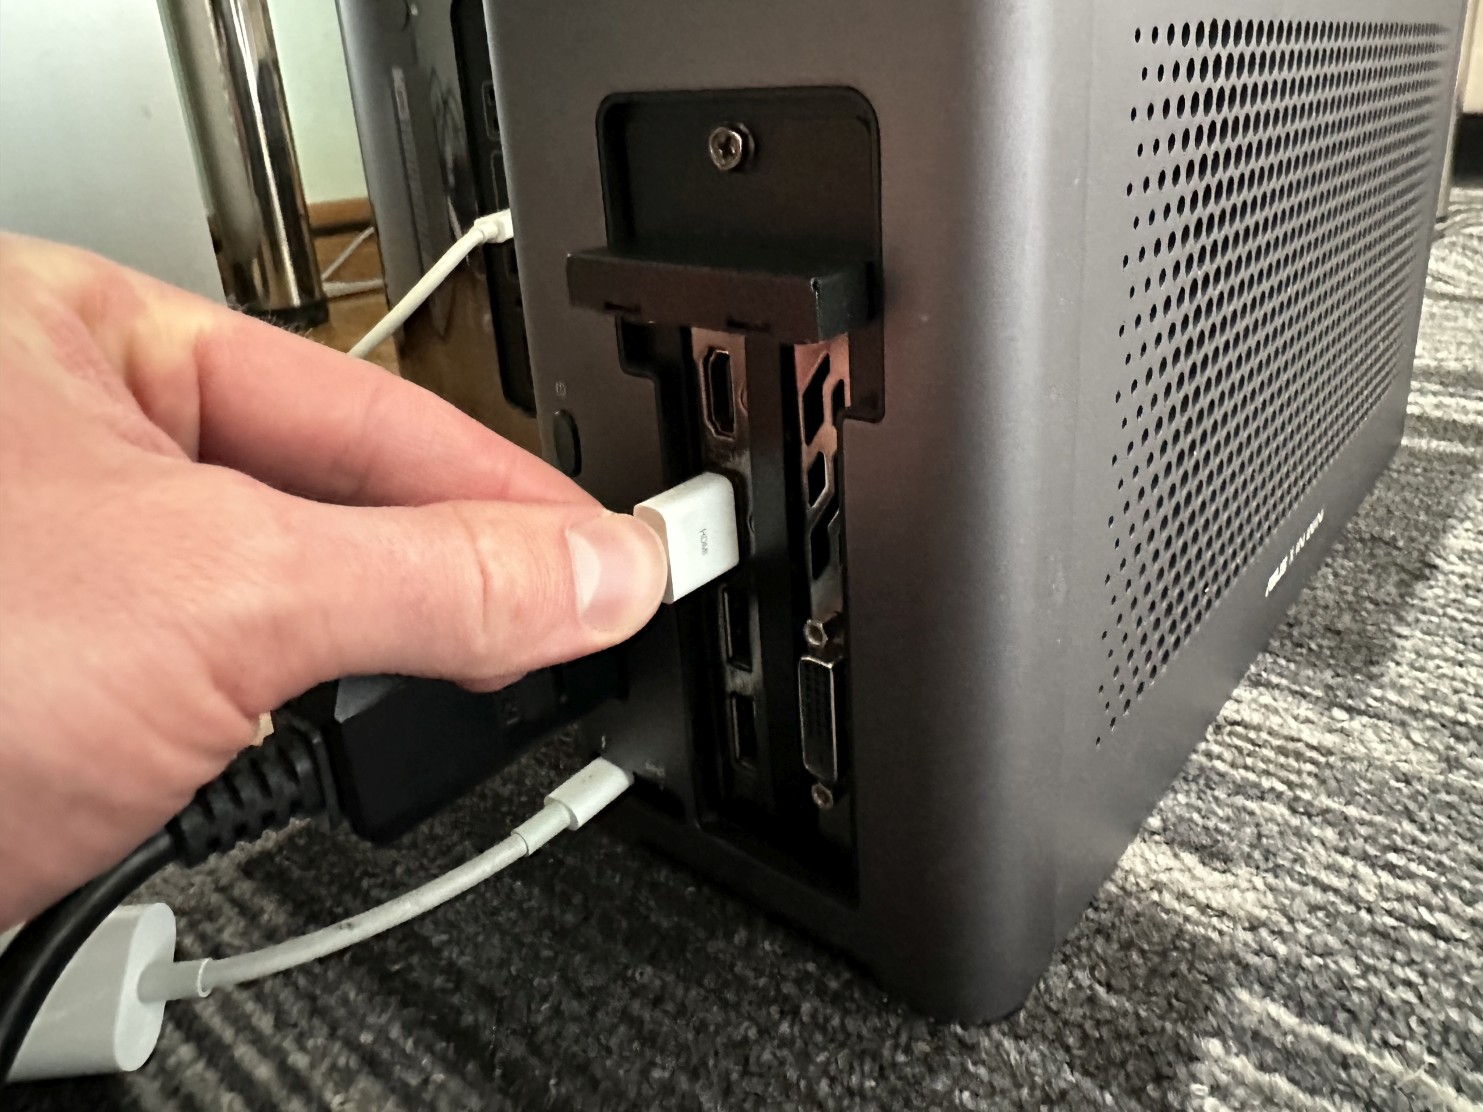
Step 3Connect Thunderbolt 2 cable to the Apple Thunderbolt 3 to Thunderbolt 2 adapter (cable side doesn't matter). |
 |
|
|
|
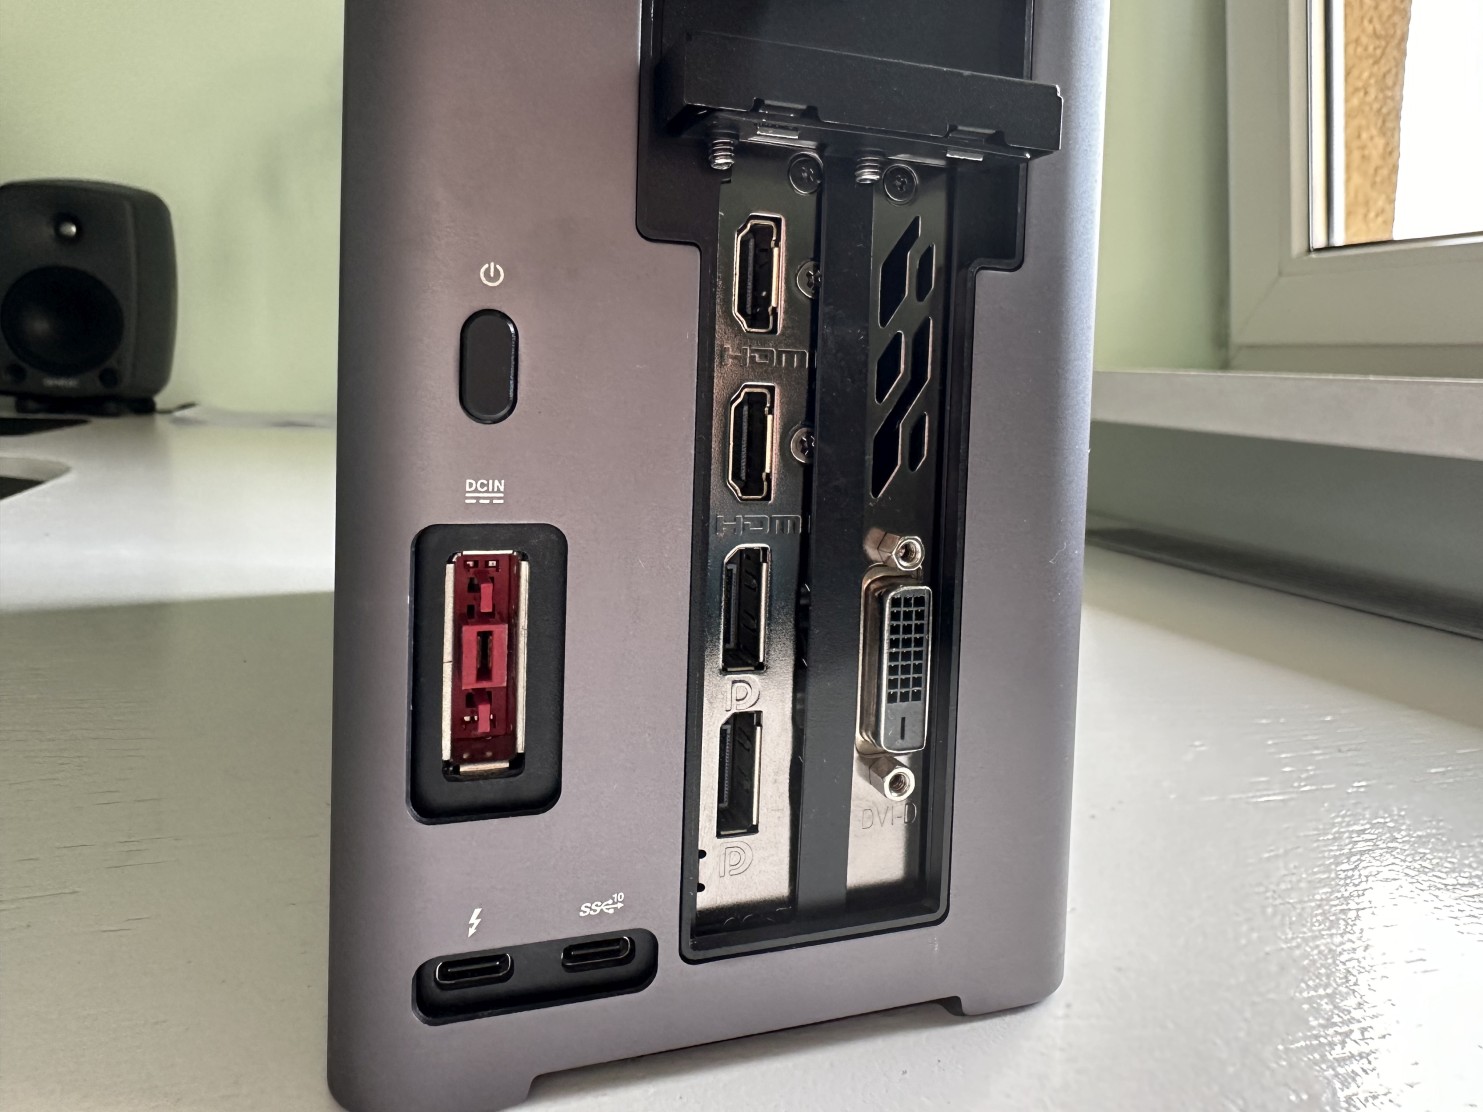
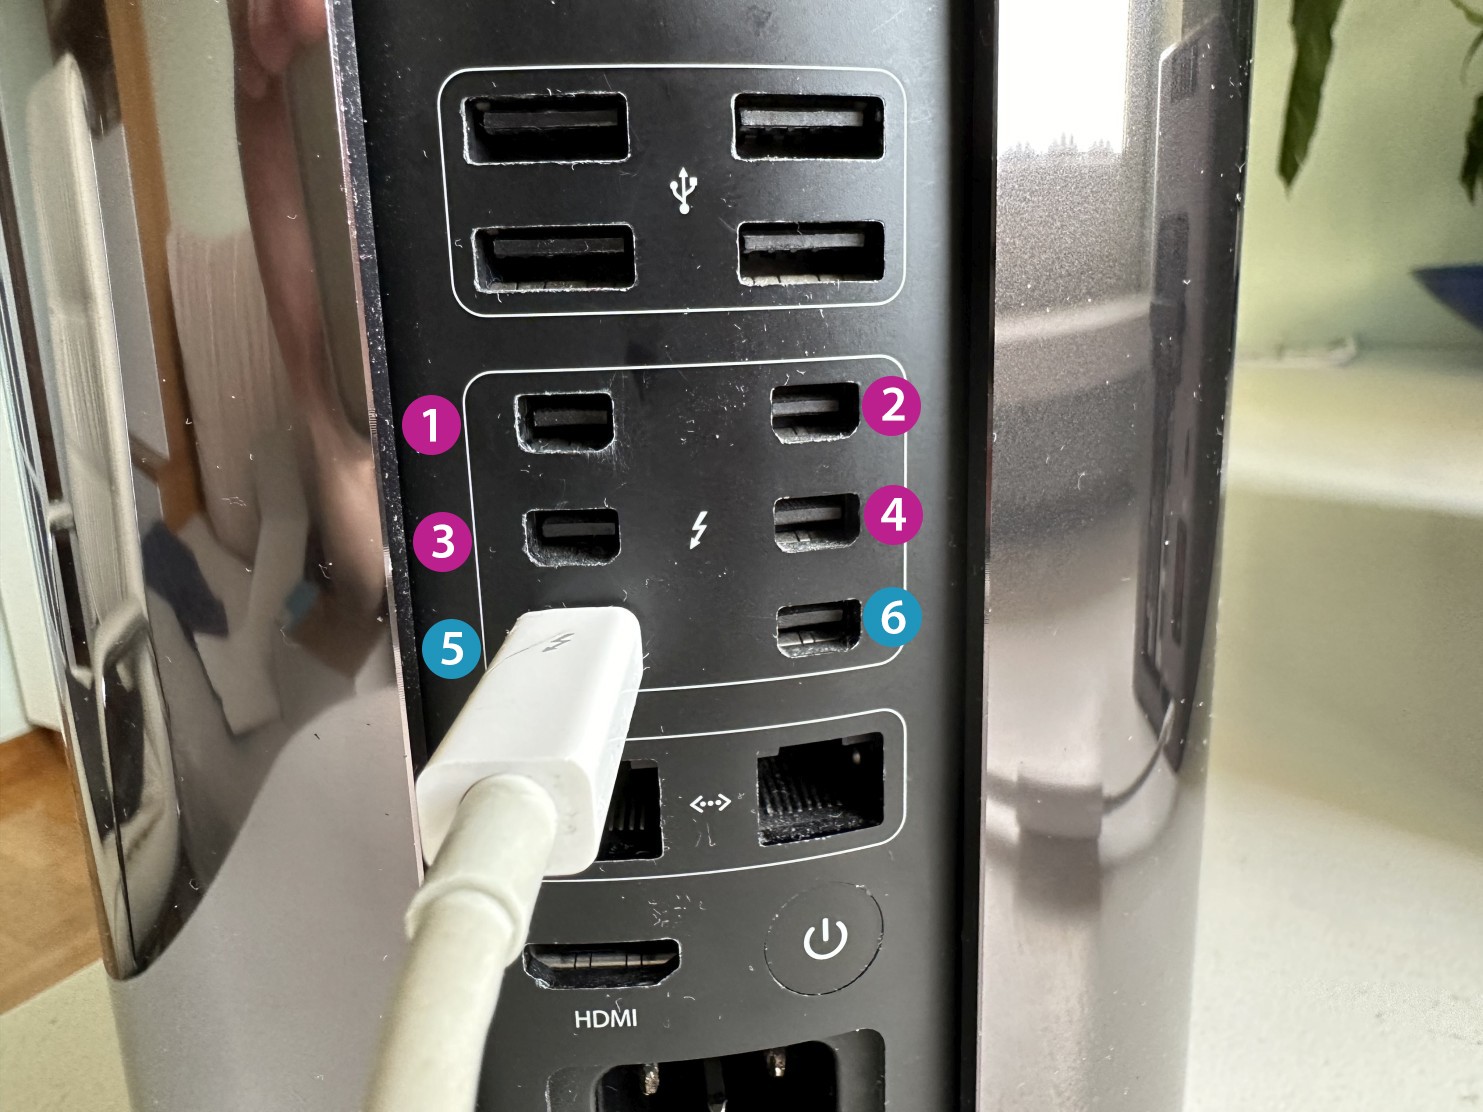
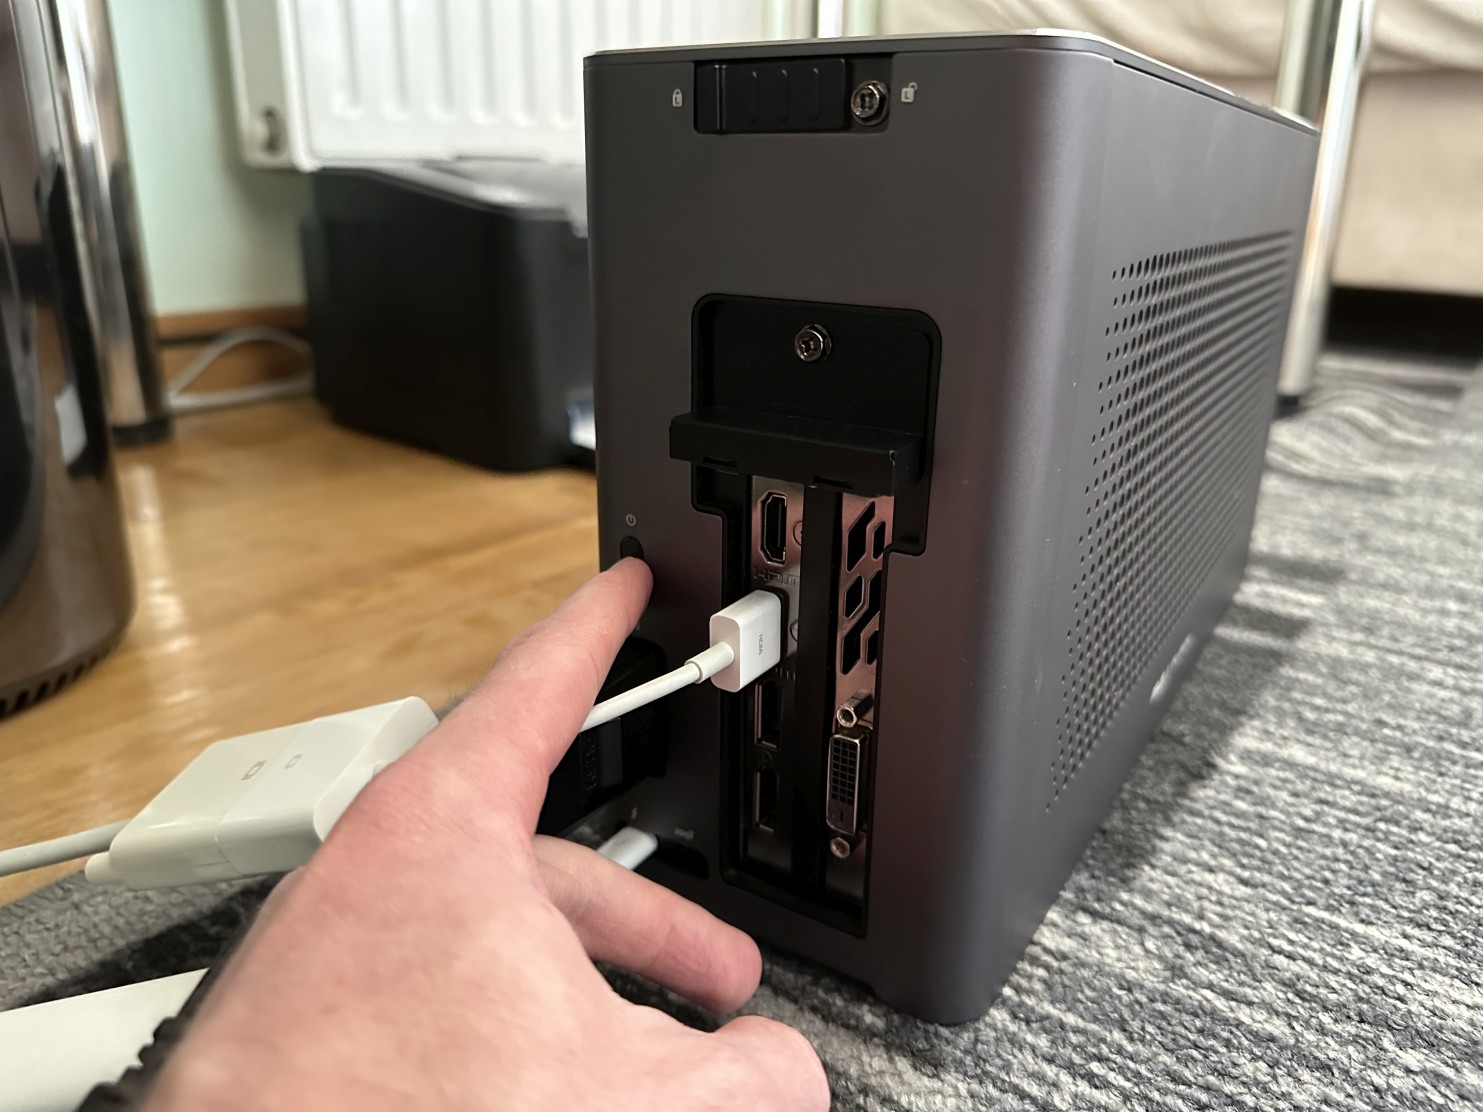
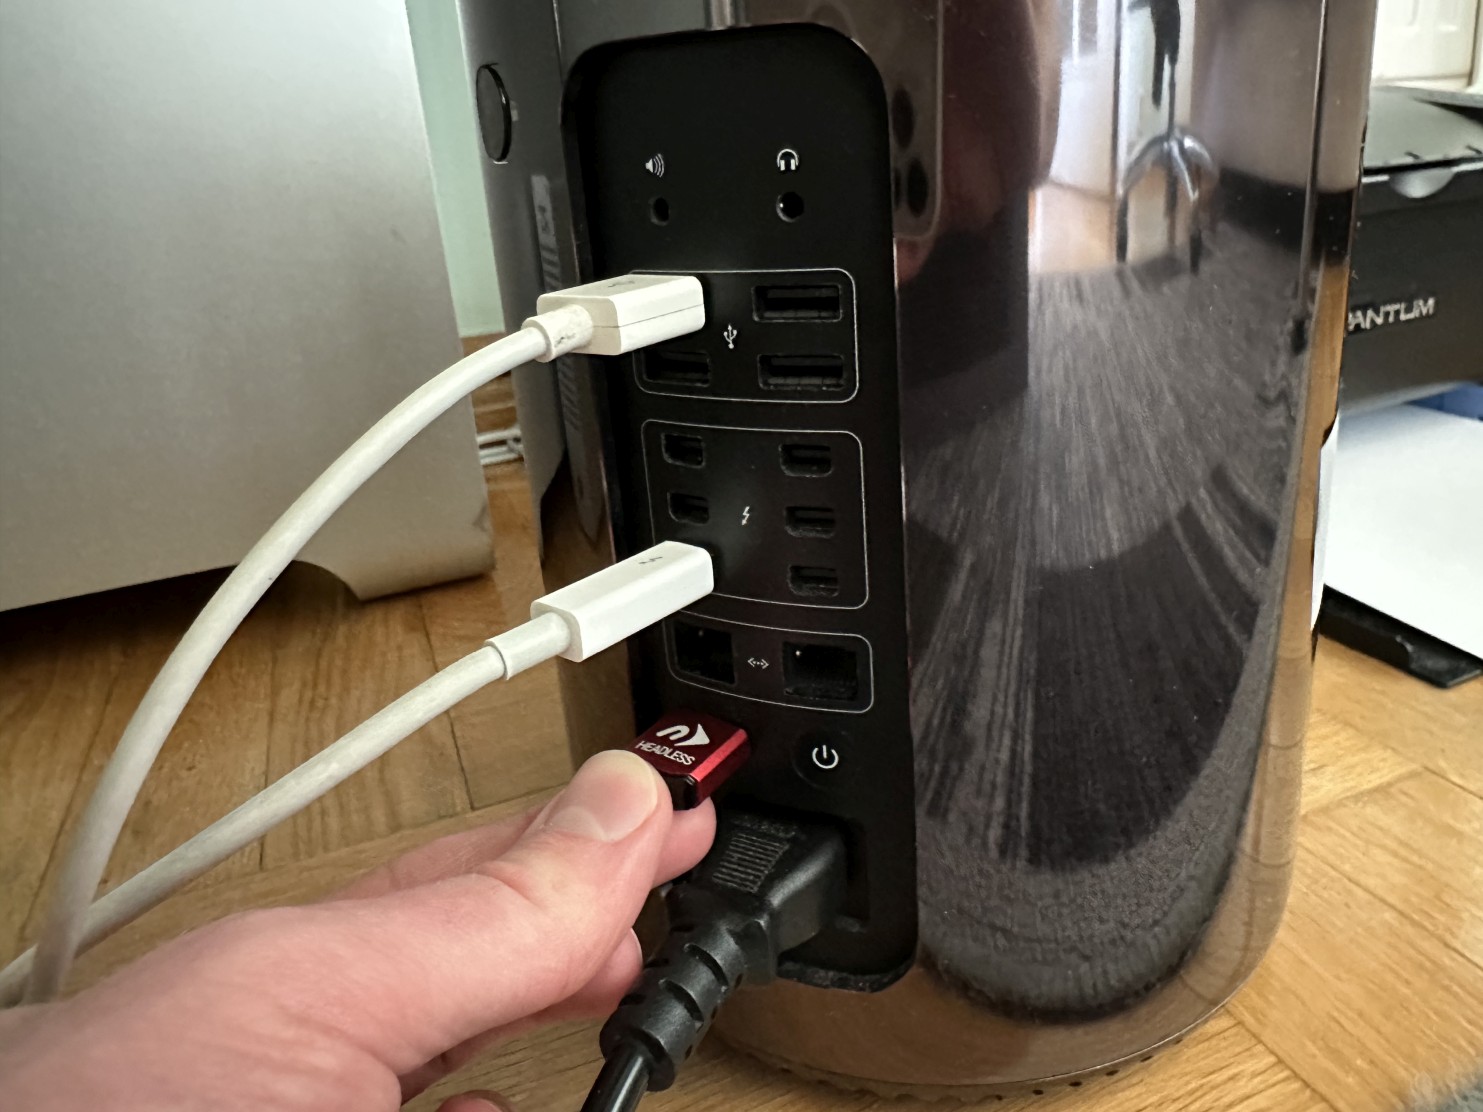
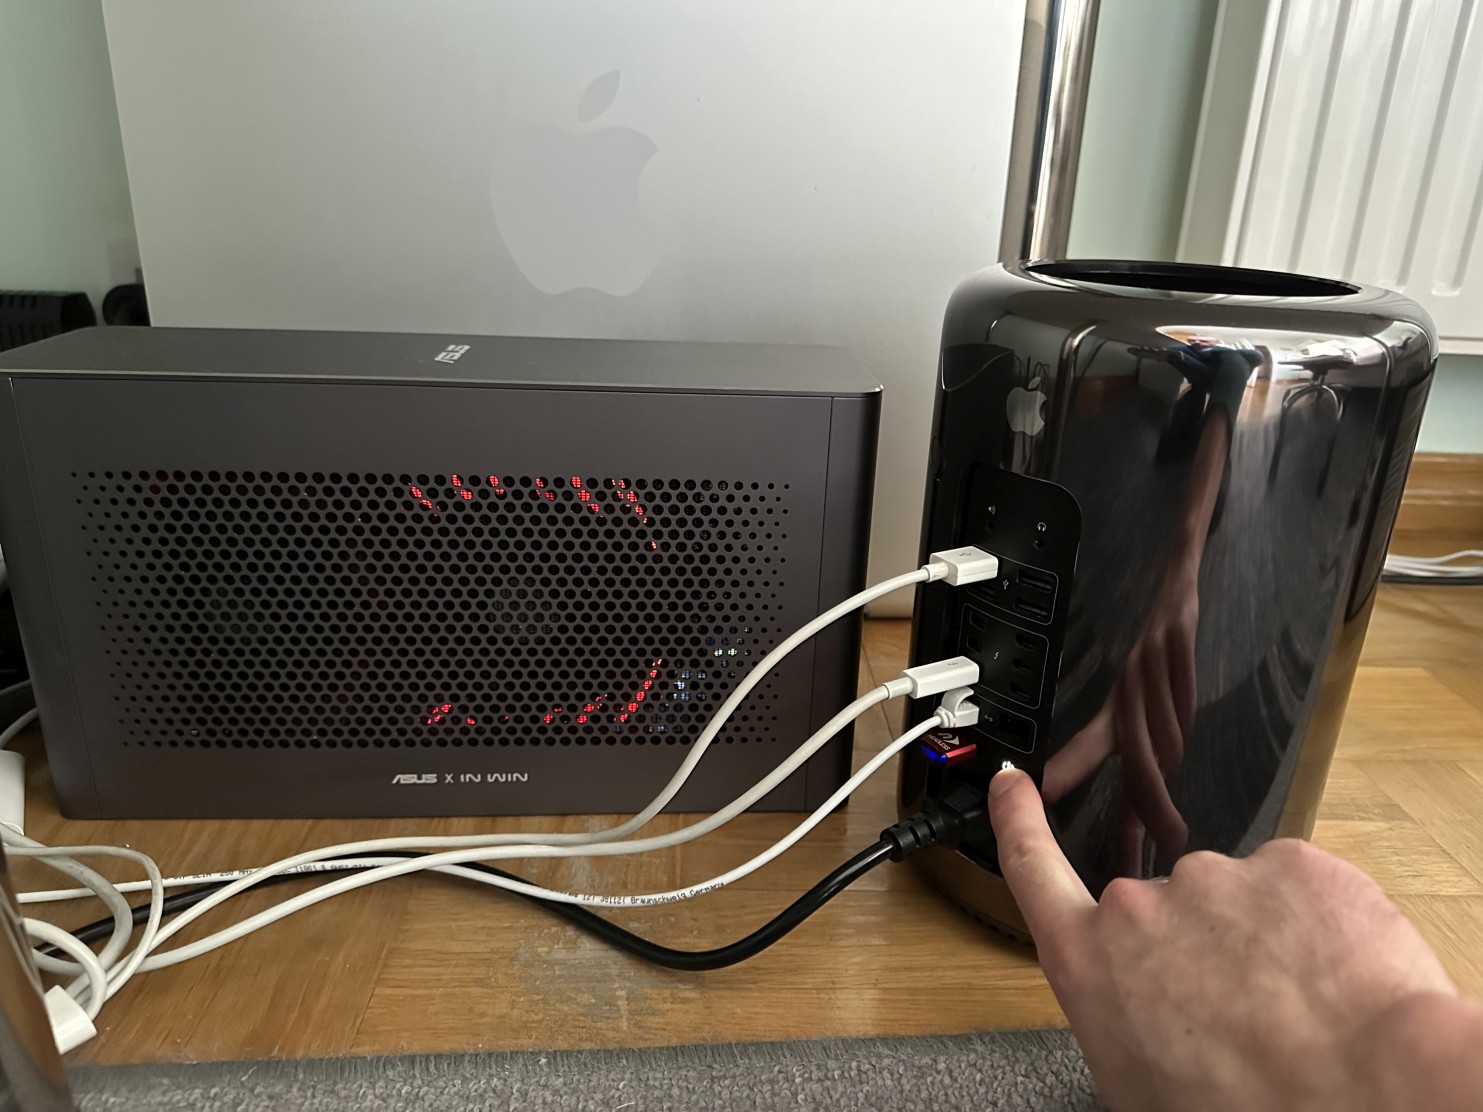
Step 4Connect the other end of the cable to the 5th Thunderbolt 2 port inside Mac Pro (as pictured).
WARNING: If you connect your eGPU to other Thunderbolt ports than 5 or 6 it won't work! Also make sure not to connect anything to port 6. You can use all the remaining ports 1, 2, 3 and 4. Please note ports 1,2 and 3,4 share the same bandwidth (20 Gbps). |
 |
|
|
|
Step 5Connect external power supply to the red power supply connector. Also connect external power supply to power outlet. |
 |
|
|
|
Step 6If you have an NVIDIA graphics card - connect your display to any of the graphics cards connectors e.g. to HDMI or DisplayPort.
If you have an AMD graphics card - do not connect the display yet. Make sure it's still connected to the internal graphics card either via miniDisplayPort or HDMI. |
 |
|
|
|
Step 7Push the power button on the back of the eGPU chassis. |
 |
|
|
|
Step 8Front power LED will light up. The GPU itself might light up for just a second, but will remain off at this time. |
 |
|
|
|
Step 9If you plan to use Windows with a single display connected to eGPU, you also need to plug OWC (or other brand) dummy display into Mac Pro HDMI port. Without it, Windows 10 build 1809 or later and all versions of Windows 11 won't boot (Windows 8.1 doesn't need it). Also it's not recommended to use it when you use macOS Sierra/High Sierra.
Please note, when having dummy display inserted you won't see Windows boot screen, but you will see Windows boot picker (if having more than one Windows version or Windows together with Linux installed).
Also if you are using an AMD card and dummy display plug, the boot picker won't be shown properly.
We recommend not to connect dummy display yet. You will connect it later when using our Windows on a Mac guides. |
 |
|
|
|
Step 10Push the Mac Pro power button to turn on Mac Pro. eGPU chassis will automatically start together with Mac Pro. It's also turning off automatically when your shutdown your Mac Pro. |
 |
|
|
|
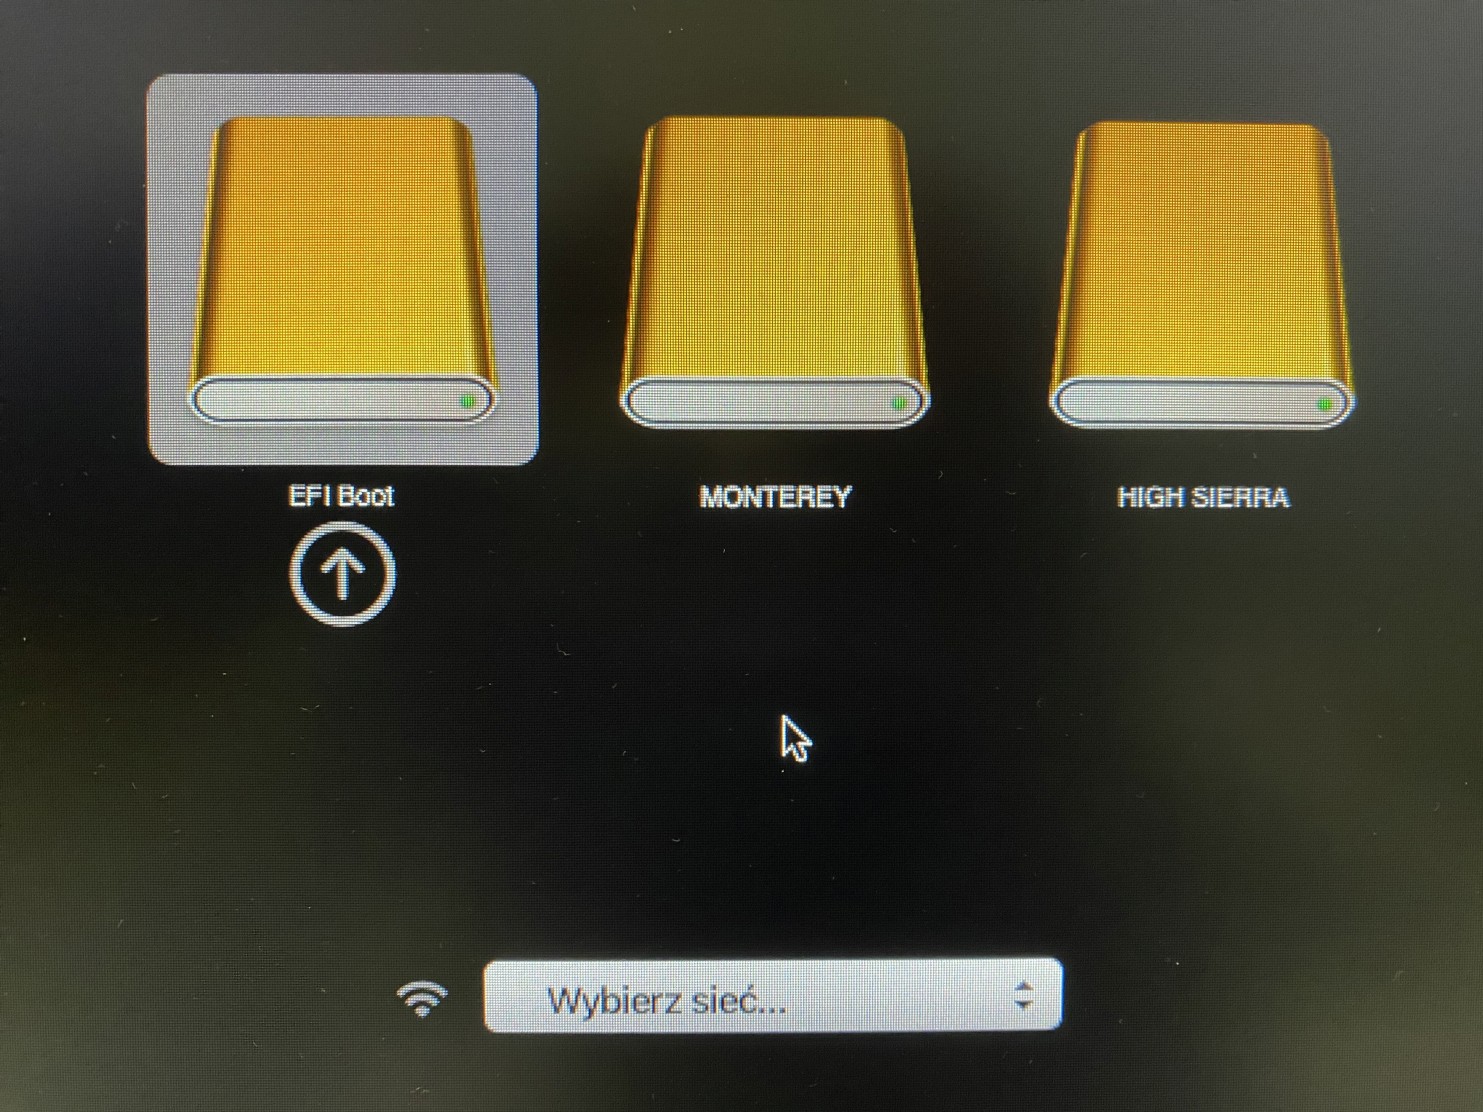
Step 11If you have an NVIDIA graphics card, press and hold Option key on boot (or ALT on Windows keyboard) to see boot picker, in order to see if the eGPU is working properly. Boot the chosen version of macOS e.g. Sierra or High Sierra.
If you have an AMD graphics card, continue the installation process in the previous guide (steps 6 and later): Preparing Mac Pro 6,1 (2013) to use with AMD eGPU. |
 |
|
|
|
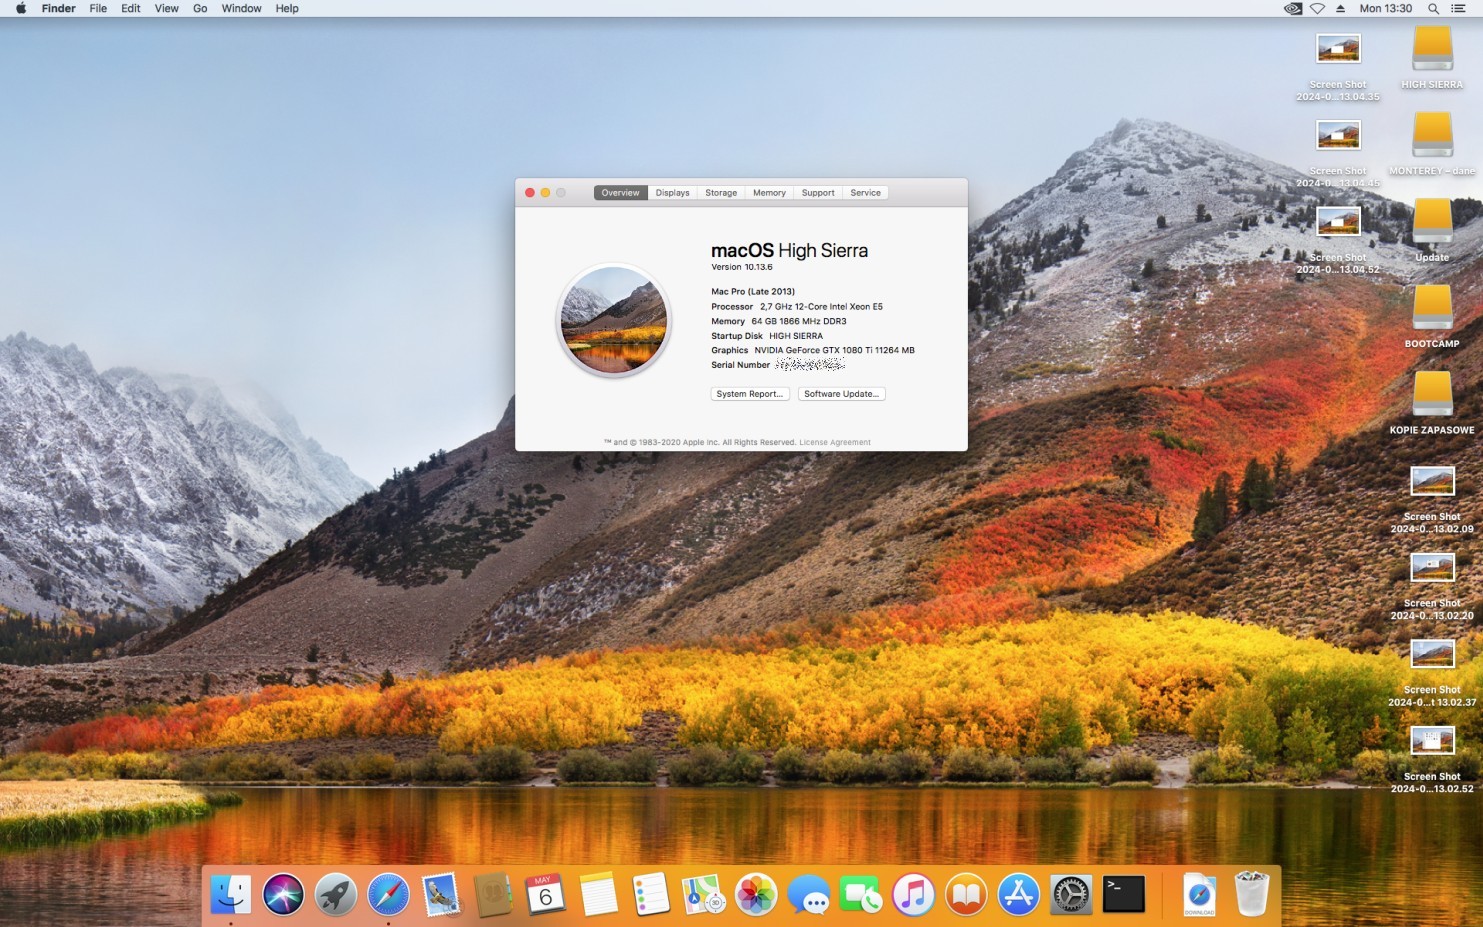
Step 12If you have an NVIDIA graphics card, you can boot macOS Sierra or High Sierra and you will see that your graphics card will change from standard AMD FirePro D300/D500/D700 to the name of your eGPU. Enjoy! |
 |