
Graphics card installation inside eGPU chassis for Mac Pro 6,1 (2013)
We are using ASUS XG Station Pro eGPU chassis, but you can use any other eGPU Thunderbolt 3 or Thunderbolt 2 chassis you wish. Steps should be similar.
ASUS XG Station Pro allows graphics cards up to 311 mm length and 2,7-slot wide with a TDP up to 300W so you can install every model of our cards as eGPU.
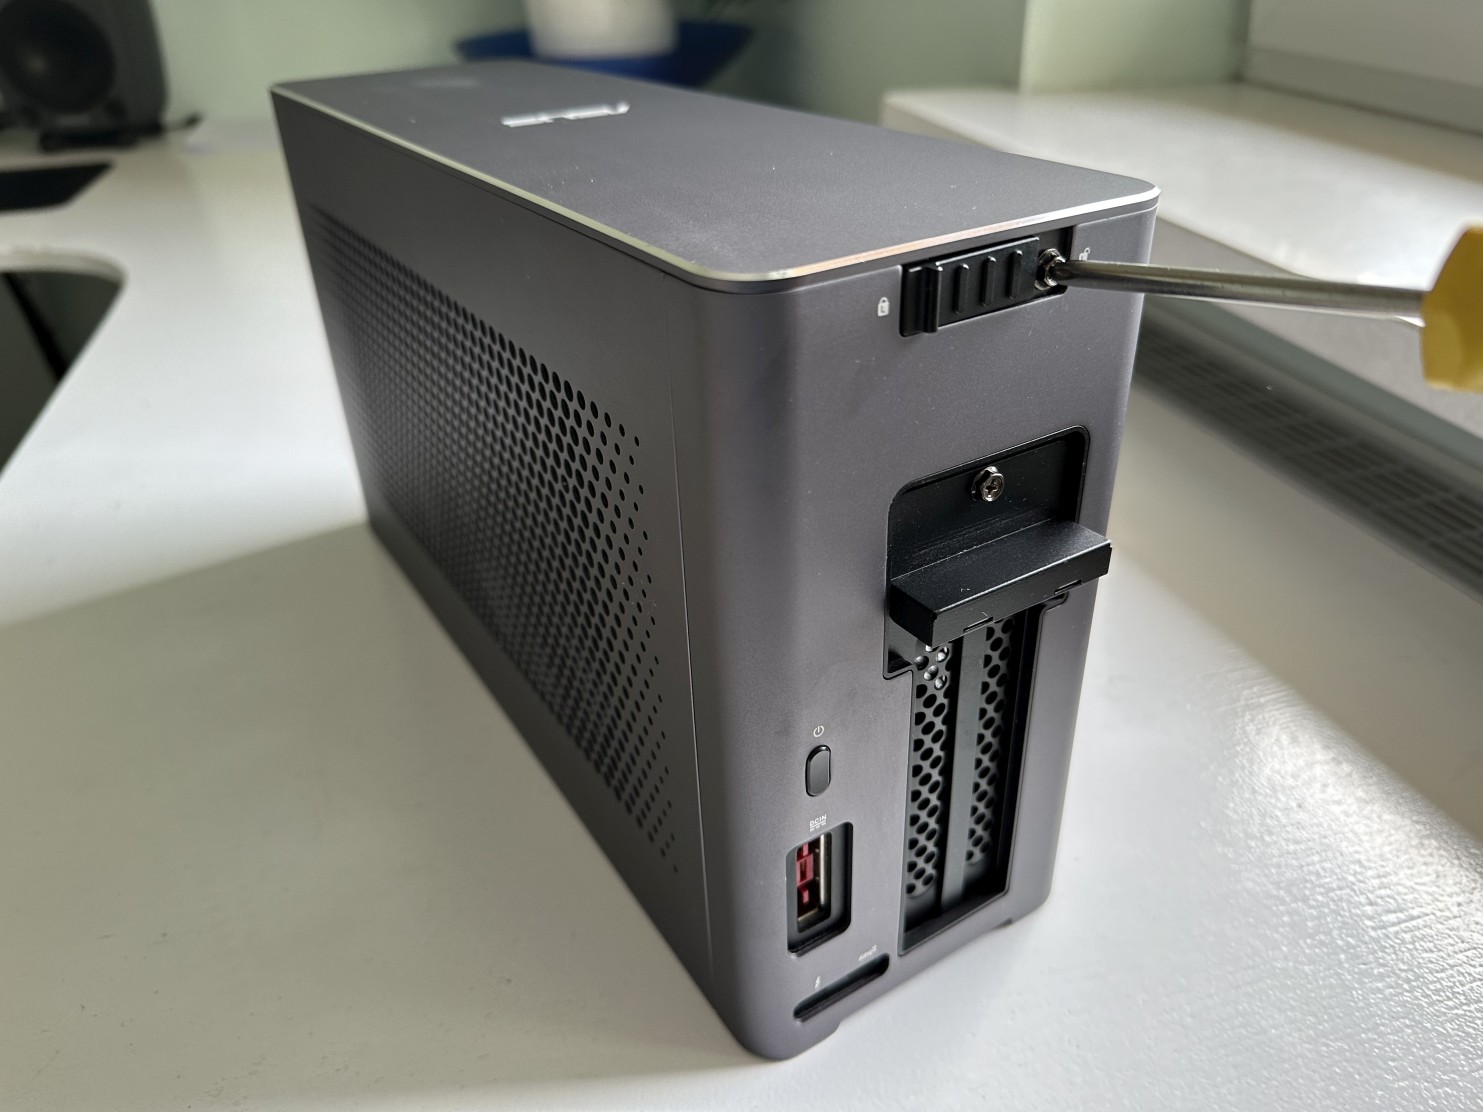
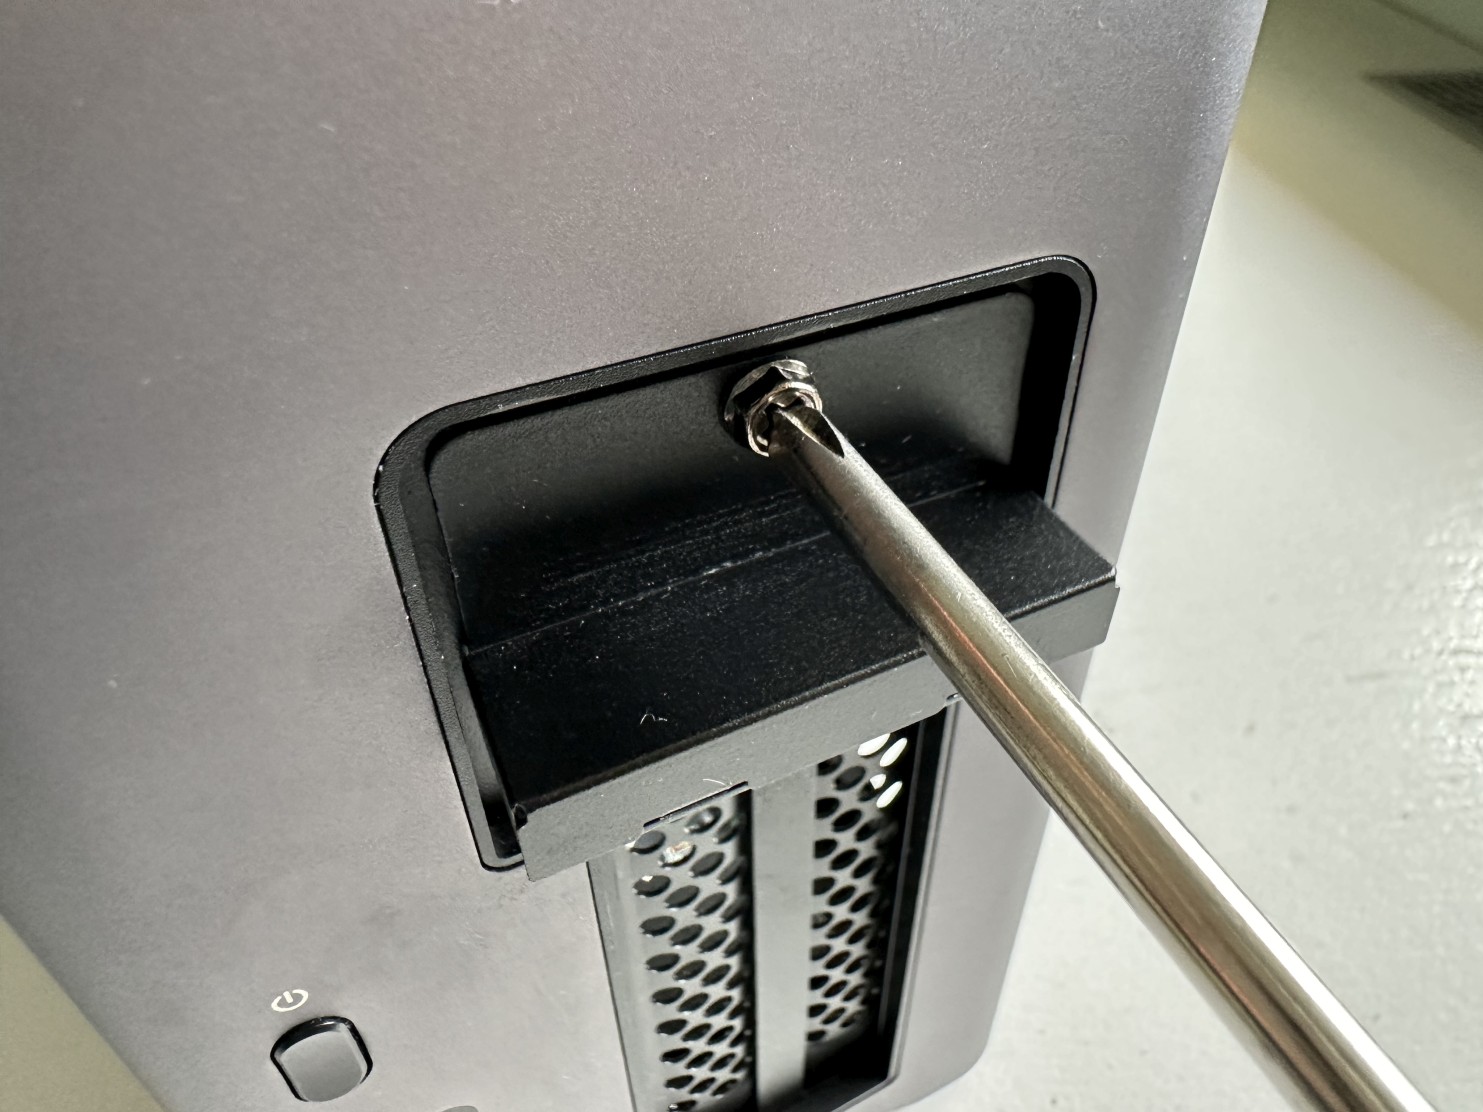
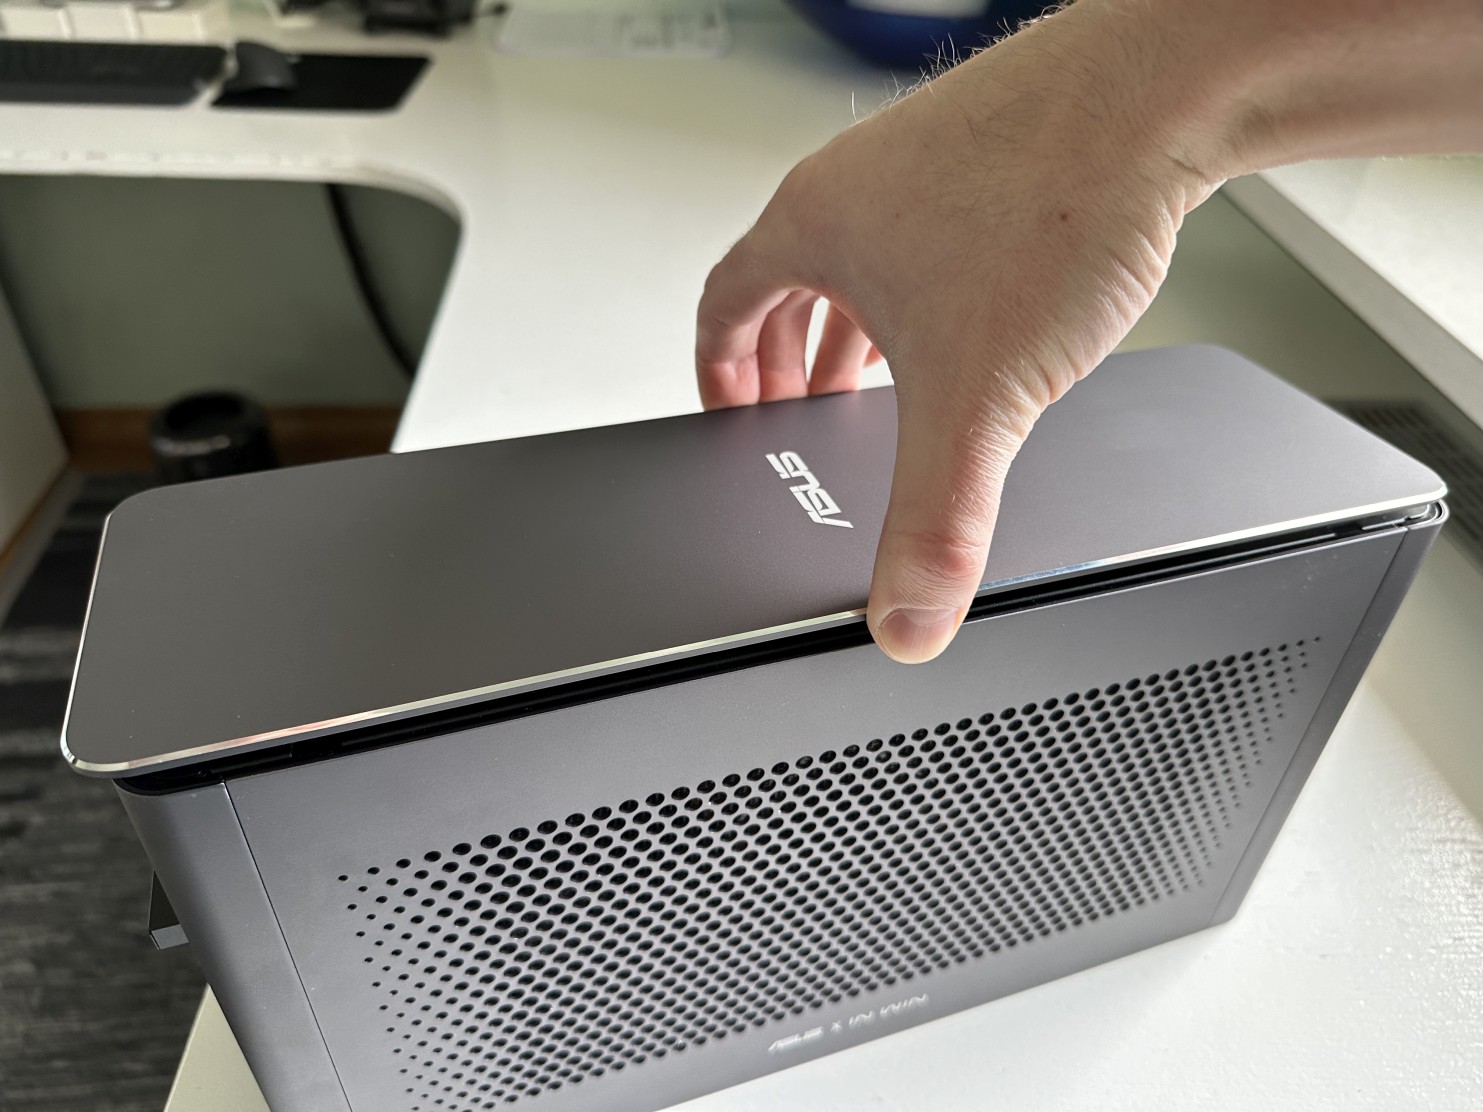
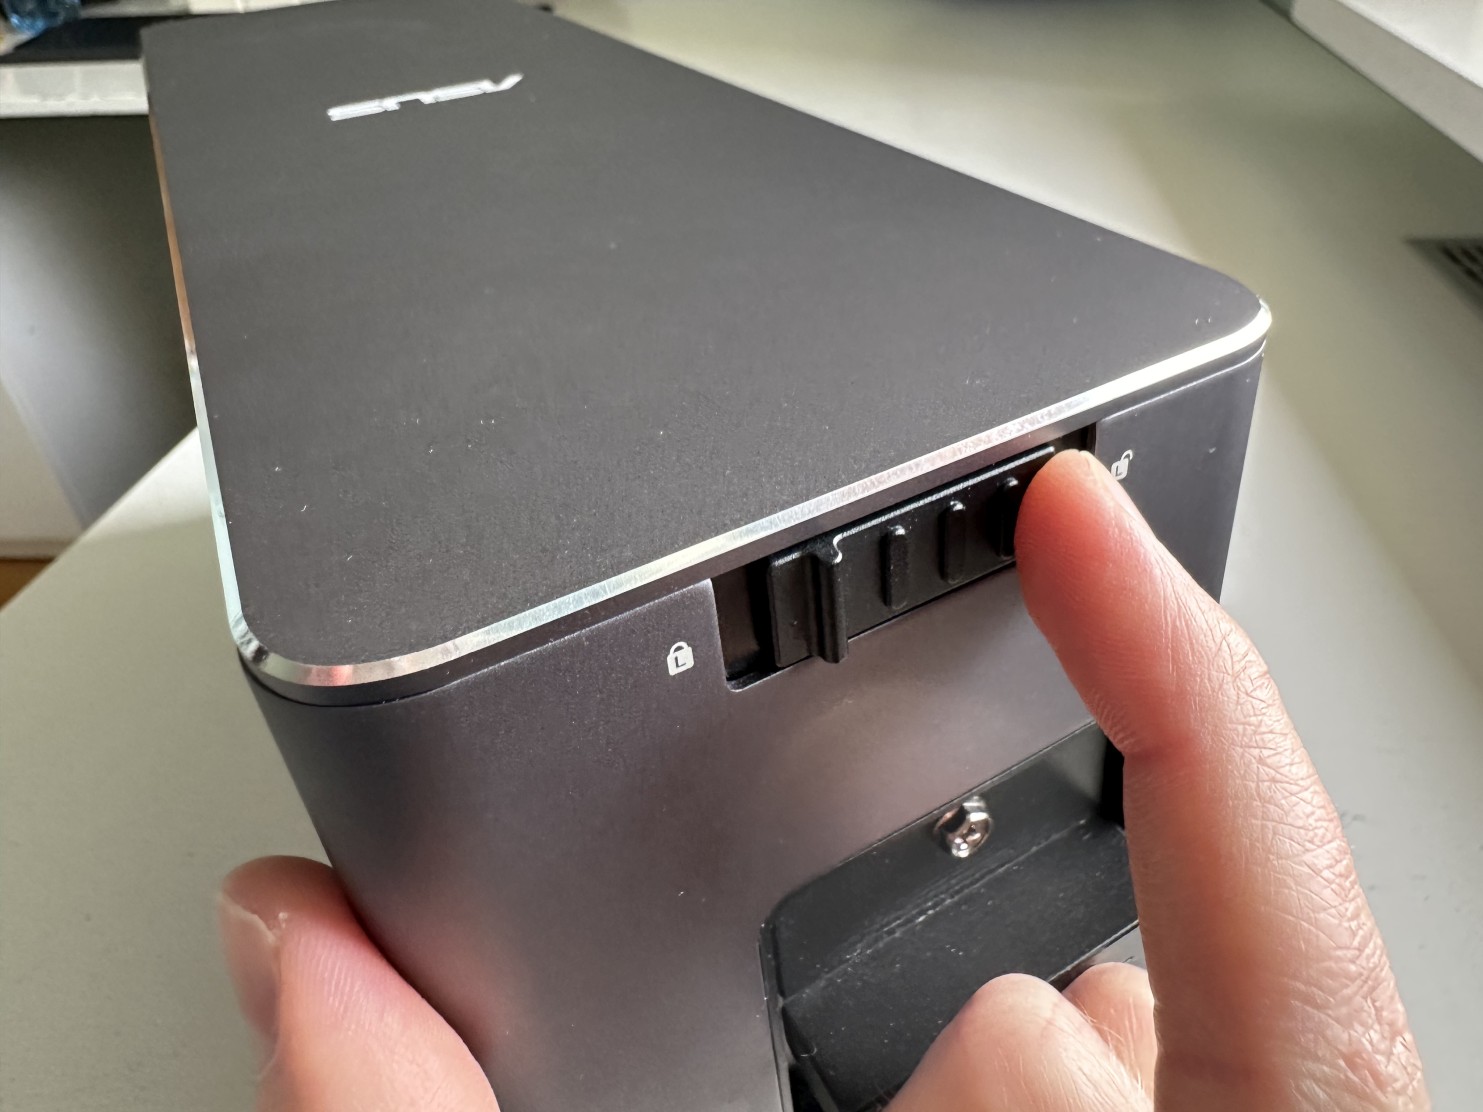
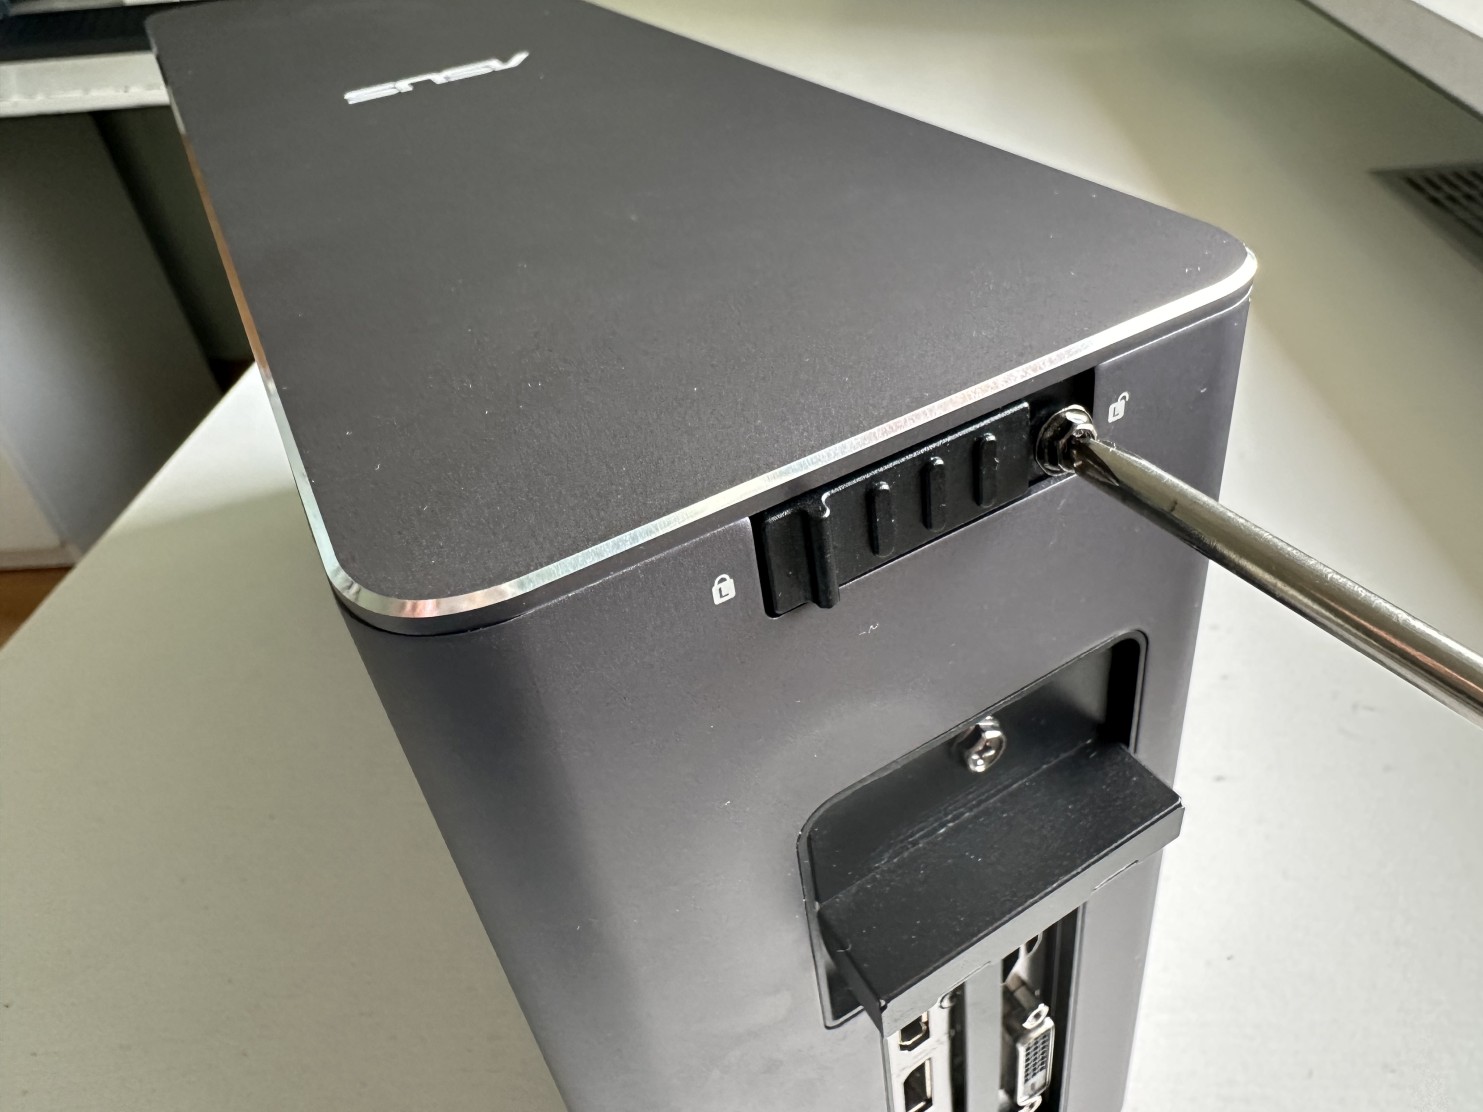
Step 1Remove the first screw on top with a Philips screwdriver to unlock the chassis slider. |
 |
|
|
|
Step 2Slide the slider to the right into unlocked position. |
 |
|
|
|
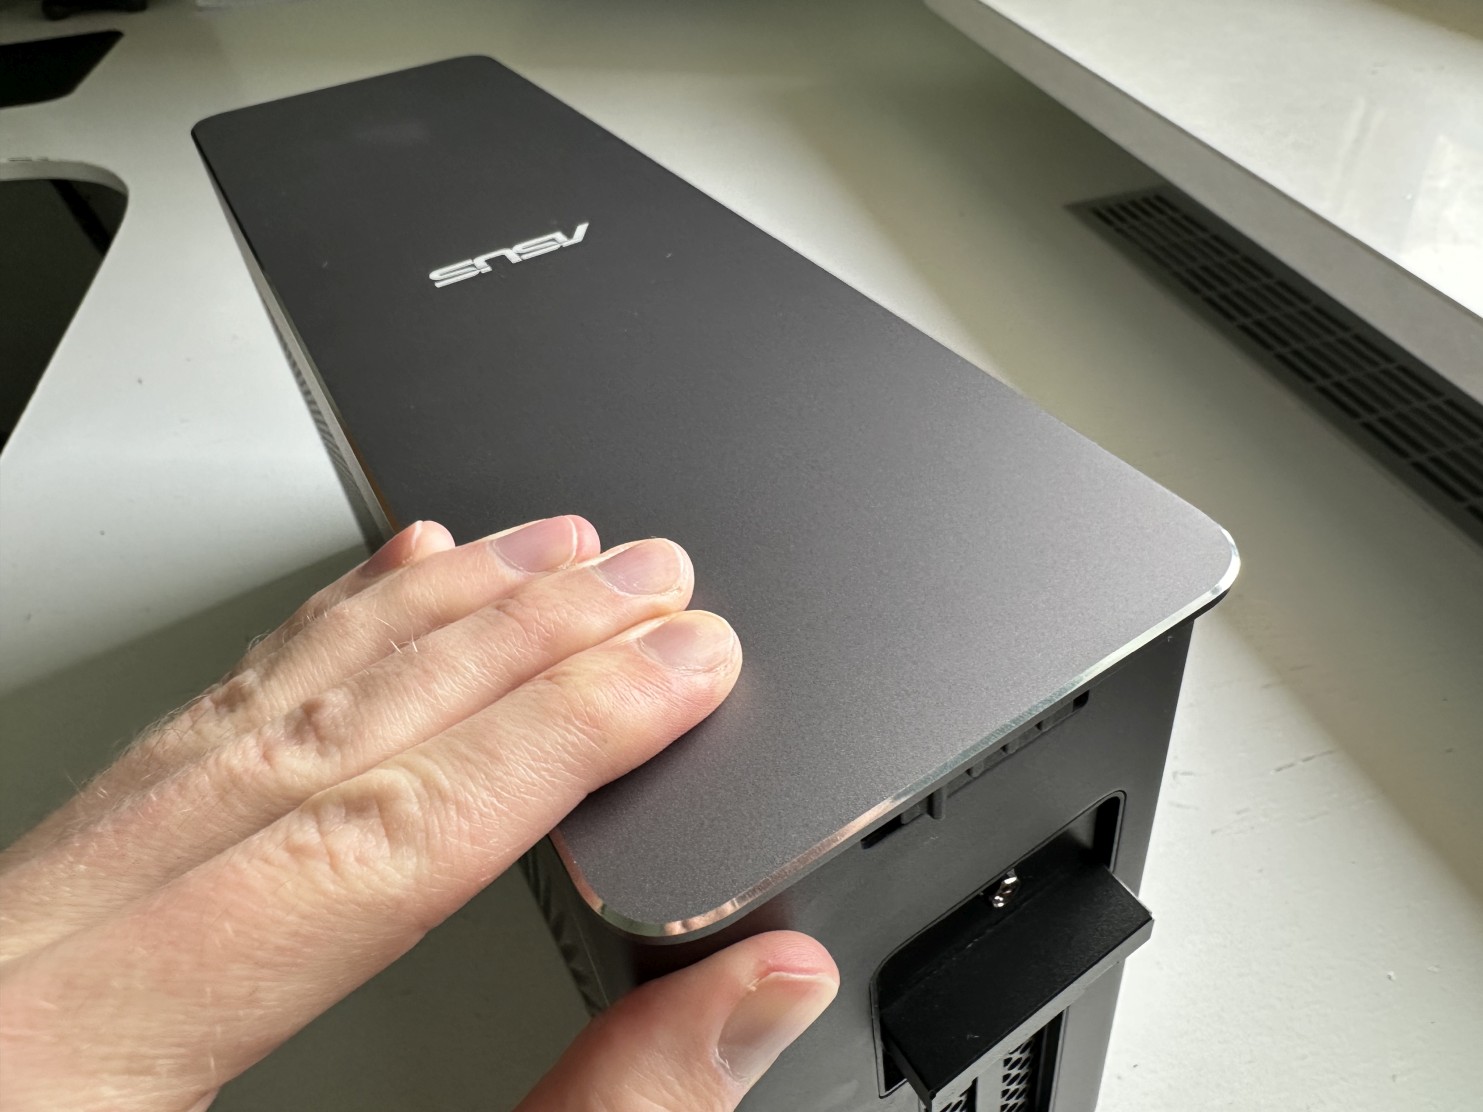
Step 3Slide the top cover towards the back of the chassis and remove it. |
 |
|
|
|
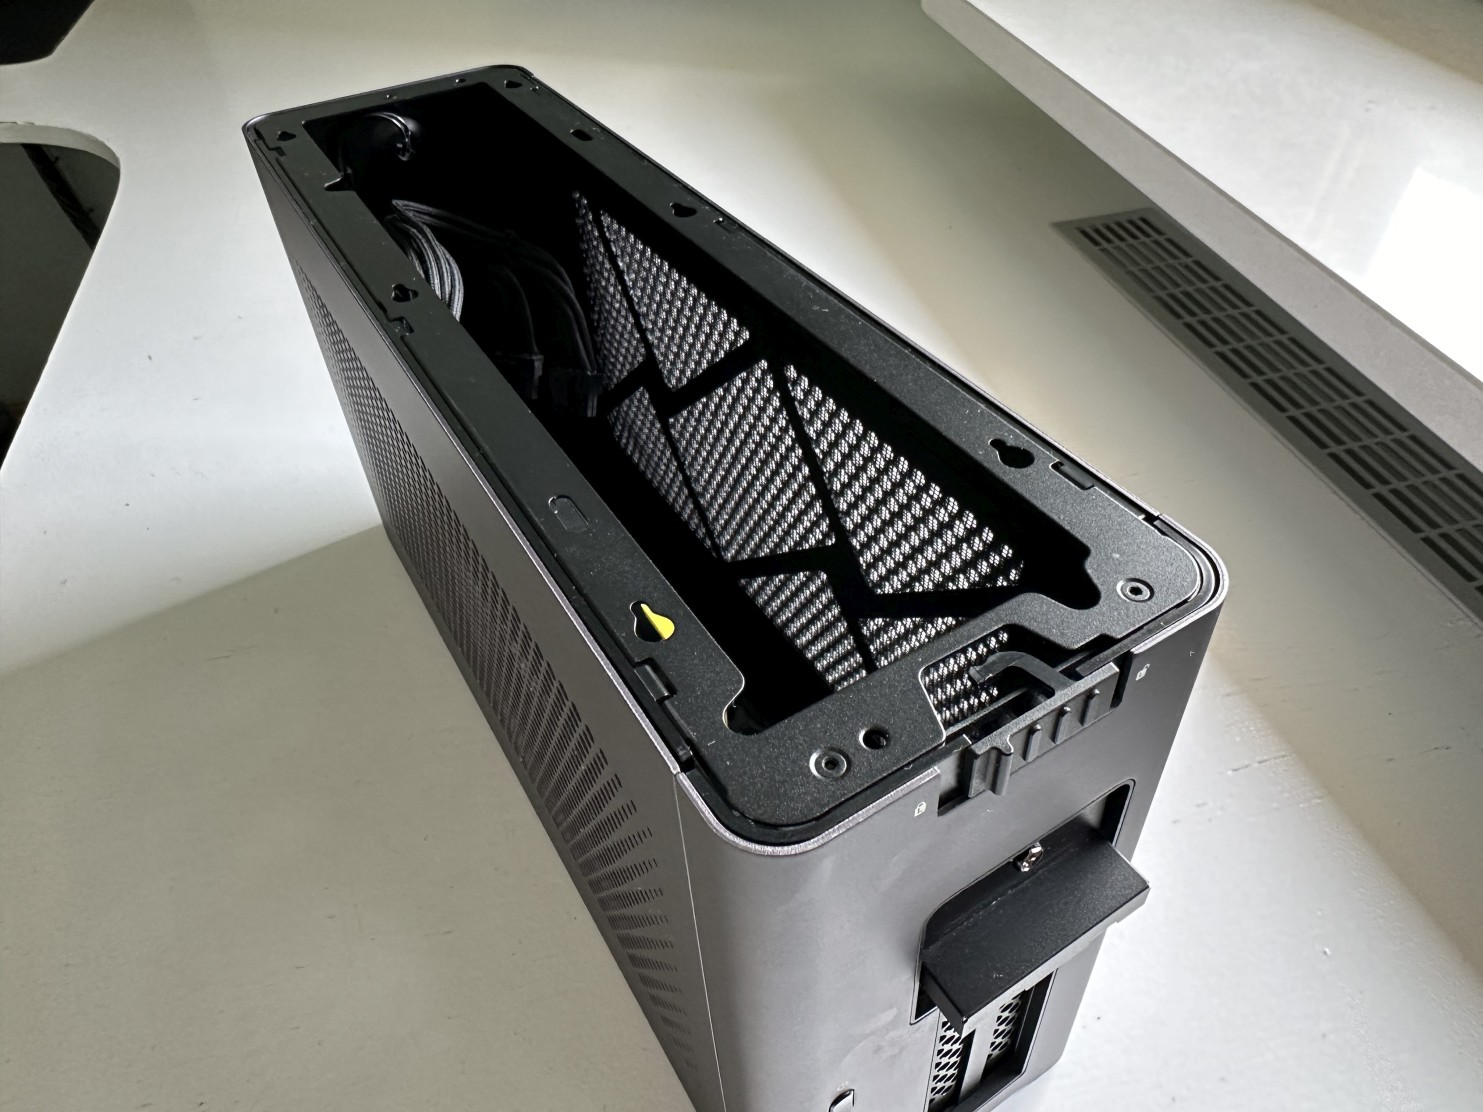
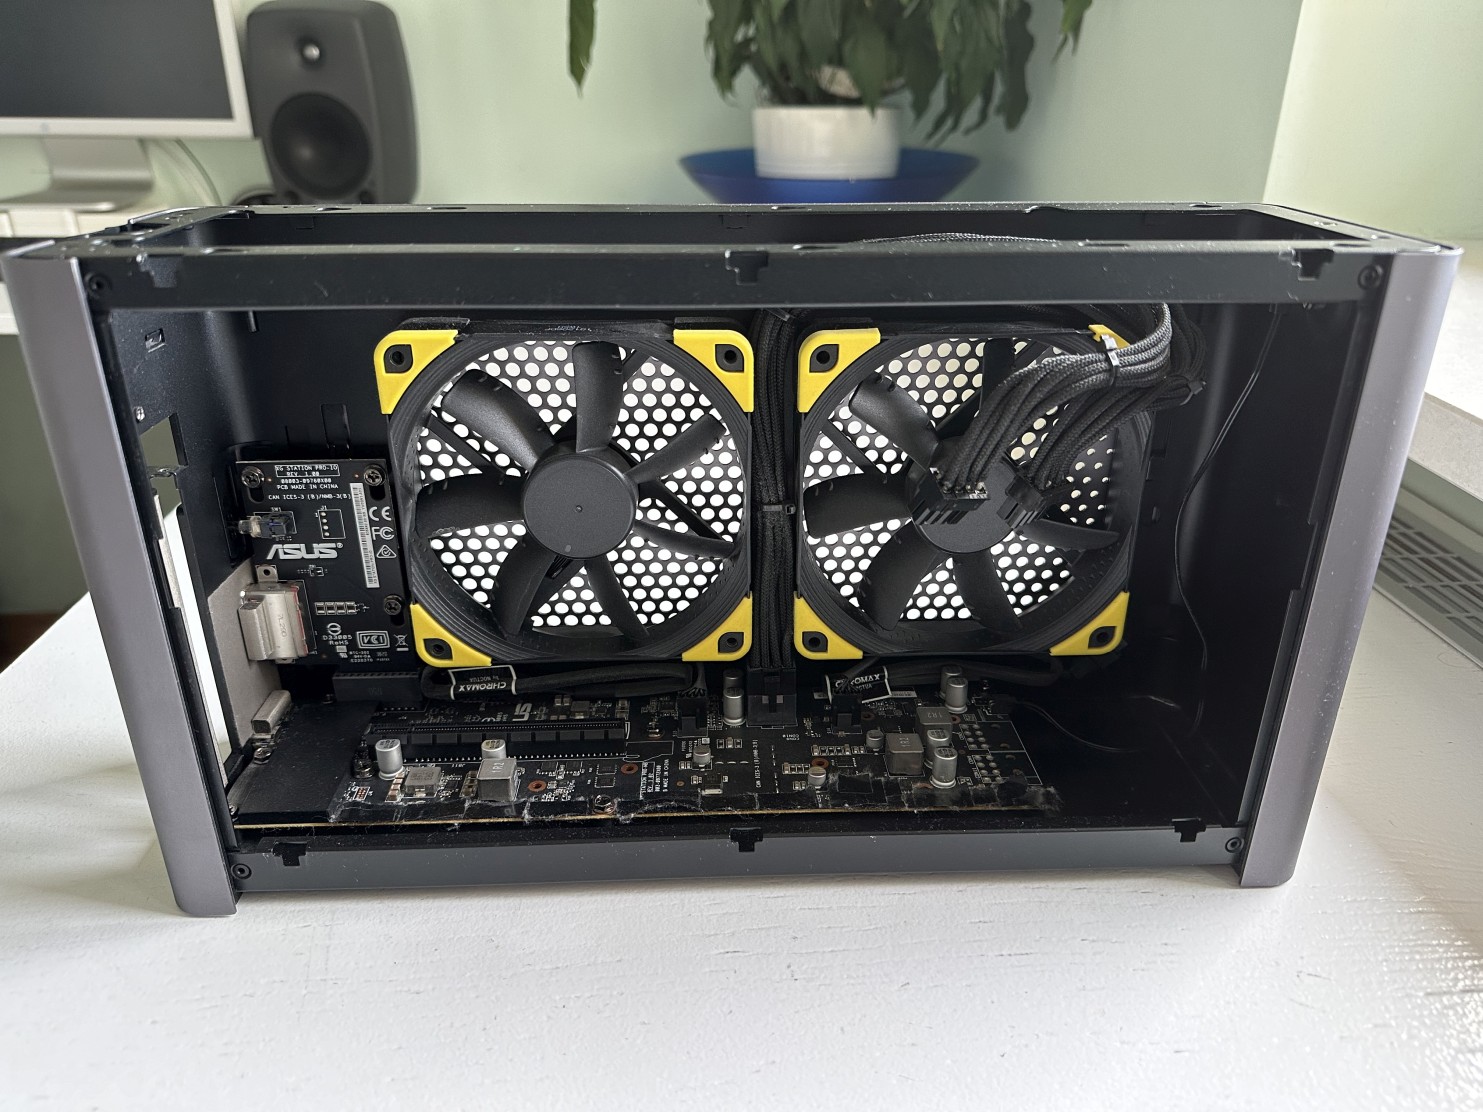
Step 4You will now see internals of the chassis. |
 |
|
|
|
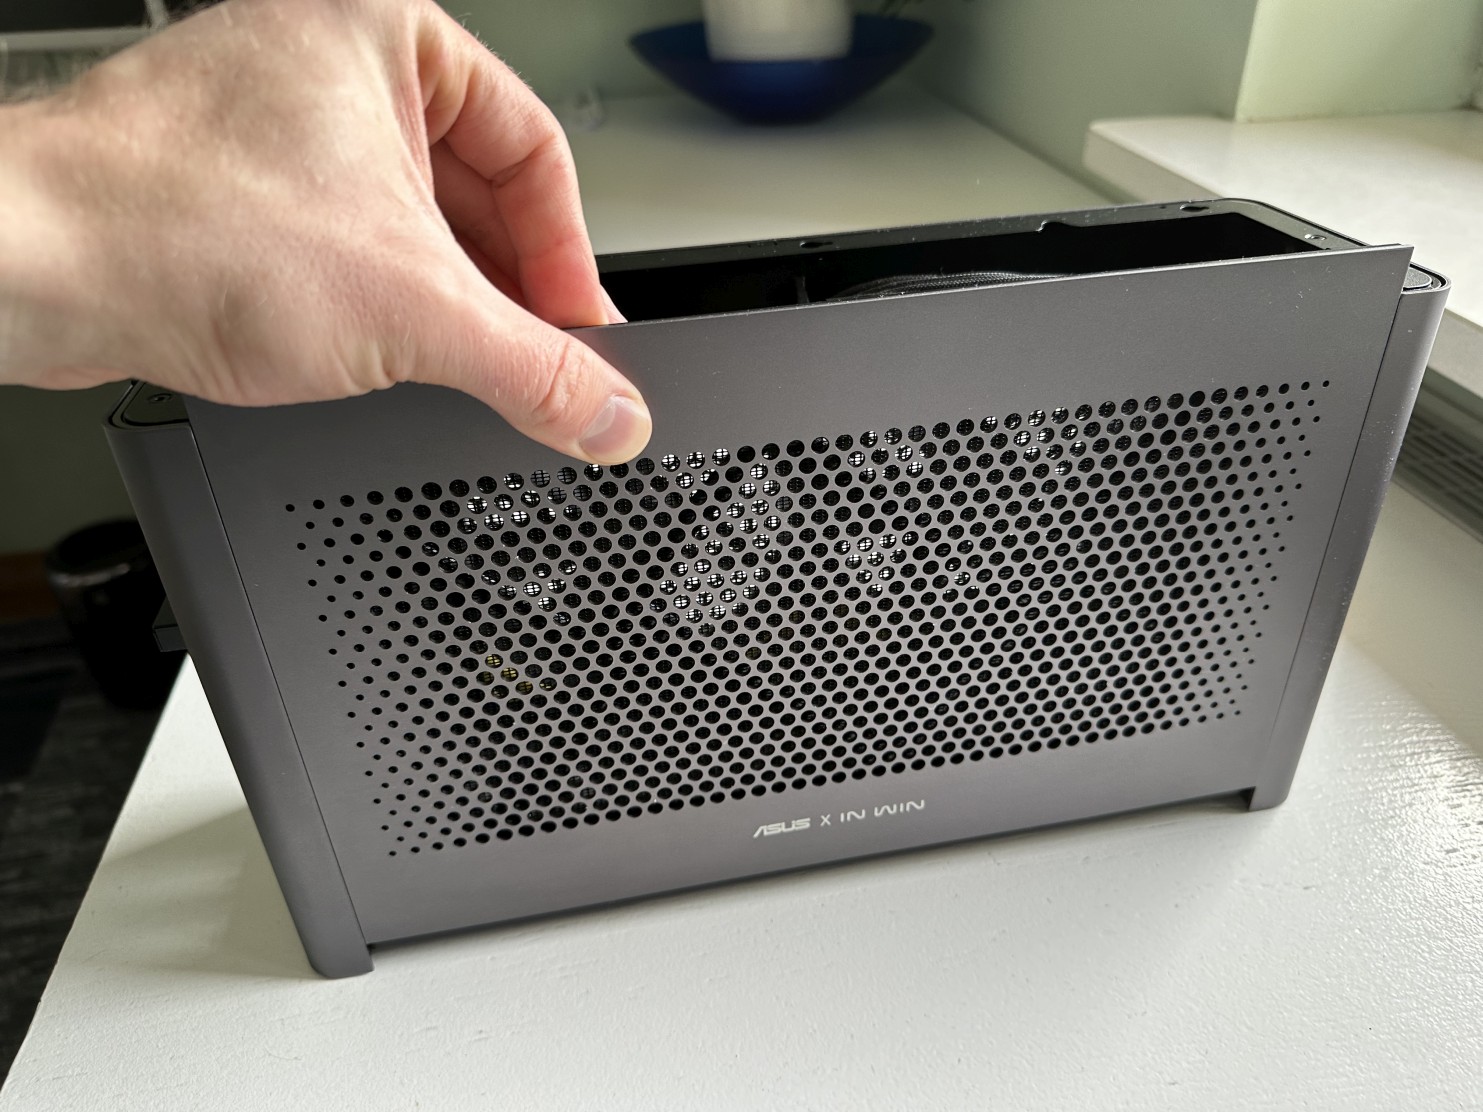
Step 5Slide the left cover of the chassis to the top and remove it. |
 |
|
|
|
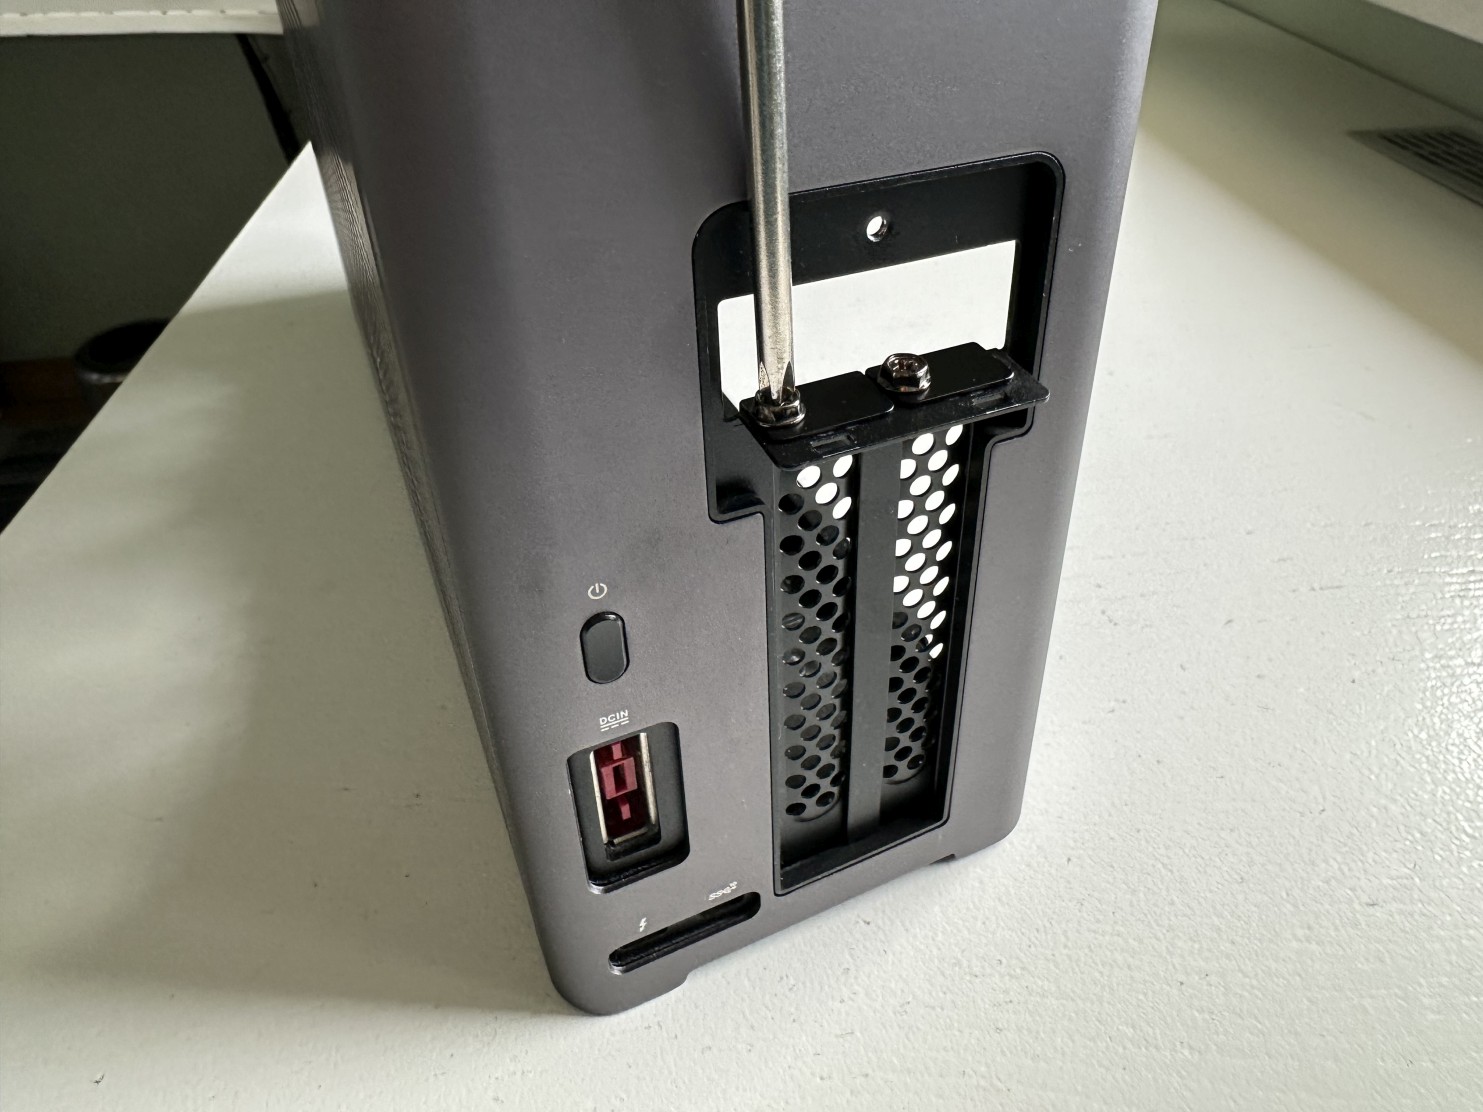
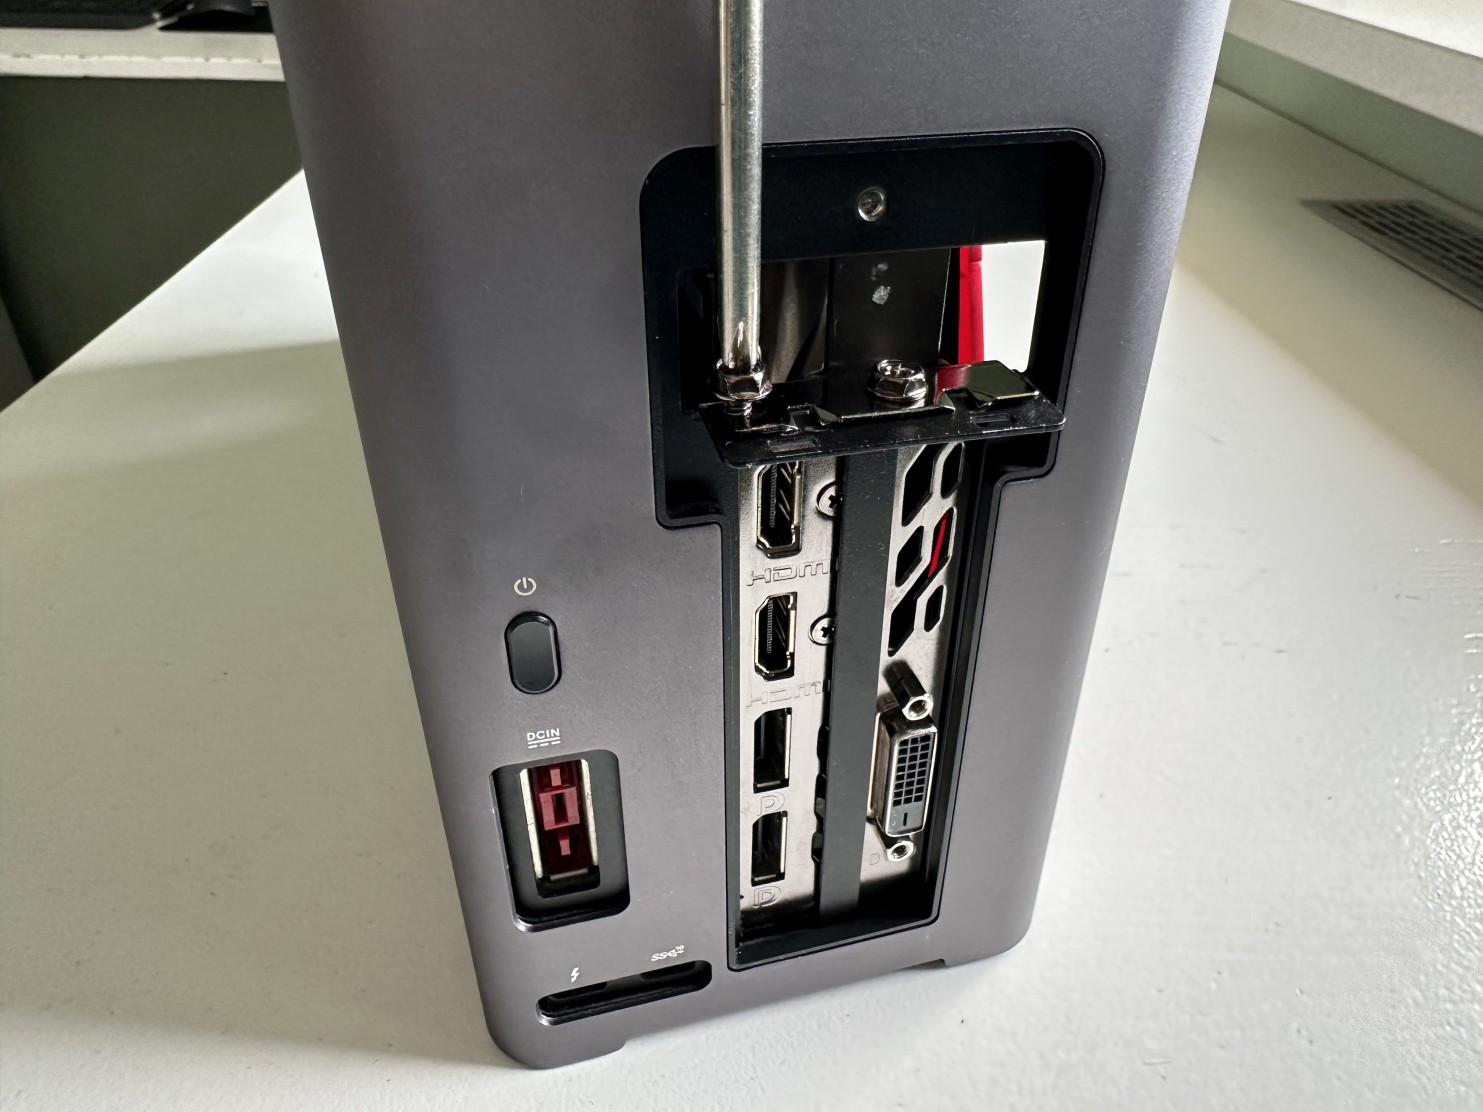
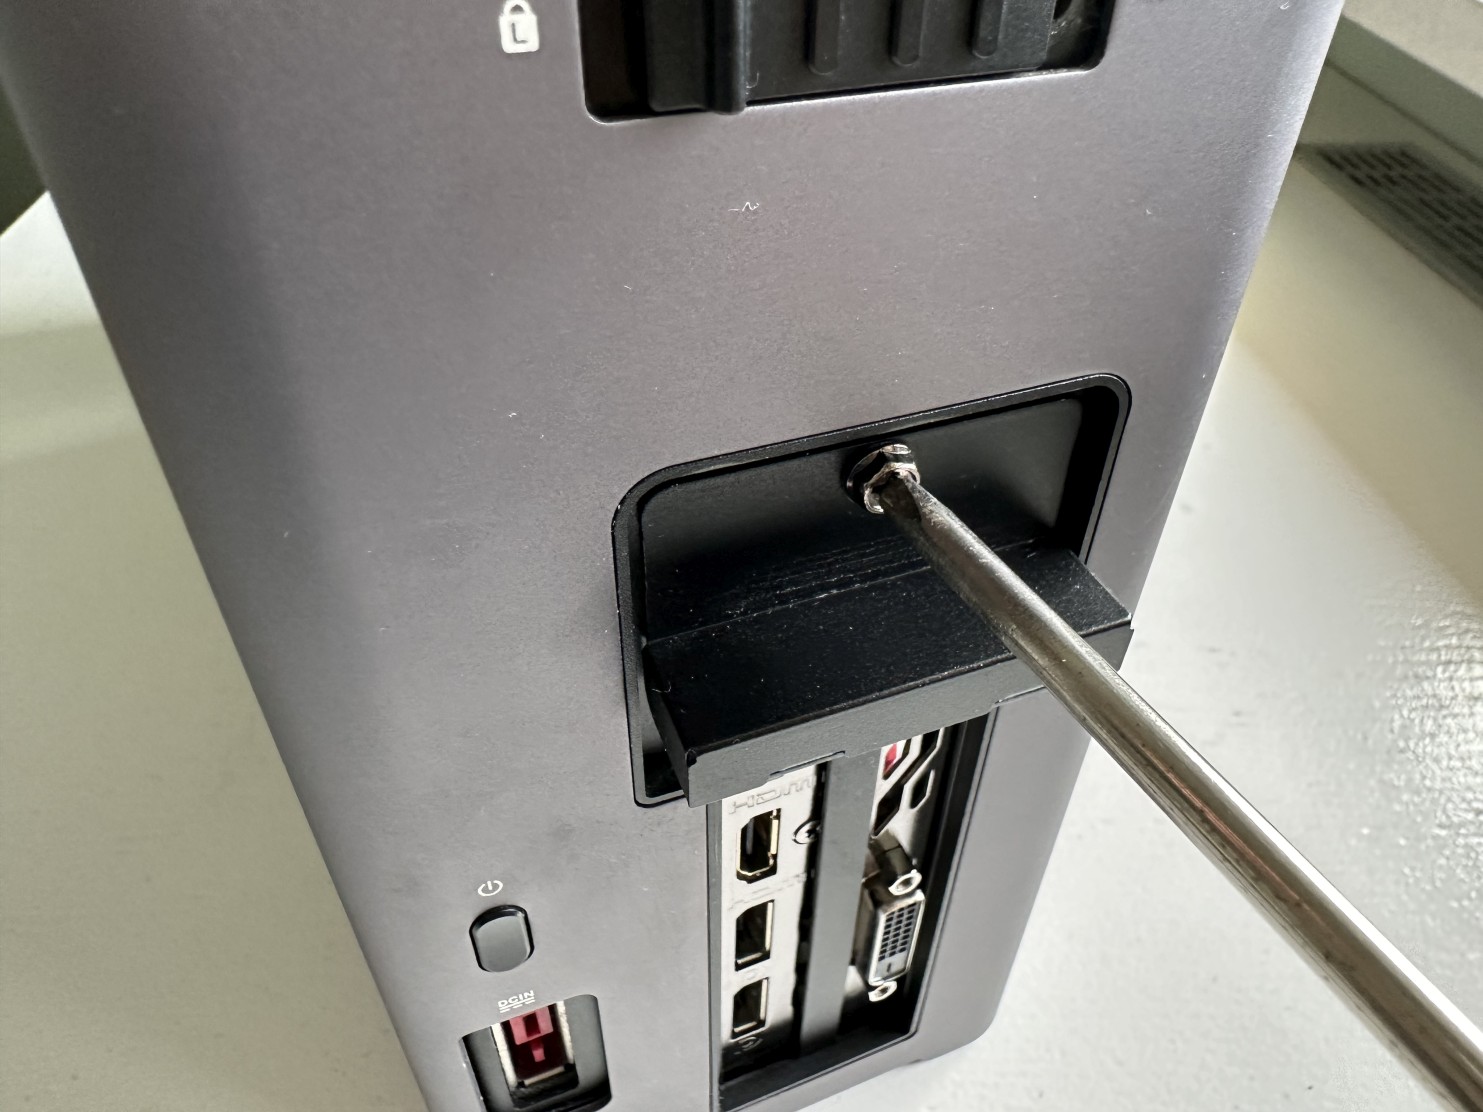
Step 6Remove another back screw with a Philips screwdriver, and remove the retaining plate to reveal brackets screws.
|
 |
|
|
|
Step 7Remove brackets screws and remove both brackets (if your graphics card is single slot wide, remove only one bracket on the left).
The brackets will be no longer needed. |
 |
|
|
|
Step 8Locate PCI-Express slot inside the chassis. |
 |
|
|
|
Step 9Before inserting your new graphics card make sure to remove all the protective films, PCI-Express connector cover and port covers if they still exist.
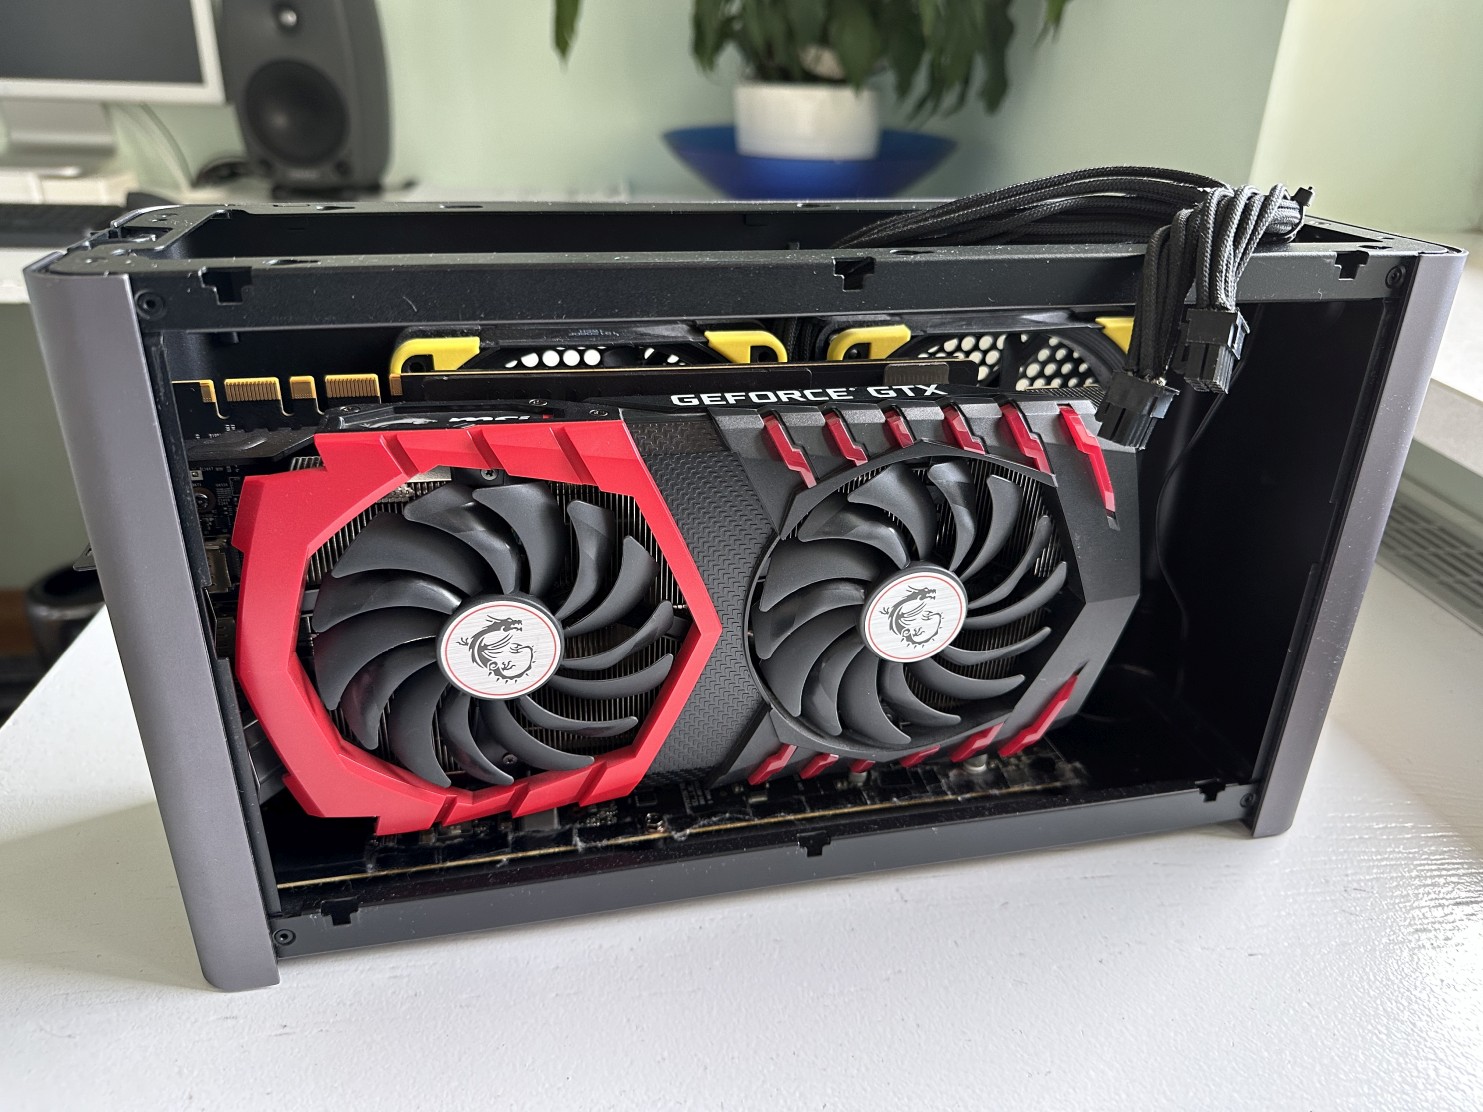
Line up the connector tab and the PCI-Express slot correctly, and insert it gently into the slot. Do not use excessive force. If the card does not seem to be inserting correctly, remove it and check the alignment again. |
 |
|
|
|
Step 10Secure the graphics card inside the chassis with two screws previously removed from the brackets. |
 |
|
|
|
Step 11Remount the retaining plate and secure it with a screw. |
 |
|
|
|
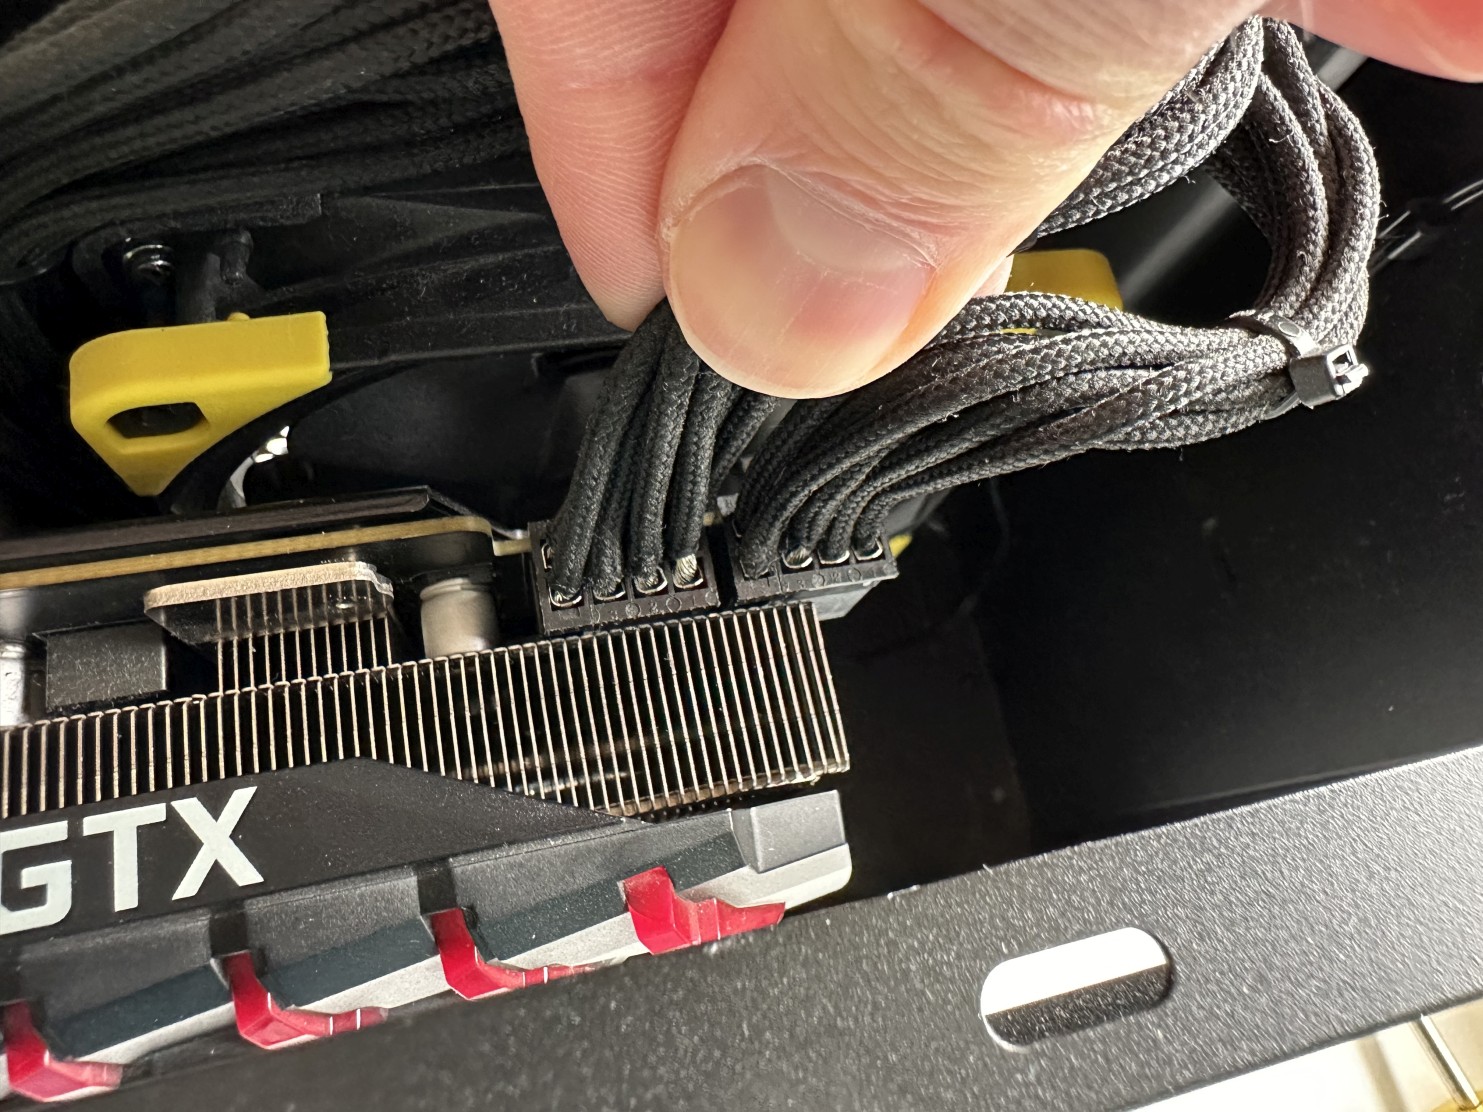
Step 12If your card is using 8-pin+8-pin power plug, plug both power cables into power connectors into card.
If your card is using 6-pin+8-pin power plugs, remove two unnecessary pins from one of the 8-pin power cables, so one of the plugs would become 6-pin, and plug both power cable into power connectors into card.
If your card is using 6-pin+6-pin power plugs, remove two unnecessary pins from both of the 8-pin power cables, so both of the plugs would become 6-pin, and plug both power cables into power connectors into card.
If your card is using a single 8-pin power plug, plug just one 8-pin power cable into card. The other 8-pin power cable is not needed.
If your card is using a single 6-pin power plug, remove two unnecessary pins from one of the 8-pin power cables, so one of the plugs would become 6-pin, and plug it into card. The other 8-pin power cable is not needed. |
 |
|
|
|
Step 13Remount left chassis cover starting from the top. It has some tiny holes which needs to match, then simply slide it towards the bottom. |
 |
|
|
|
Step 14Remount top chassis cover. Again it has some tiny holes which needs to match. Then simply slide it towards the front of the chassis. |
 |
|
|
|
Step 15Slide the slider to the left into locked position. |
 |
|
|
|
Step 16Finally secure the slider with a screw.
Your hardware installation is now finished, but now you need to follow another guides to make it work: Preparing Mac Pro 6,1 (2013) to use with NVIDIA eGPU or Preparing Mac Pro 6,1 (2013) to use with AMD eGPU. |
 |