
Preparing Mac Pro 6,1 (2013) to use with AMD eGPU
If you have your eGPU graphics card already mounted inside the chassis, you are now ready to prepare your Mac Pro 6,1 (2013) to use with AMD eGPU.
Step 1Press and hold Command + R keys combination (or ALT + R key on Windows keyboard) on startup to launch recovery mode.
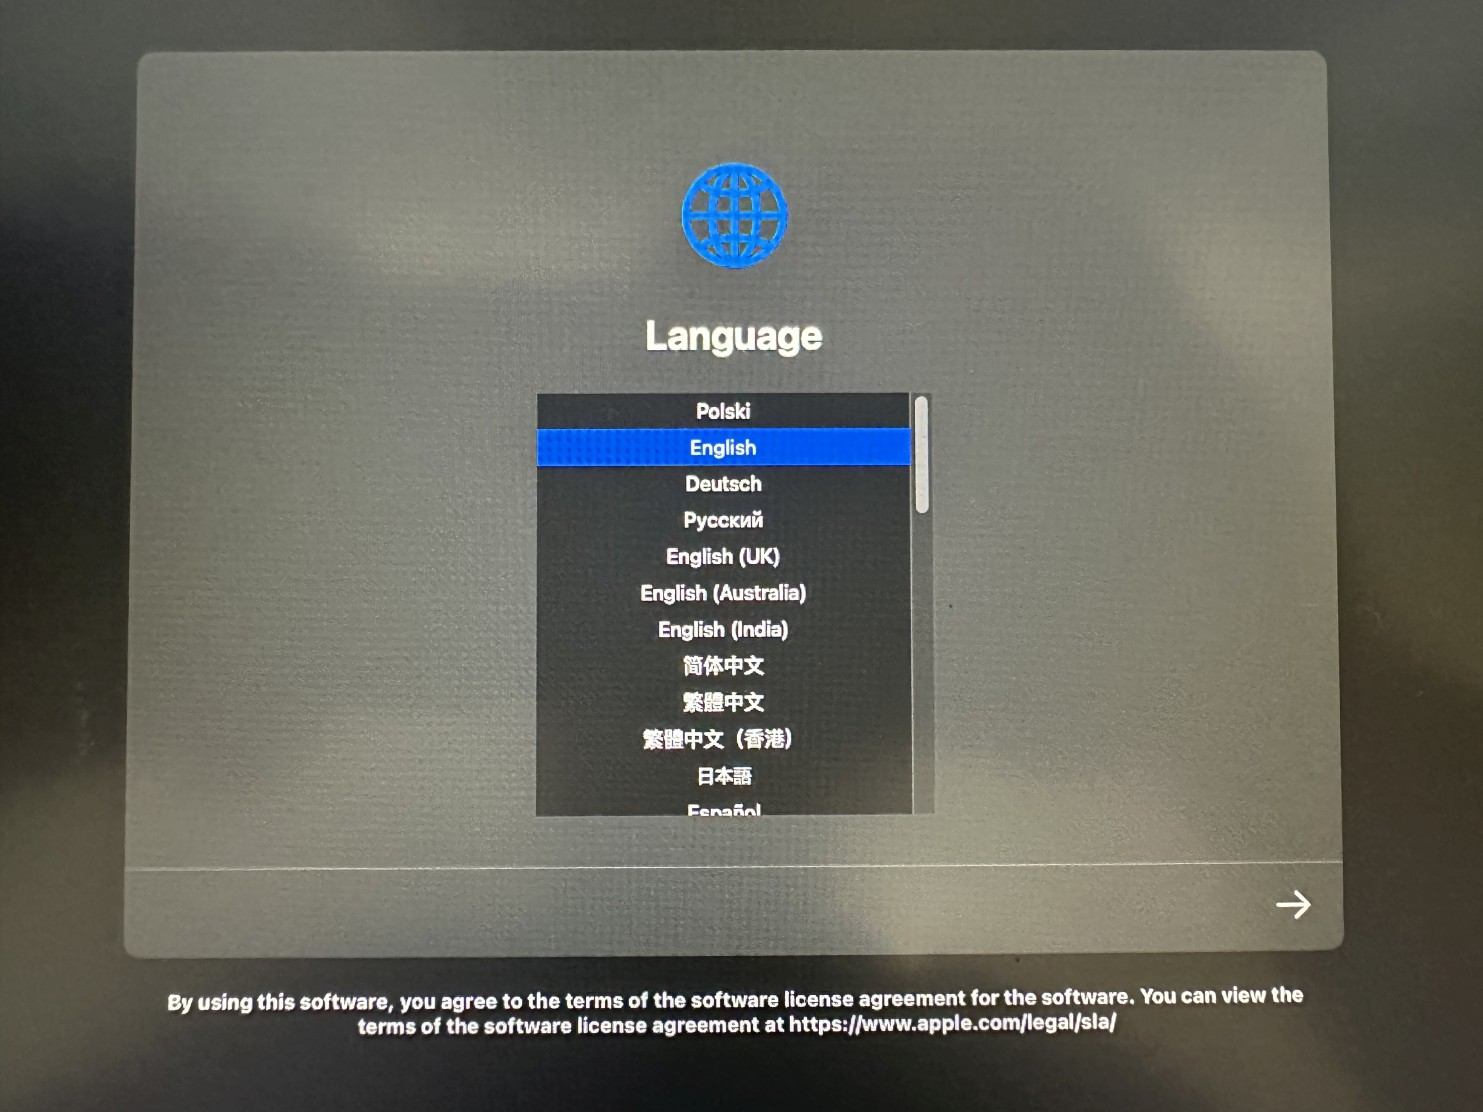
You might be prompted to choose language. Simply choose any language from the list and click an arrow on the right to continue.
Please note: If you don't have recovery mode installed it will be automatically downloaded from the web. |
 |
|
|
|
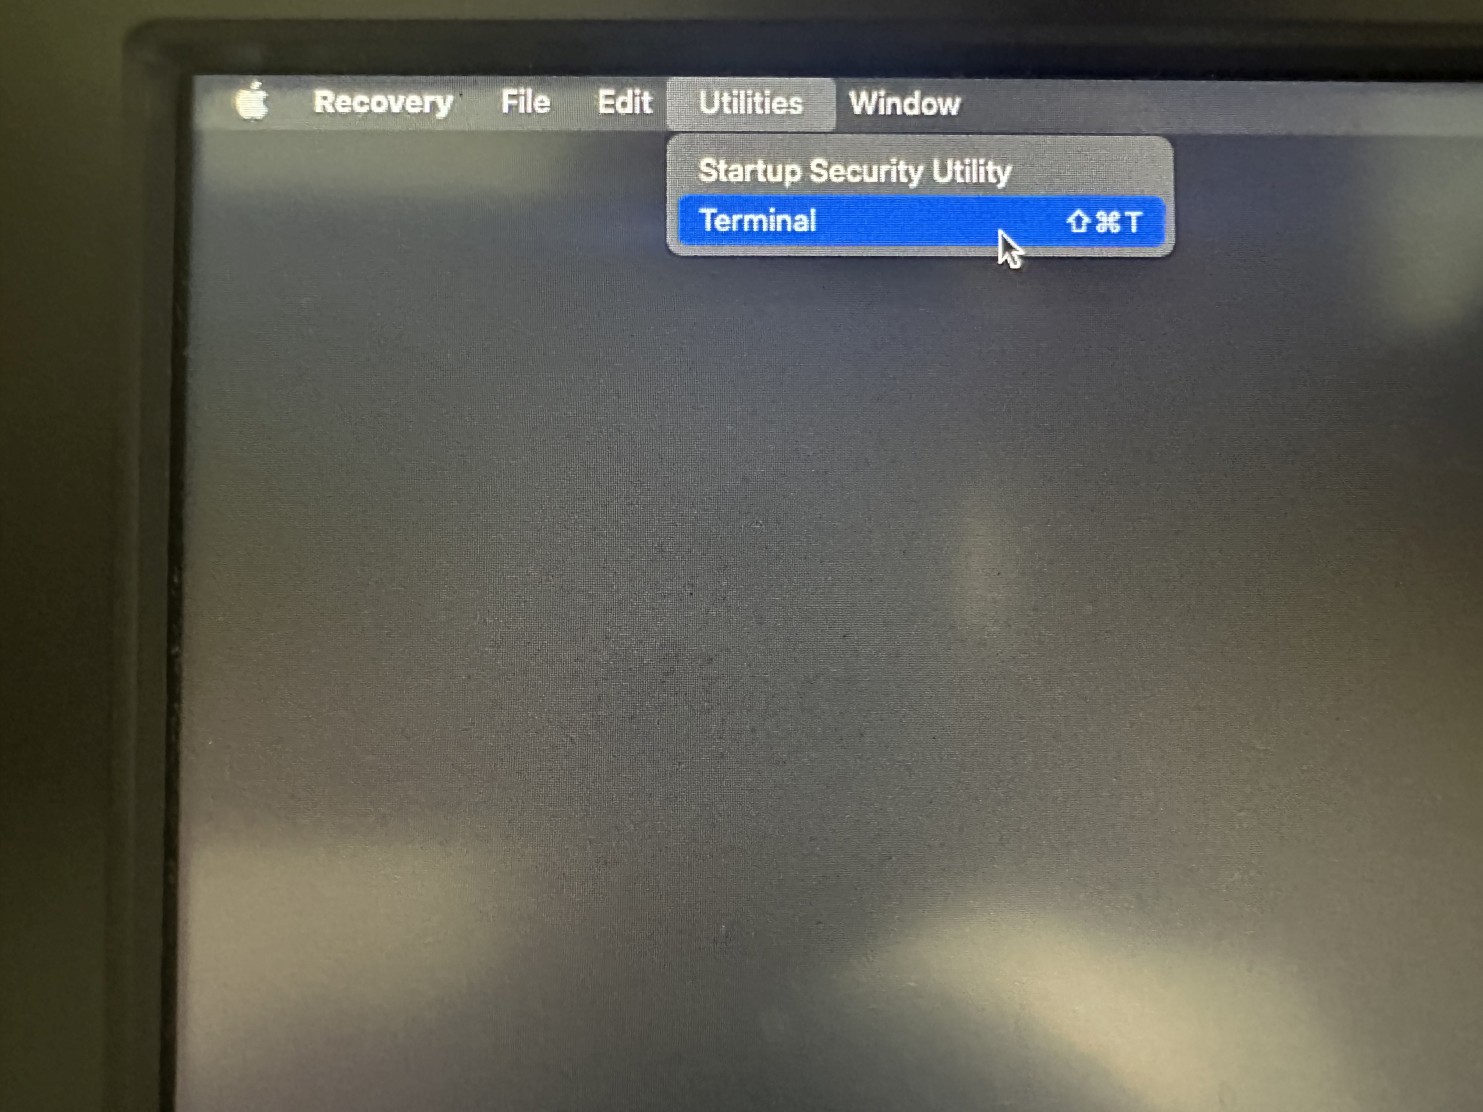
Step 2Choose Utilities then Terminal from Finder menu. |
 |
|
|
|
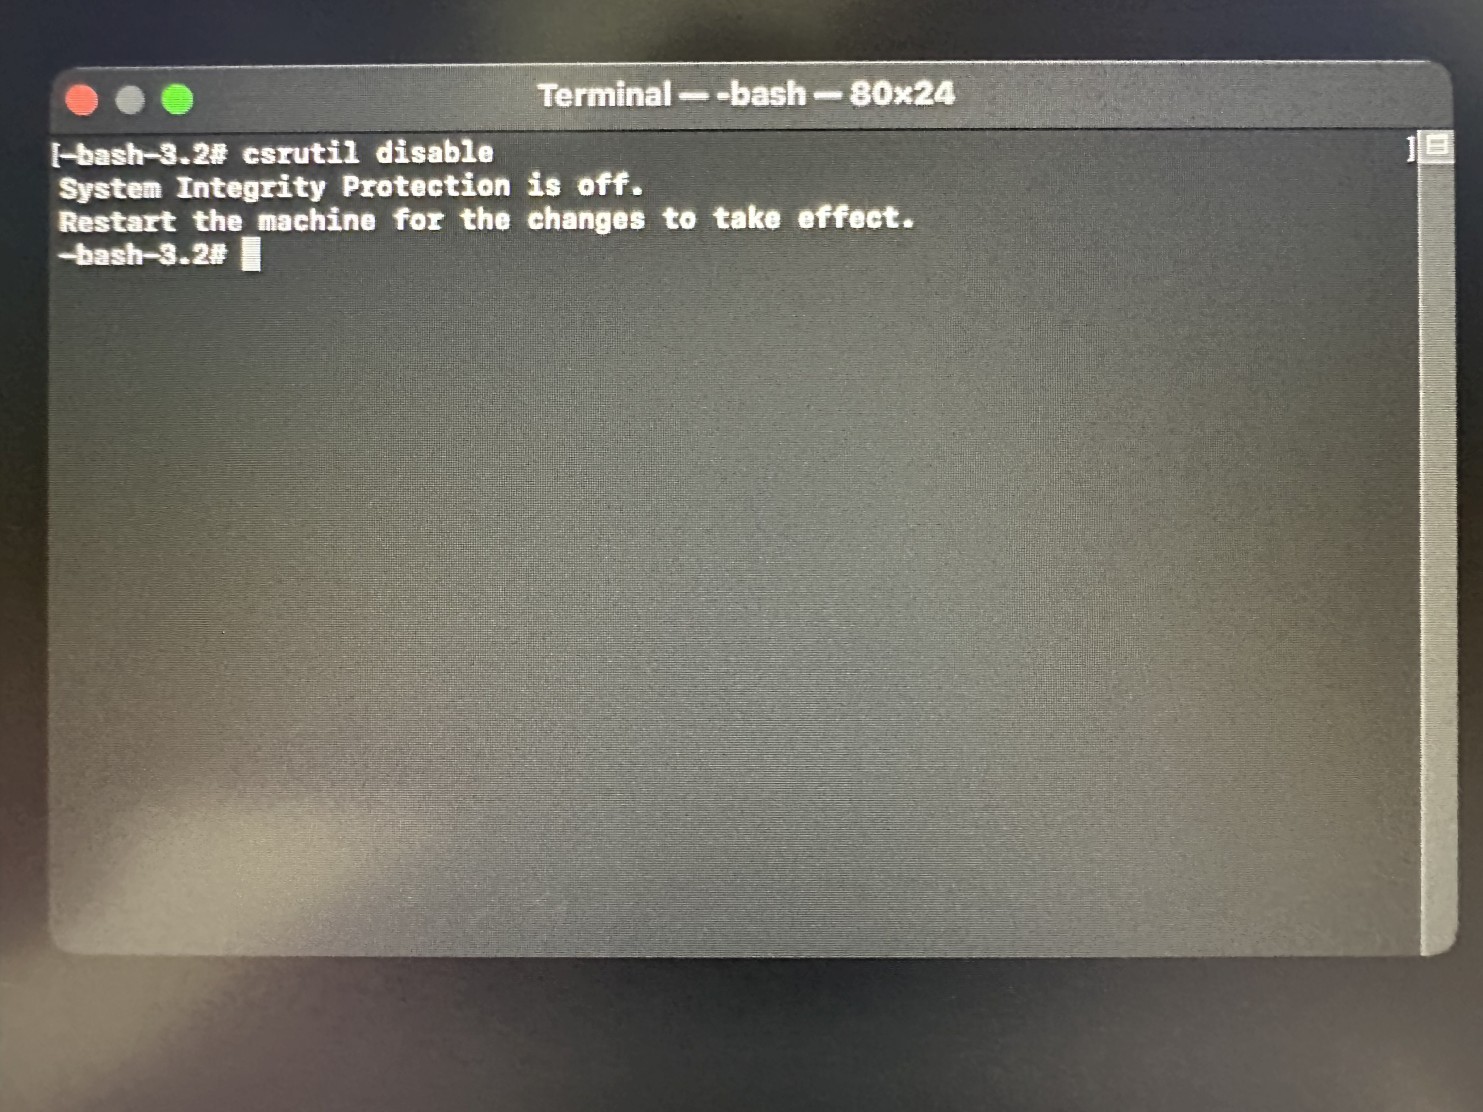
Step 3Type a following command in the Terminal window:
csrutil disable
and press ENTER. |
 |
|
|
|
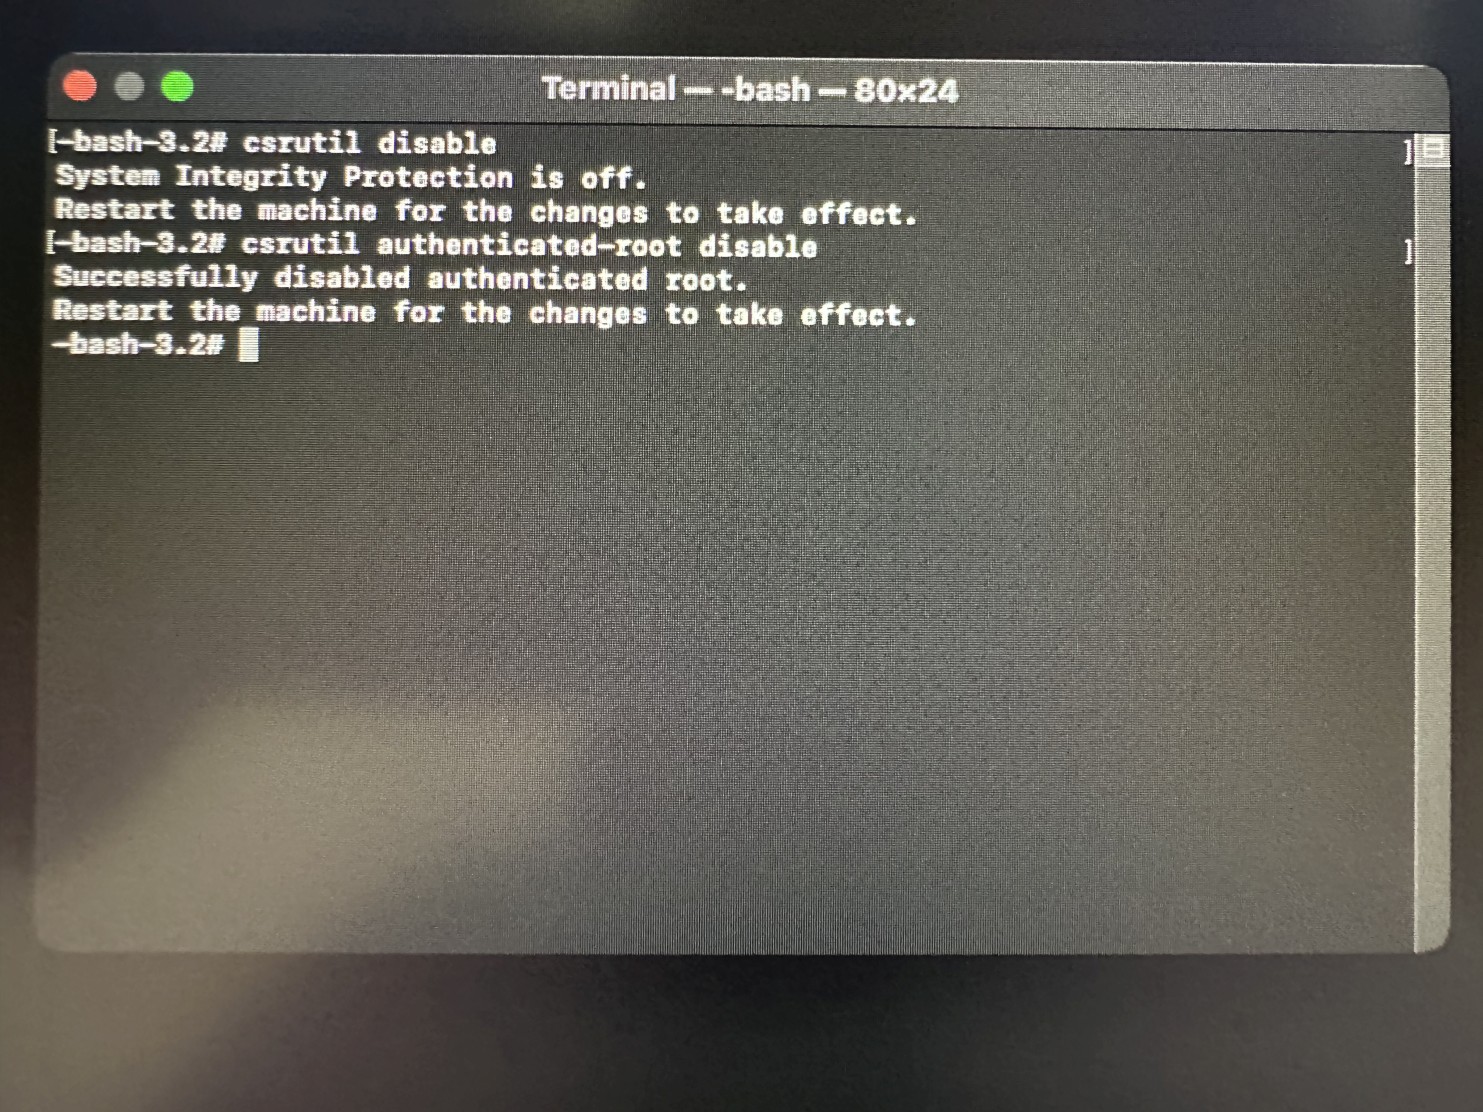
Step 4Now type:
csrutil authenticated-root disable
and press ENTER in the Terminal window.
This will fully disable SIP (System Integrity Protection) which is needed to enable patches for the eGPU. Make sure not to reset NVRAM otherwise these steps would have to be redone. |
 |
|
|
|
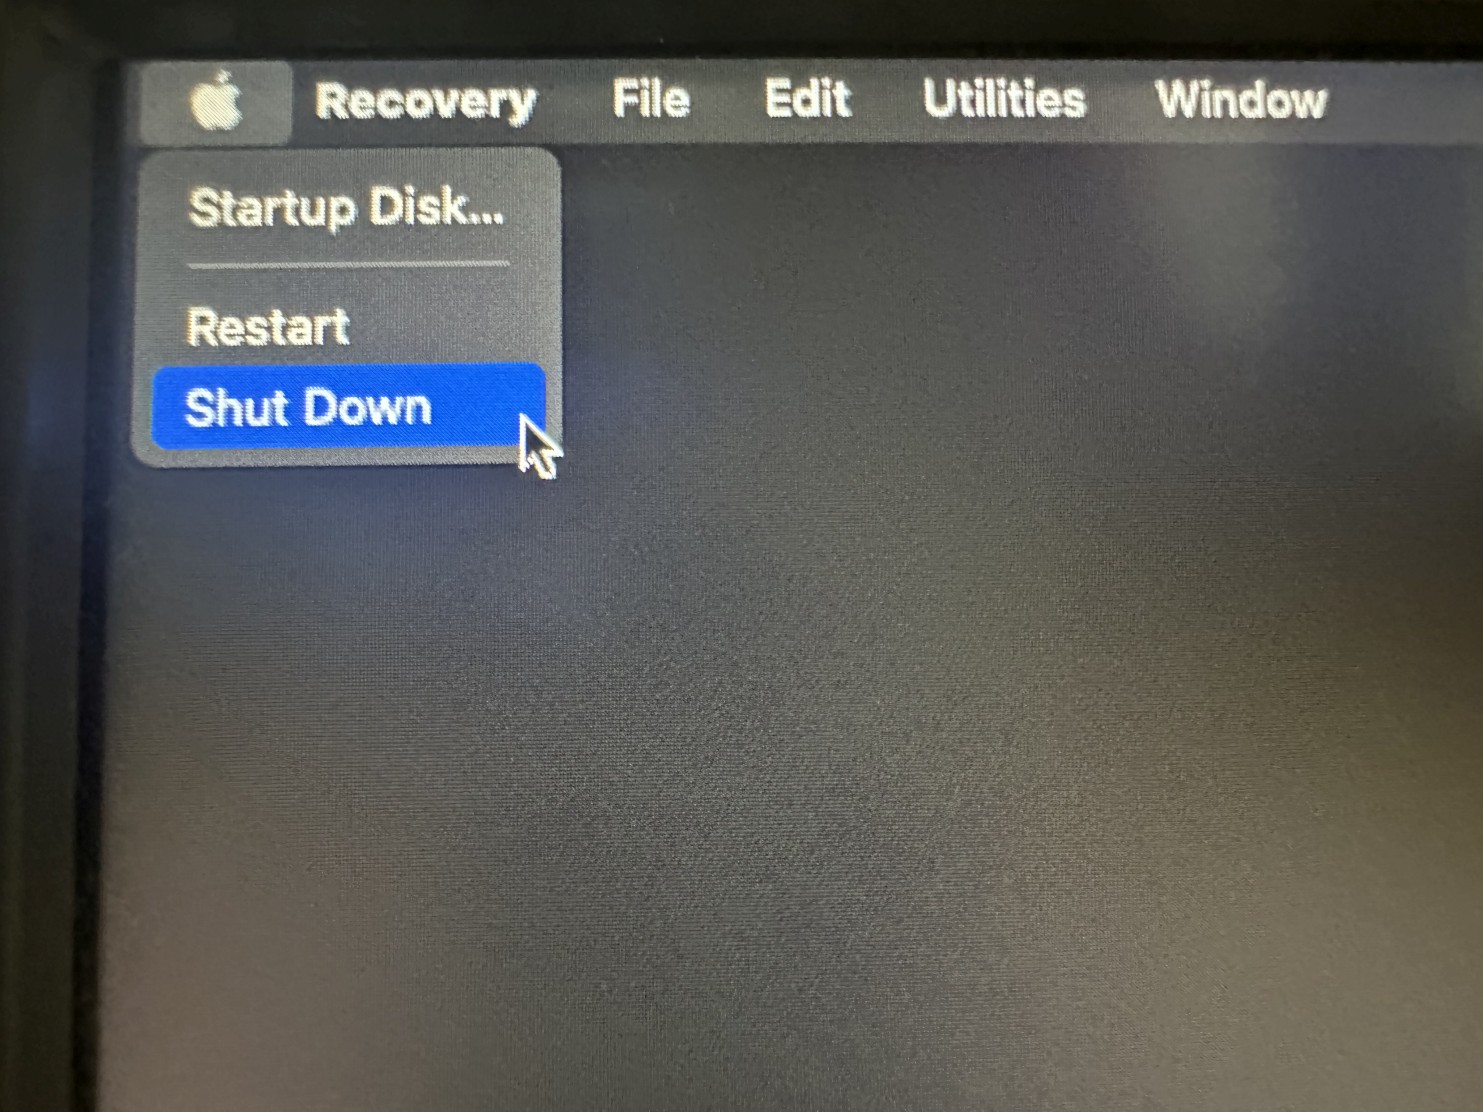
Step 5Close the Terminal window. Click Apple logo and choose Shut Down to turn off the computer. |
 |
|
|
|
Step 6Connect your eGPU, but do not connect any displays to it yet.
Please follow this guide on how to connect the eGPU, then go back here and follow further steps.
Start the computer again and press and hold Option (or ALT on Windows keyboard) to launch boot picker. Choose macOS Monterey disk from the list by clicking an arrow under it.
|
 |
|
|
|
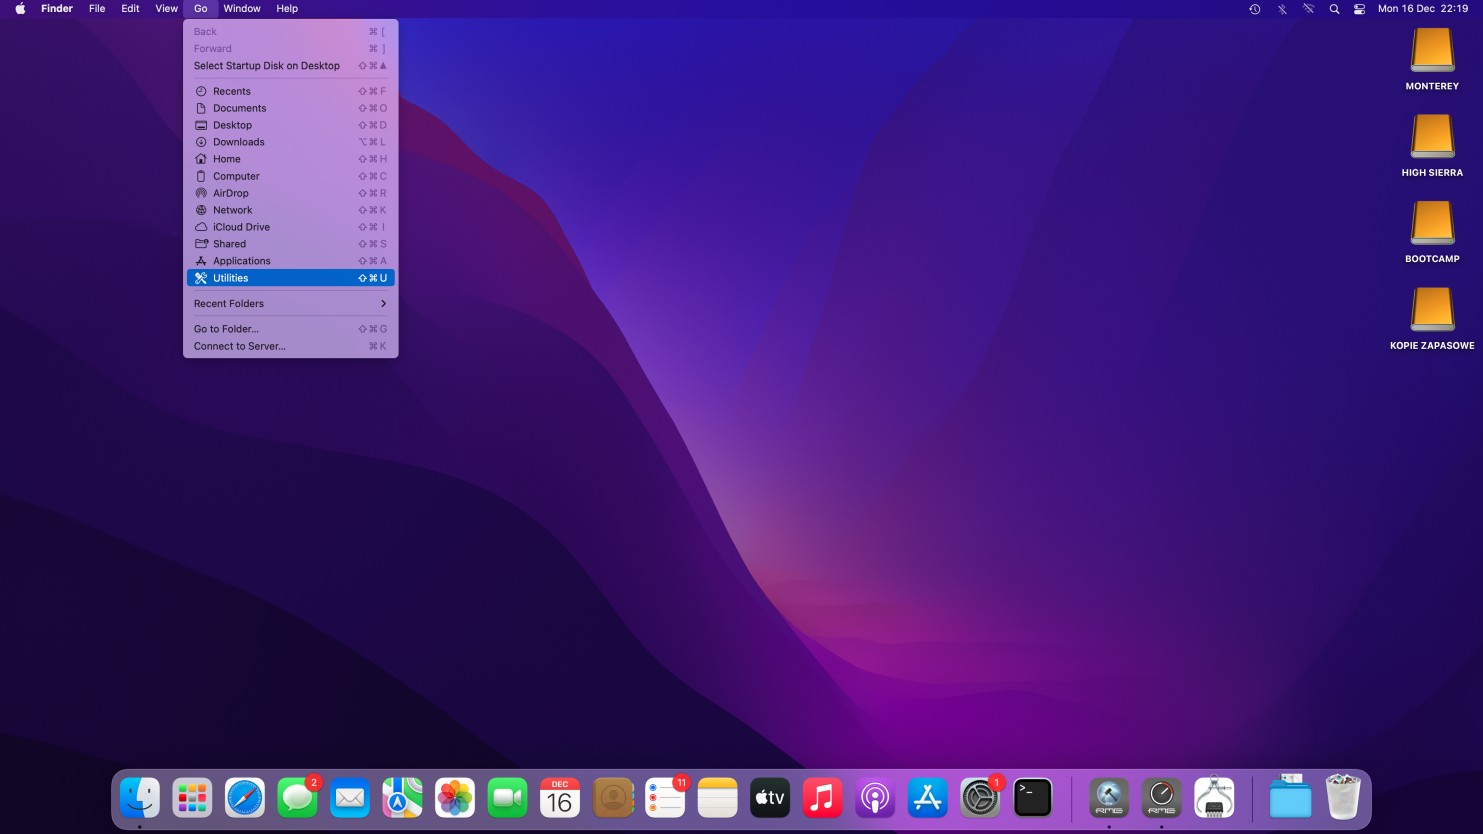
Step 7From Finder menu on top choose Go then Utilities. |
 |
|
|
|
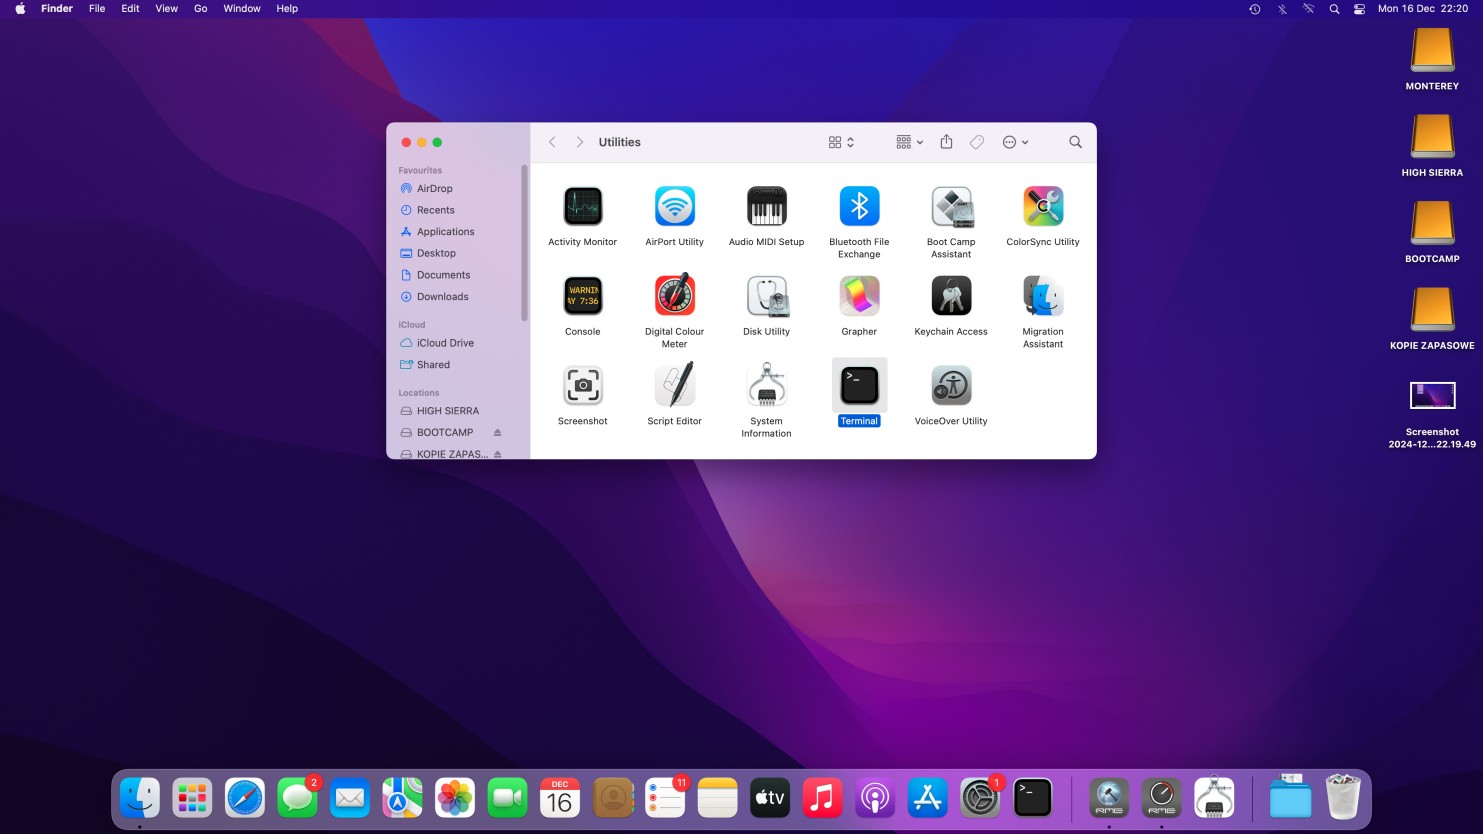
Step 8Double-click on Terminal icon to launch Terminal. |
 |
|
|
|
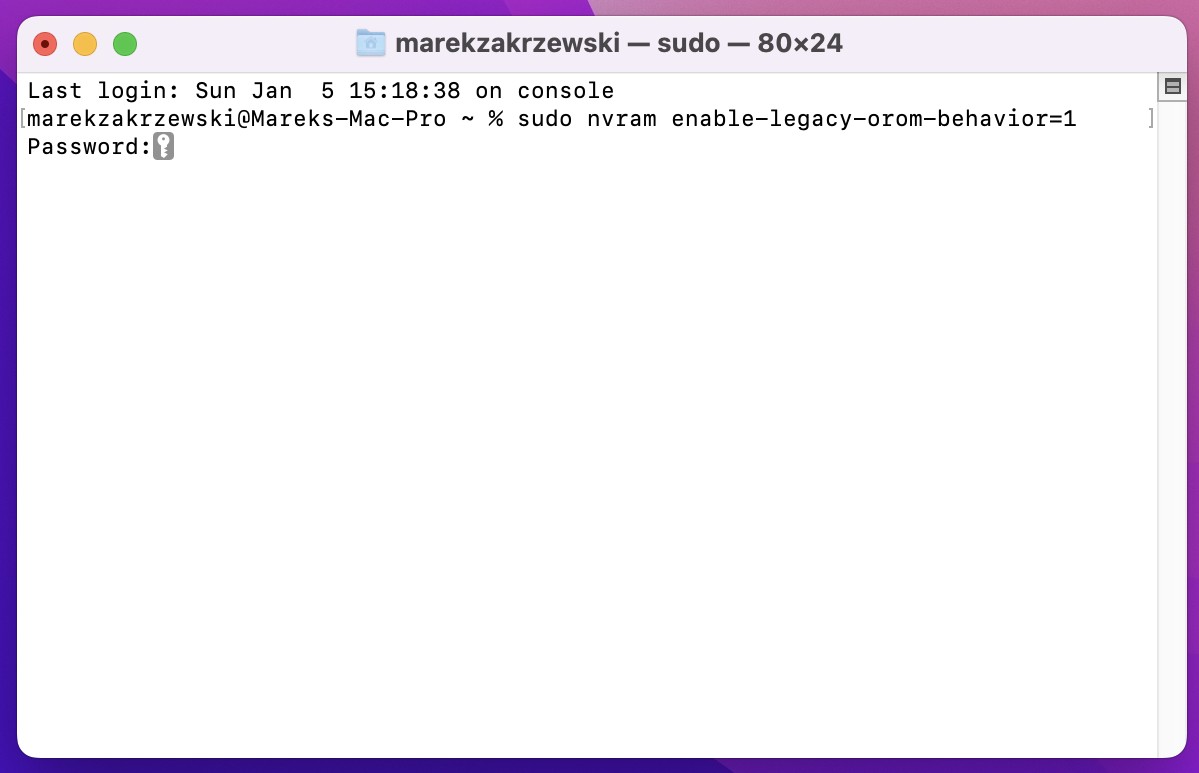
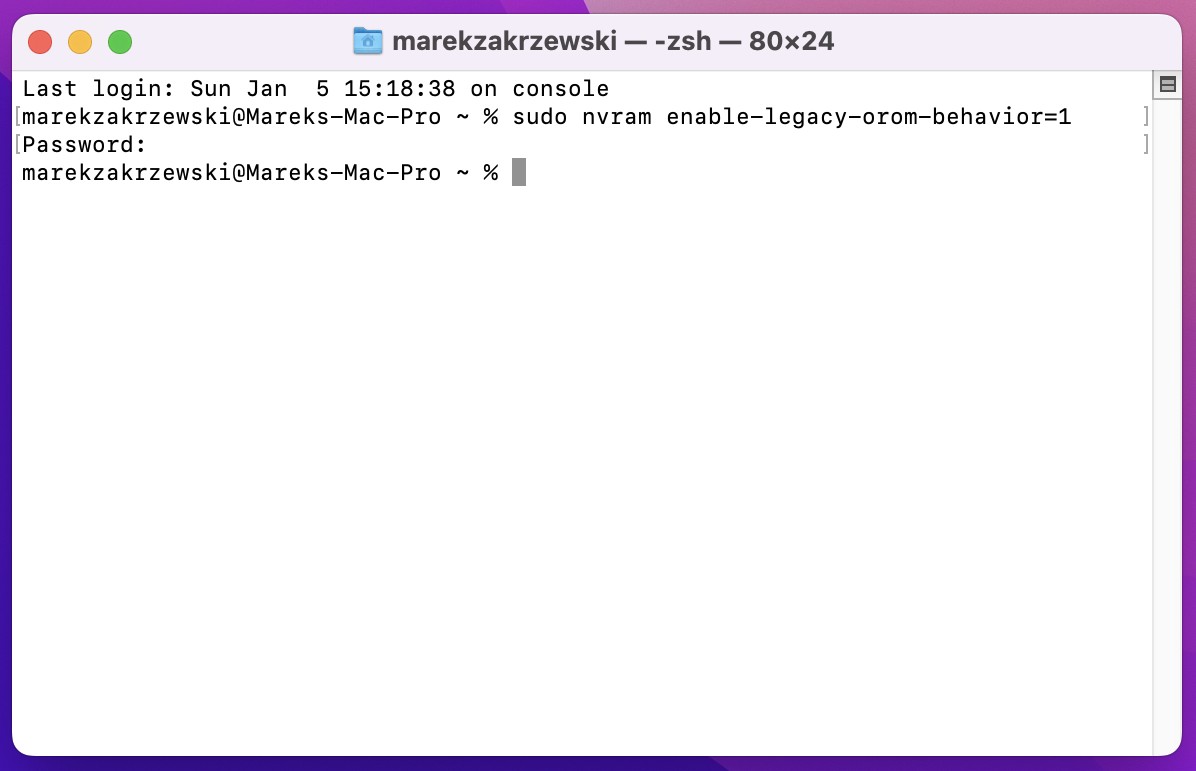
Step 9Type a following command:
sudo nvram enable-legacy-orom-behavior=1
and press ENTER.
Terminal will ask for password. Type your user password and press ENTER (password won't be shown not even under asterisk).
Make sure you have set a password for your current username, otherwise it won't work properly. |
 |
|
|
|
Step 10There would be no output from this command. If there is no error then everything is fine. |
 |
|
|
|
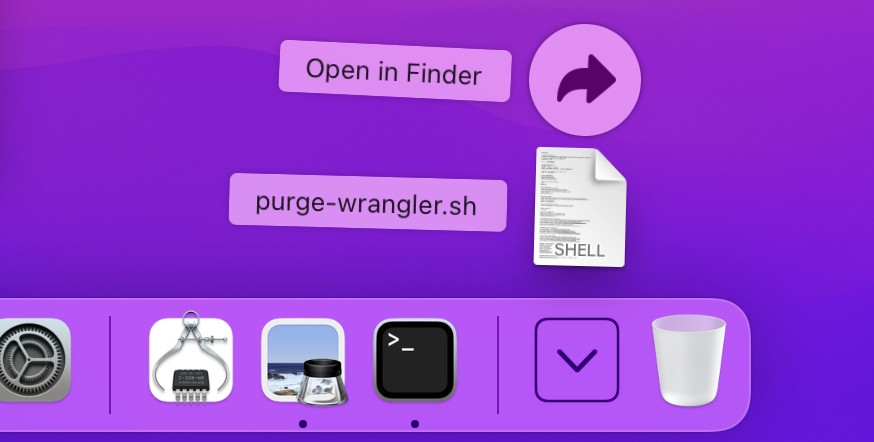
Step 11Download pure-wranger.sh script: https://github.com/mayankk2308/purge-wrangler/releases/download/6.3.4/purge-wrangler.sh
It will be downloaded into Downloads folder near the recycle bin. |
 |
|
|
|
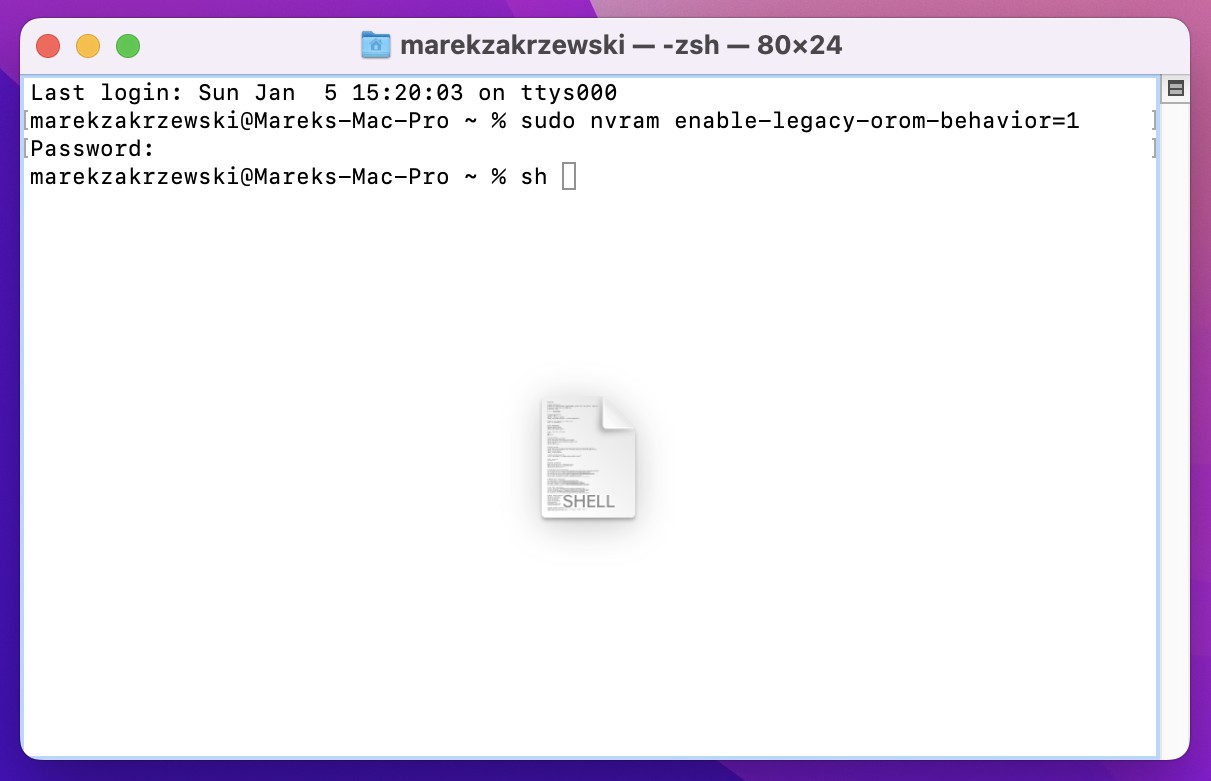
Step 12Type sh followed by <space>. Then drag and drop the downloaded purge-wrangler.sh script from Downloads folder over the Terminal and press ENTER. |
 |
|
|
|
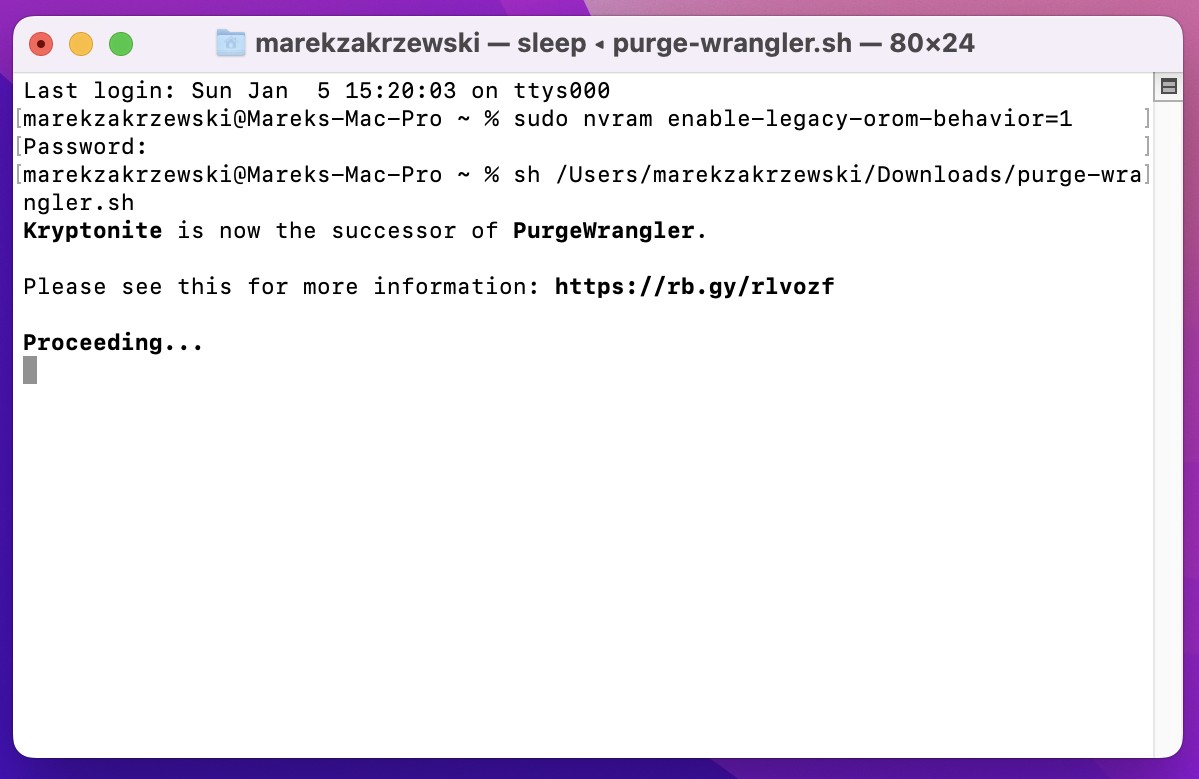
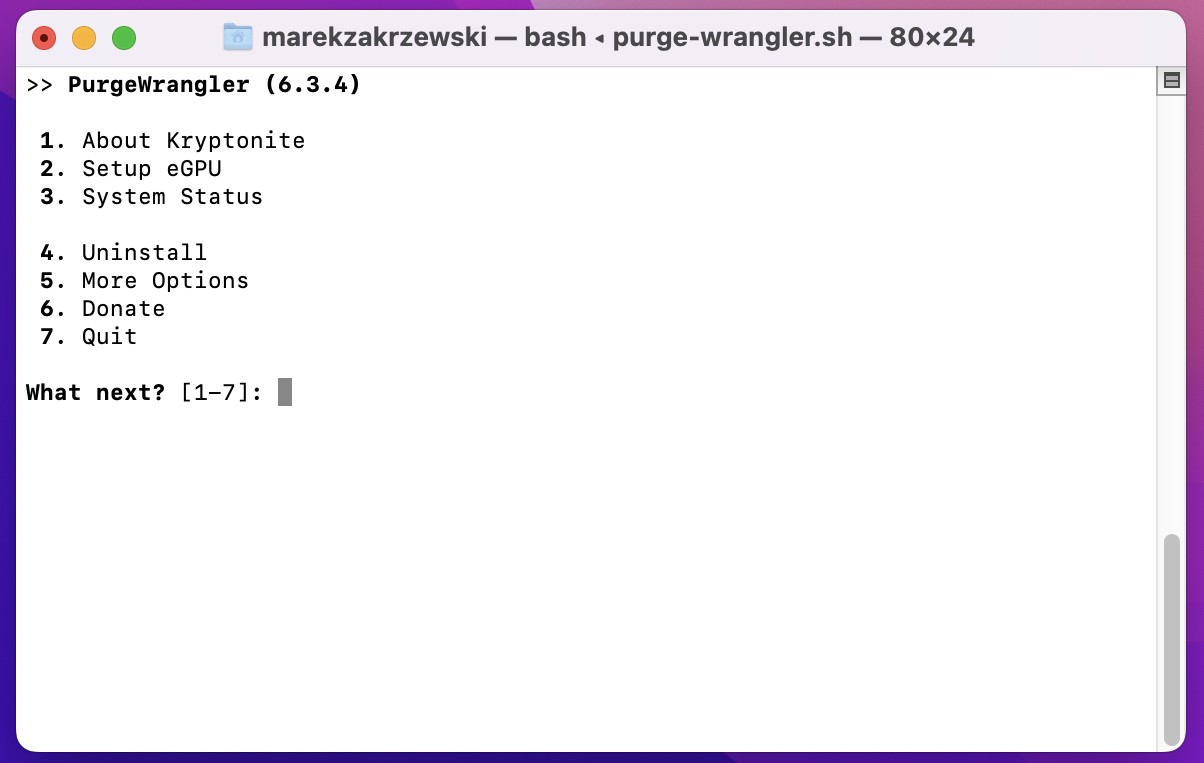
Step 13The script will start running. Ignore the warning about Kryptonite. |
 |
|
|
|
Step 14Press 2 to Setup eGPU. |
 |
|
|
|
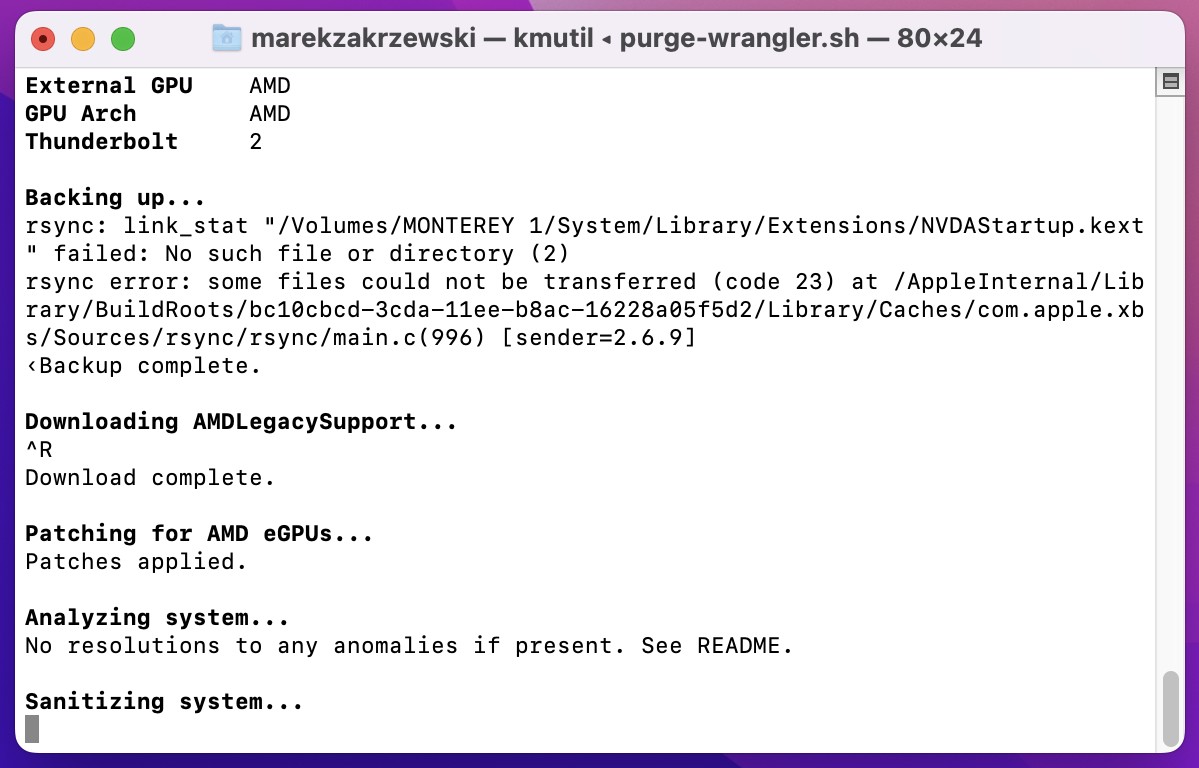
Step 15Script will start installing necessary patches and will automatically reboot the system.
These patches will enable Thunderbolt and Thunderbolt 2 AMD eGPU support.
Again, please ignore the rsync error related to NVIDIA eGPU. |
 |
|
|
|
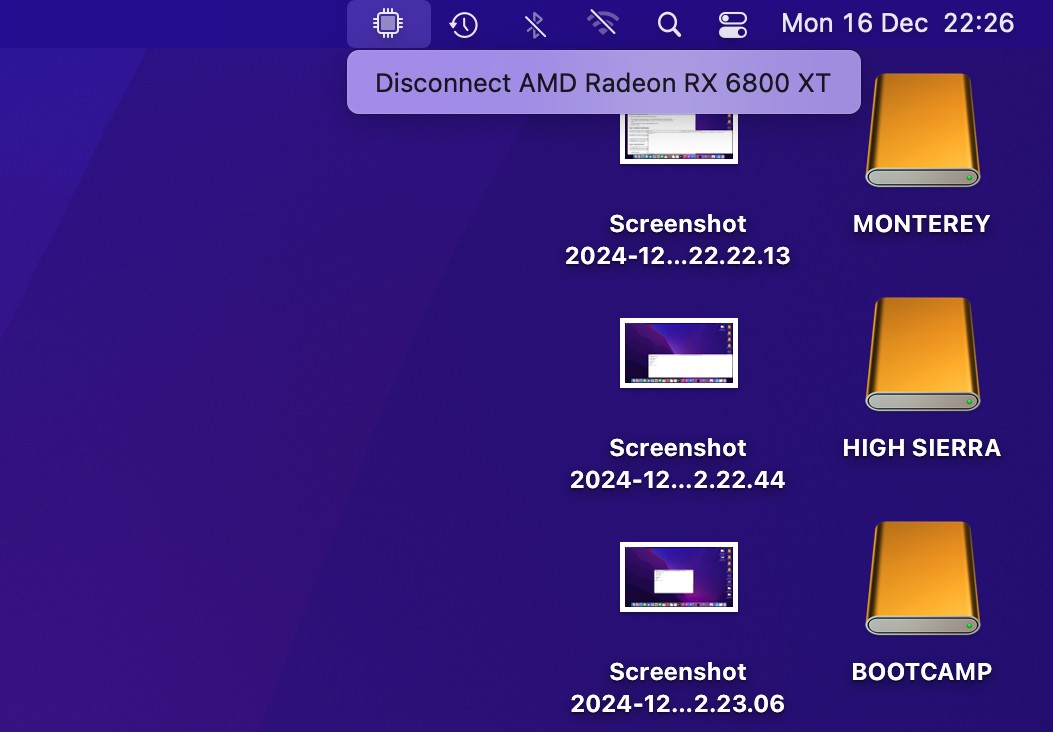
Step 16Post reboot you will notice a new icon near the clock.
When you click it, it will say e.g. Disconnect AMD Radeon RX 6800XT.
Now it's time to connect the display or displays to your eGPU.
Disconnect the display from the standard AMD FirePro graphics card and connect it to any of your eGPU ports.
If you're using an Apple Studio Display, make sure to use WJESOG USB-C to DisplayPort cable (https://www.amazon.com/WJESOG-DisplayPort-Adapter-Converter-Thunderbolt/dp/B0BNX7MS6N) or similar.
Make sure an additional USB-A connector is also connected, so the camera, loudspeakers and microphones inside the display would also work properly. |
 |
|
|
|
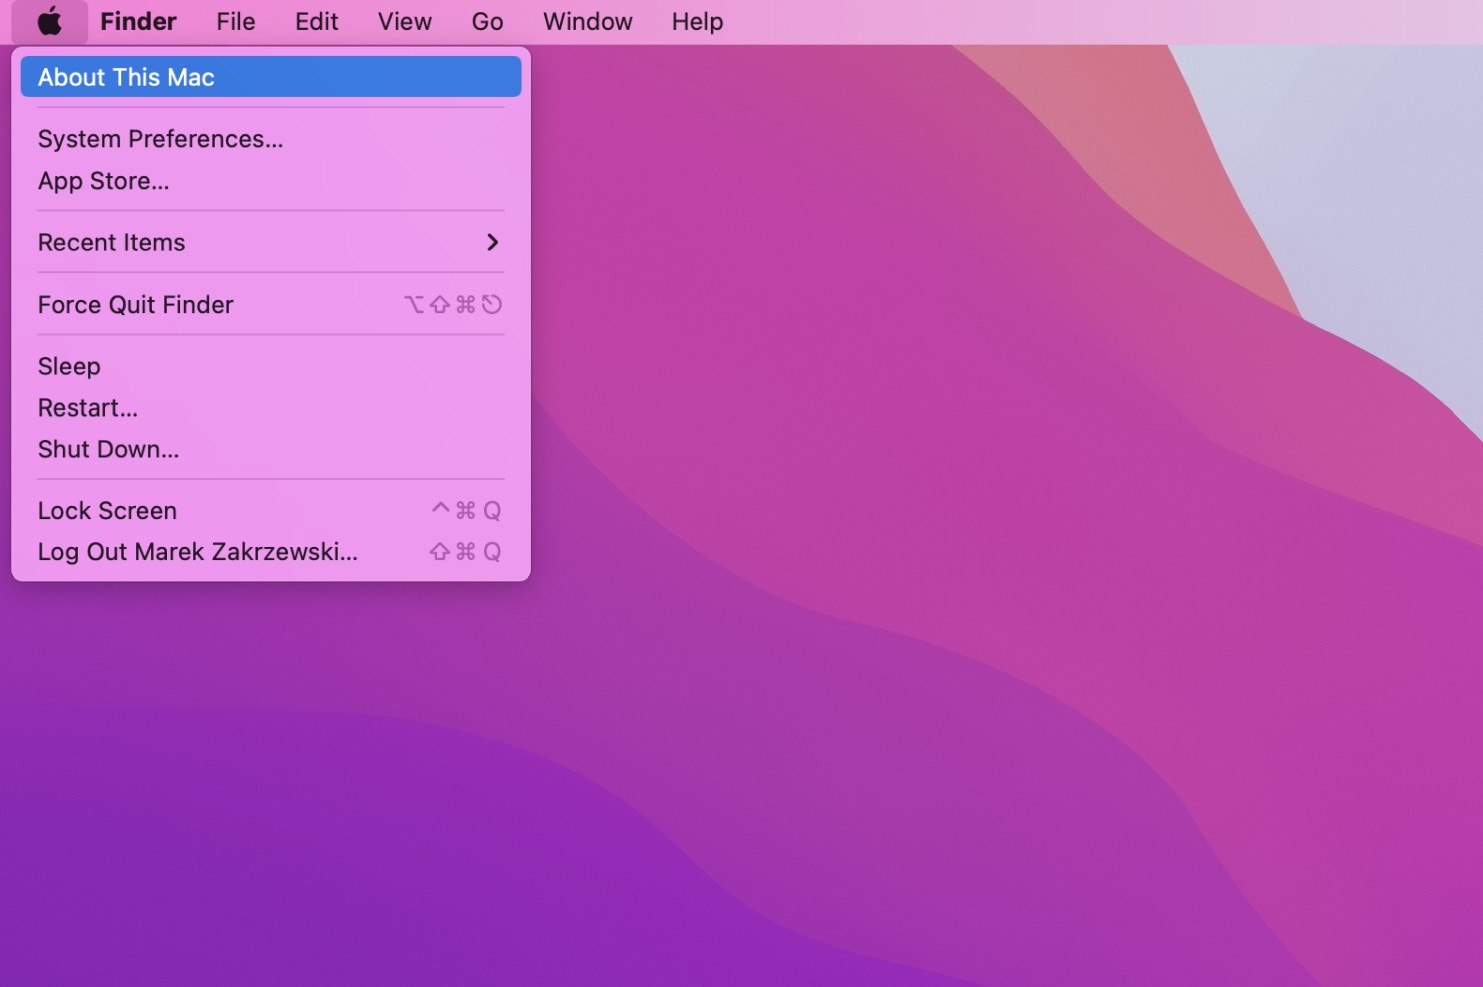
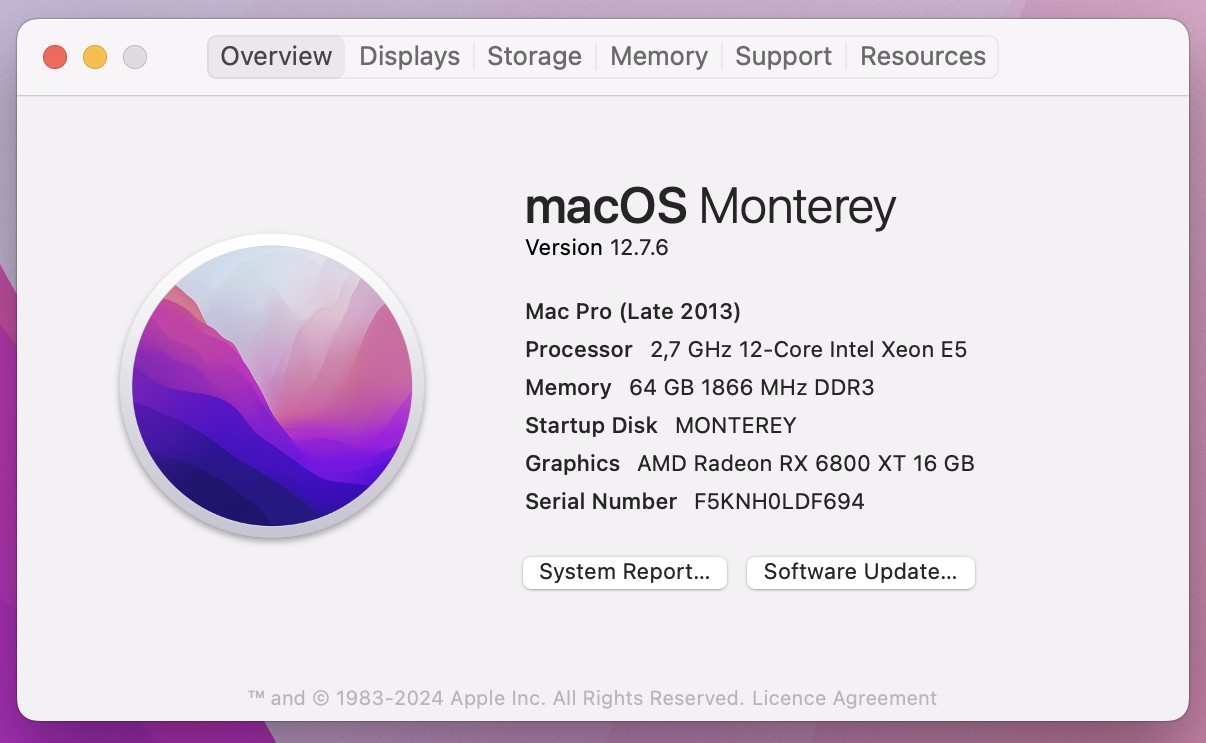
Step 17Your display should now be working on your eGPU.
You can confirm it, by clicking Apple logo and choosing About this Mac. |
 |
|
|
|
Step 18You will notice the Graphics field changed from standard AMD Radeon FirePro D300/D500/D700 to the name of your eGPU.
This means your eGPU is now working properly. Enjoy! |
 |