
Installing macOS Monterey 12 on unsupported Mac Pro
If you have a Mac Pro 4,1/5,1 make sure to have Boot ROM 144.0.0.0.0 installed. If not, please follow this guide: Installing macOS Mojave 10.14 and performing Mac Pro 5,1 Boot ROM update
This guide will allow you to run macOS Monterey in version 12.2.1 in native mode, just like on a supported Mac. You won't need OpenCore Legacy Patcher at all. We are only using older version 0.3.3 just for the installation, to skip forced EFI Firmware upgrade required for supported Macs, but not needed for Mac Pro 3,1/4,1/5,1.
We recommend macOS Monterey 12.2.1 since newer versions are problematic in native mode. If you need the newest version of macOS Monterey 12.7.6, then you need to use the latest OpenCore Legacy Patcher version, but then booting must be done via OpenCore Legacy Patcher boot picker screen otherwise it might not always boot.
You need two USB flash drives with a size of at least 16 GB. One will be used for Monterey-micropatcher, the other one for OpenCore Legacy Patcher in an older version 0.3.3 (please do not use newer versions or it won't work properly).
Native macOS Monterey 12.2.1 does not support standard 802.11n Wi-Fi module / Bluetooth 3.0 module inside Mac Pro, so if you need Wi-Fi or Bluetooth functional, either stay on macOS Big Sur or older version, or replace old Wi-Fi/Bluetooth modules with a newer 802.11ac Wi-Fi/Bluetooth 4.0 modules. If you installed the latest version of macOS Monterey 12.7.6 via newest OpenCore Legacy Patcher and used post-install patches after the installation, then even standard Wi-Fi/Bluetooth modules would work.
If you installed macOS Monterey 12.2.1 and use NVIDIA Kepler based graphics card (GTX600/GTX700 series or Quadro K series), post the installation you also need to install GeForce Kepler patcher to install proper drivers: Installing GeForce Kepler patcher for NVIDIA GeForce GTX600/GTX700 and Quadro K series cards under macOS Monterey 12.0.1 or later (for macOS Monterey 12.7.6 installed via newest OpenCore Legacy Patcher, simply run post-install patches after the installation Installing post-install patches in OpenCore Legacy Patcher).
Step 1Download macOS Monterey 12.2.1 from here.
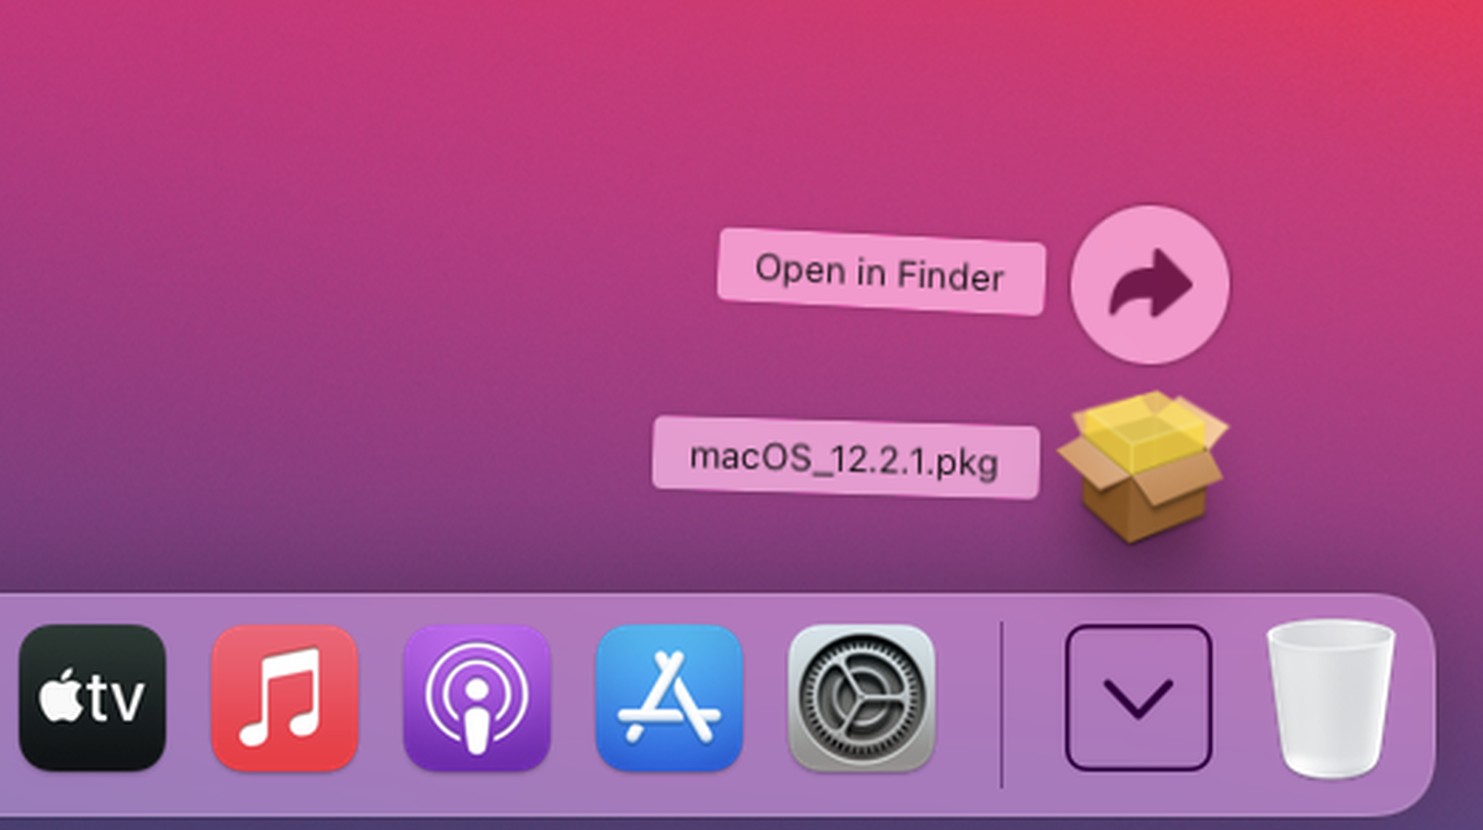
Click macOS_12.2.1.pkg file inside Downloads folder to run it.
If macOS is blocking it you need to unlock it in System Preferences - Security & Privacy - General pane by clicking Allow button. |
 |
|
|
|
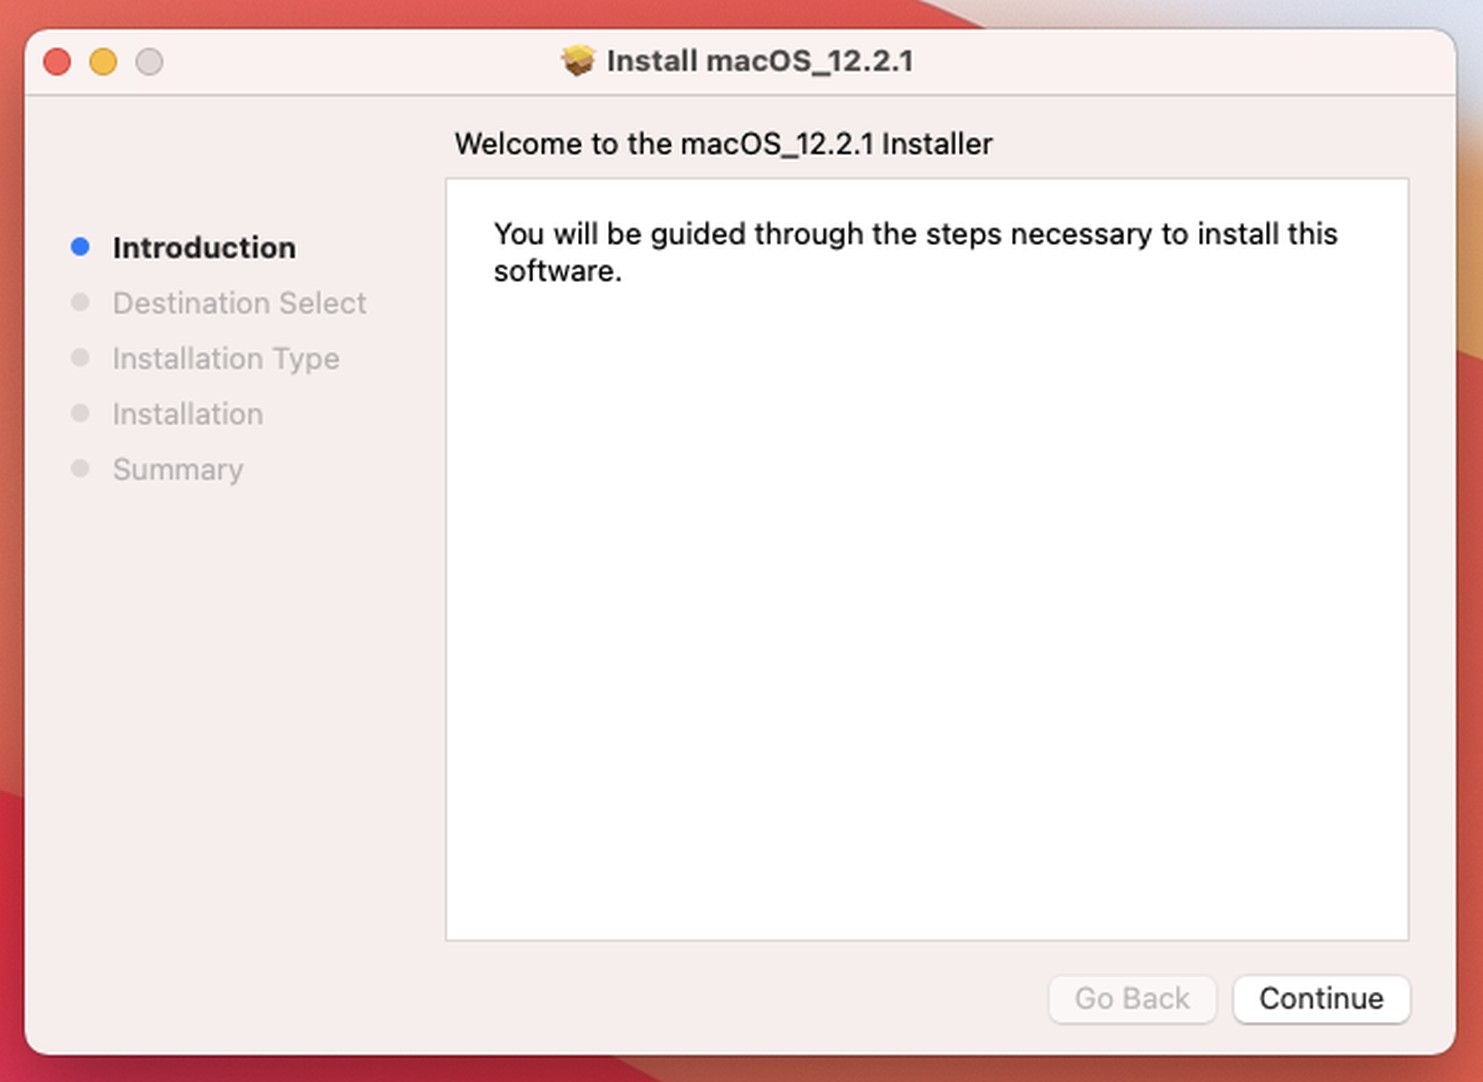
Step 2Click Continue button to start the installation. |
 |
|
|
|
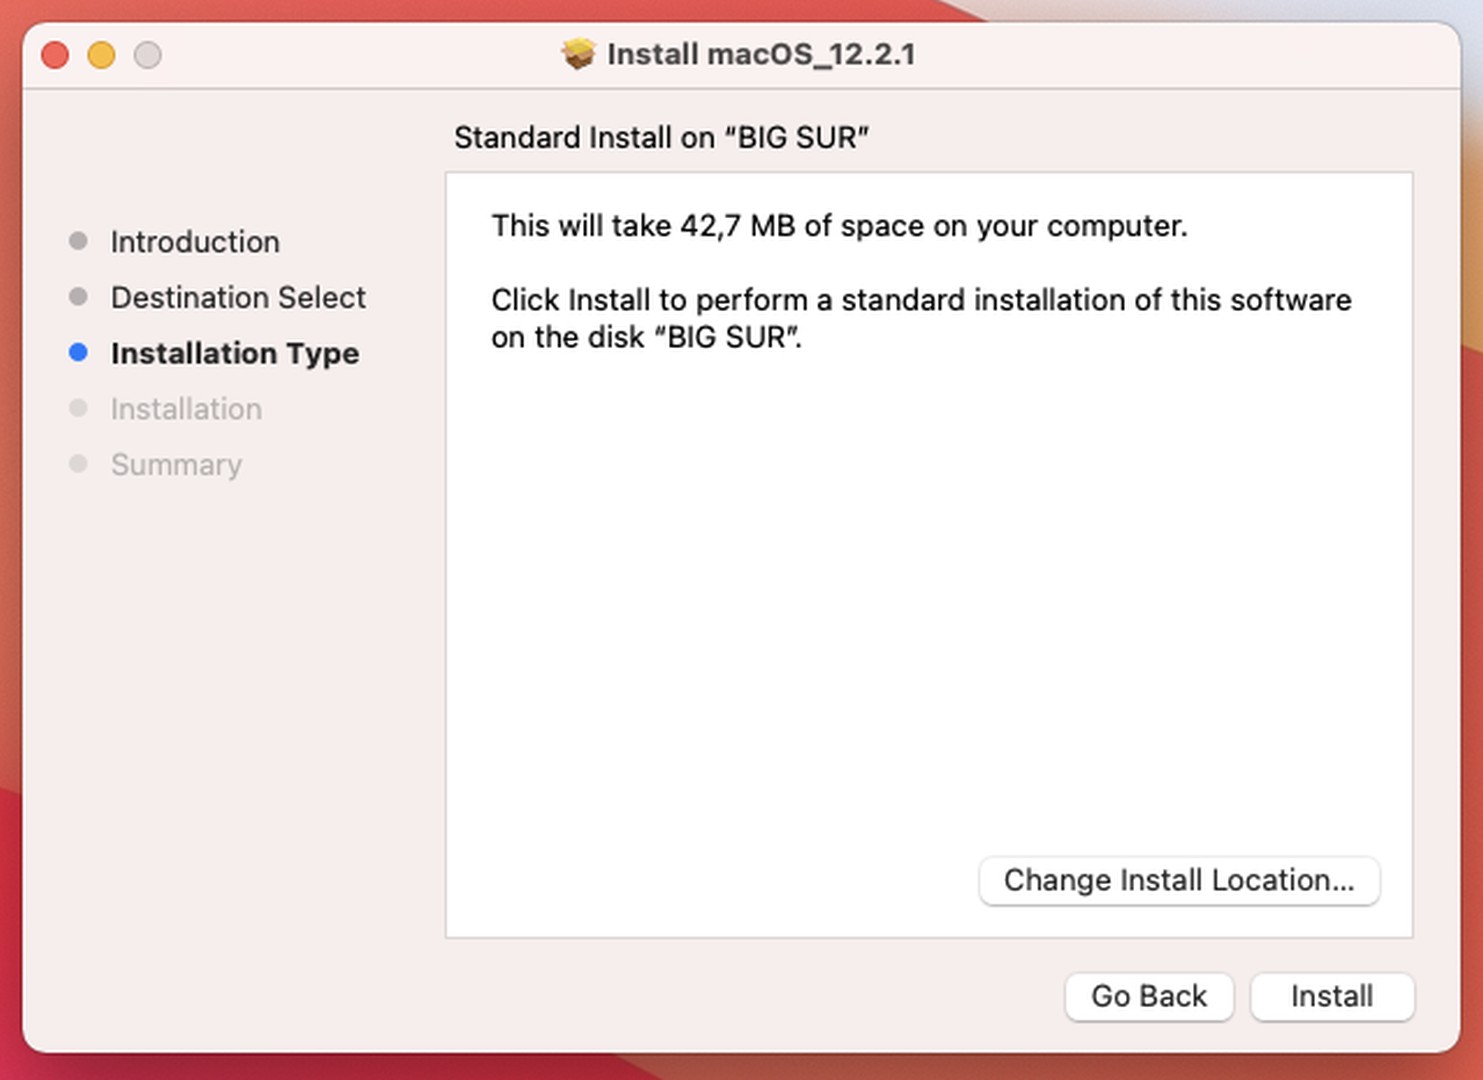
Step 3Click Install button. |
 |
|
|
|
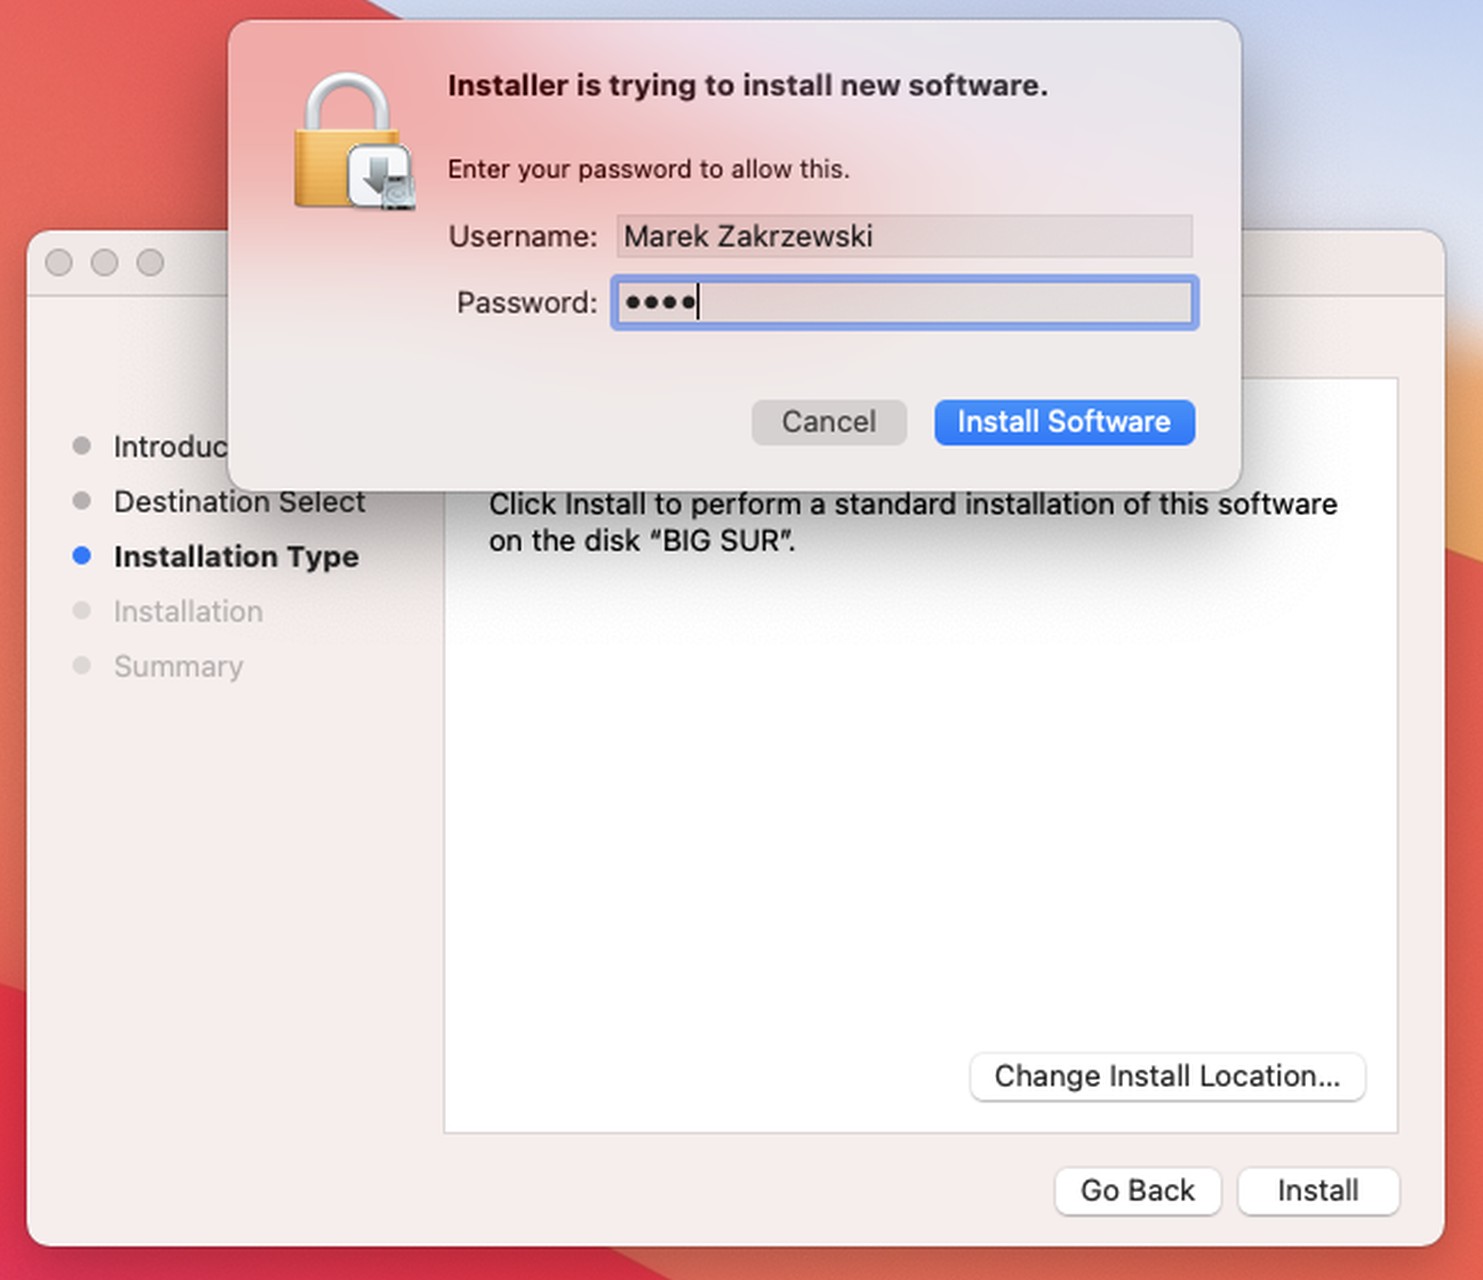
Step 4Enter your username password and click Install Software button. |
 |
|
|
|
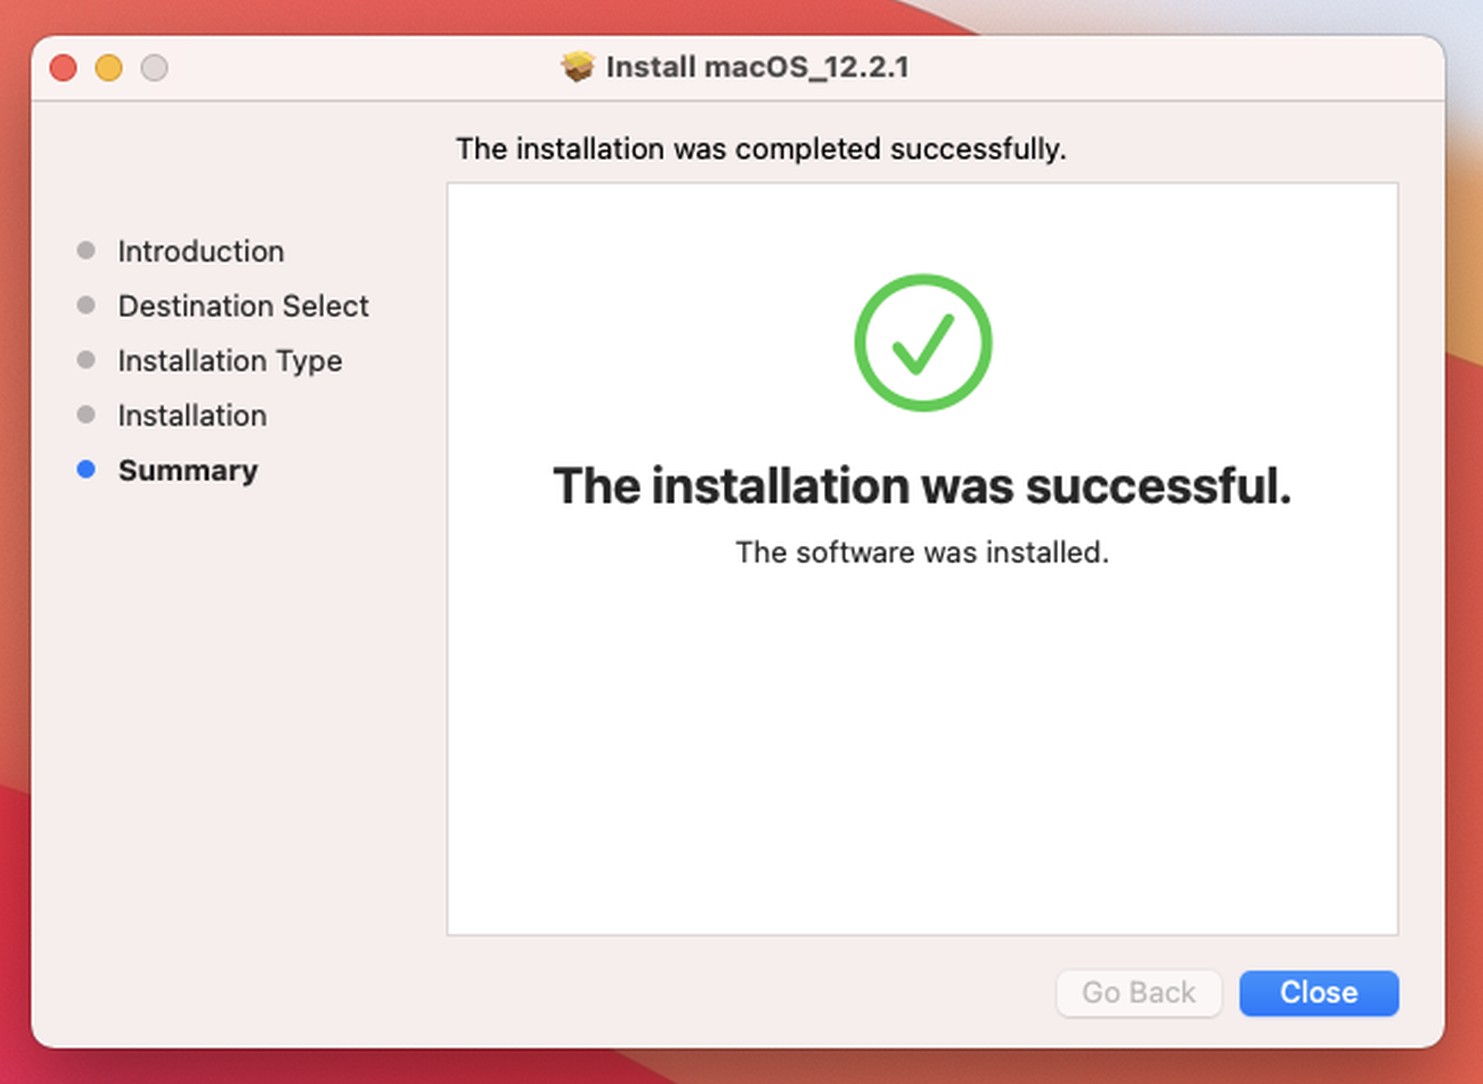
Step 5Click Close button to finish the installation. |
 |
|
|
|
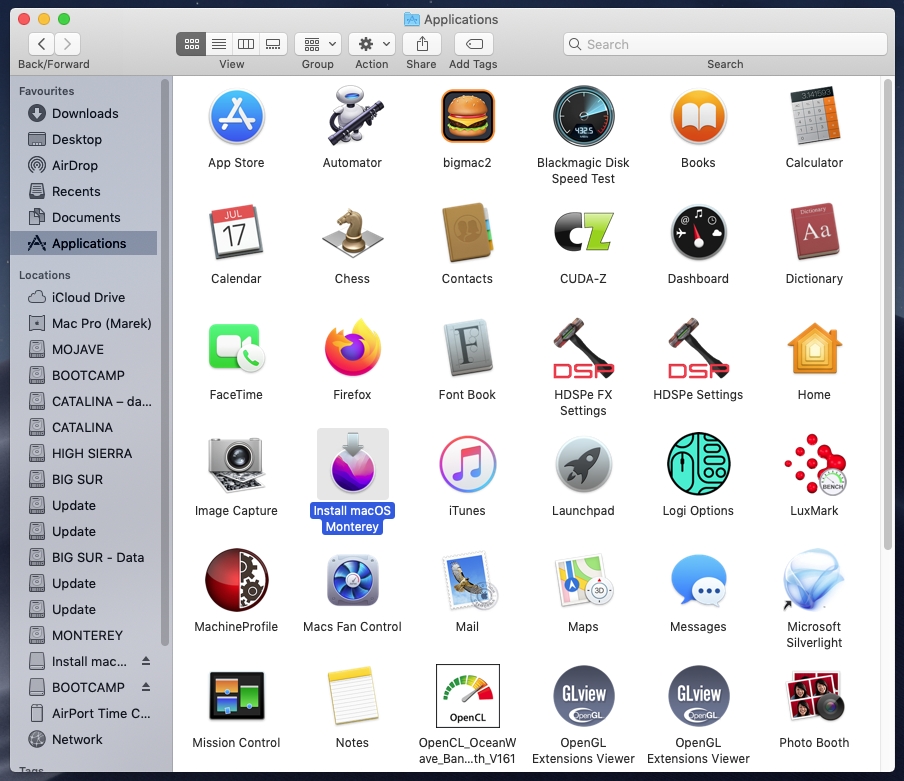
Step 6As a result you will get Install macOS Monterey icon inside Applications folder. |
 |
|
|
|
Step 7Now it's time to create bootable USB flash drive installer, but first we need to properly format it.
Insert the first USB flash drive to any USB port. It must be at least 16 GB in size.
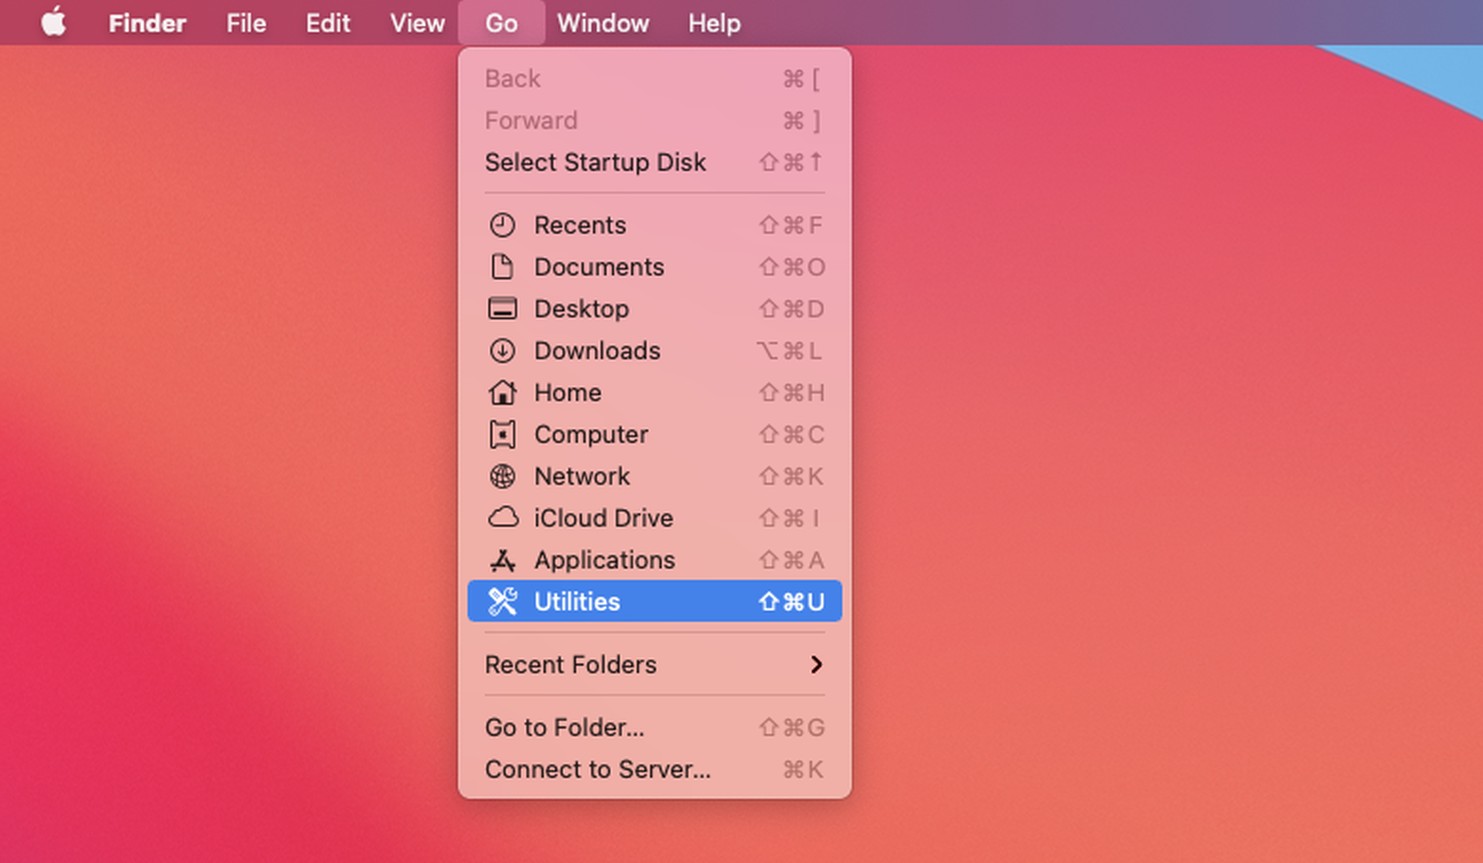
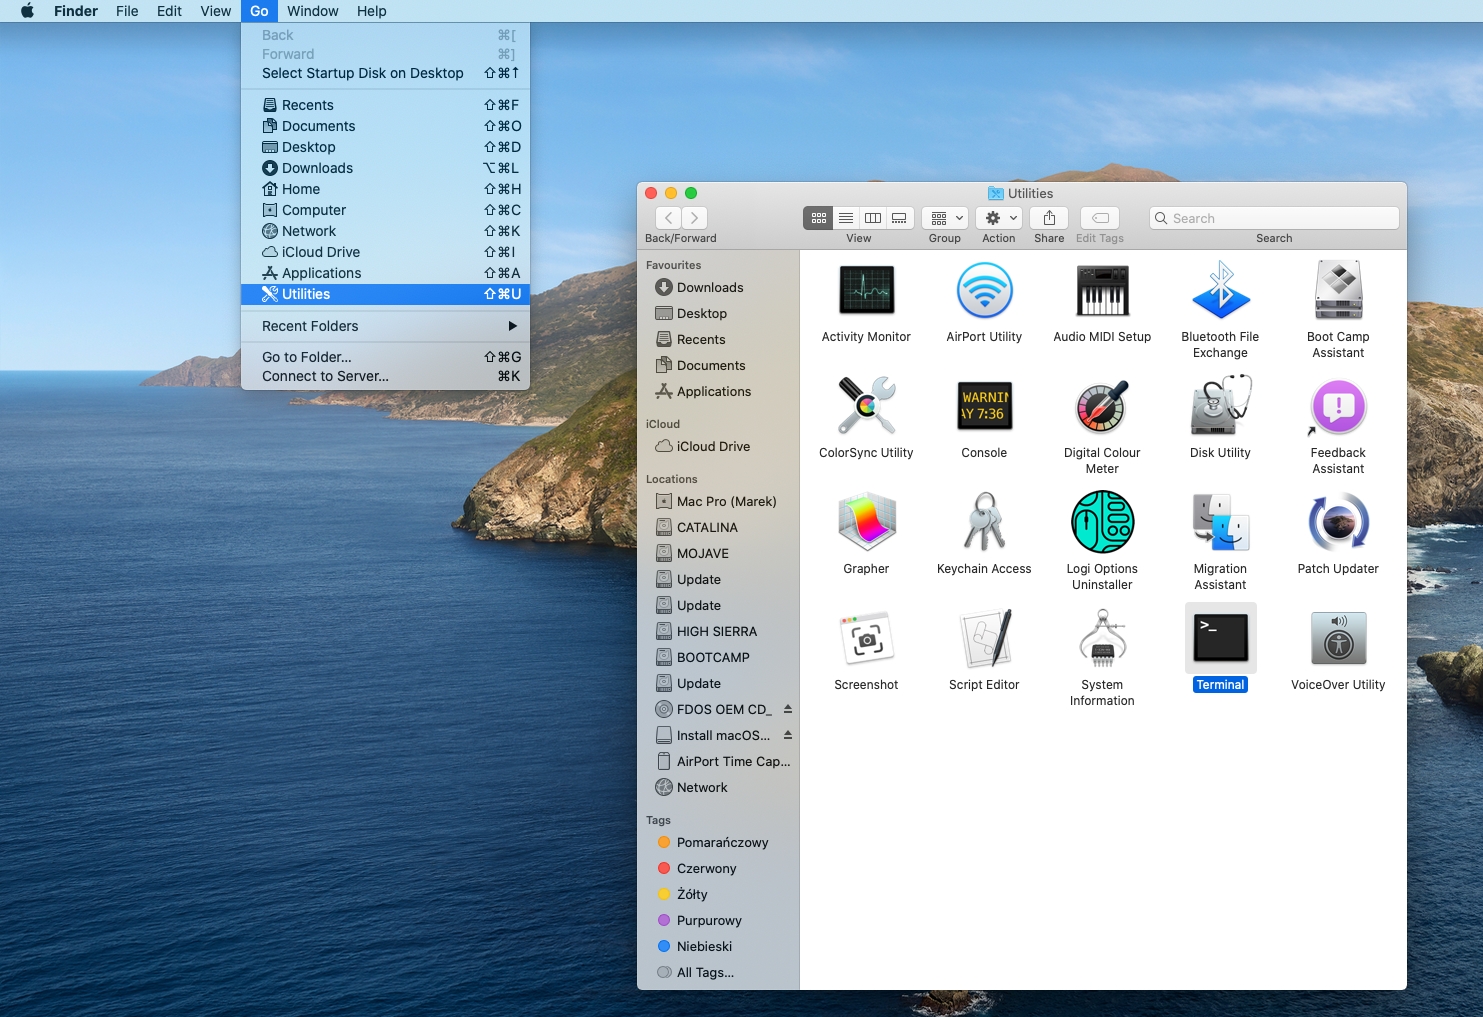
In Finder choose Go, then Utilities. |
 |
|
|
|
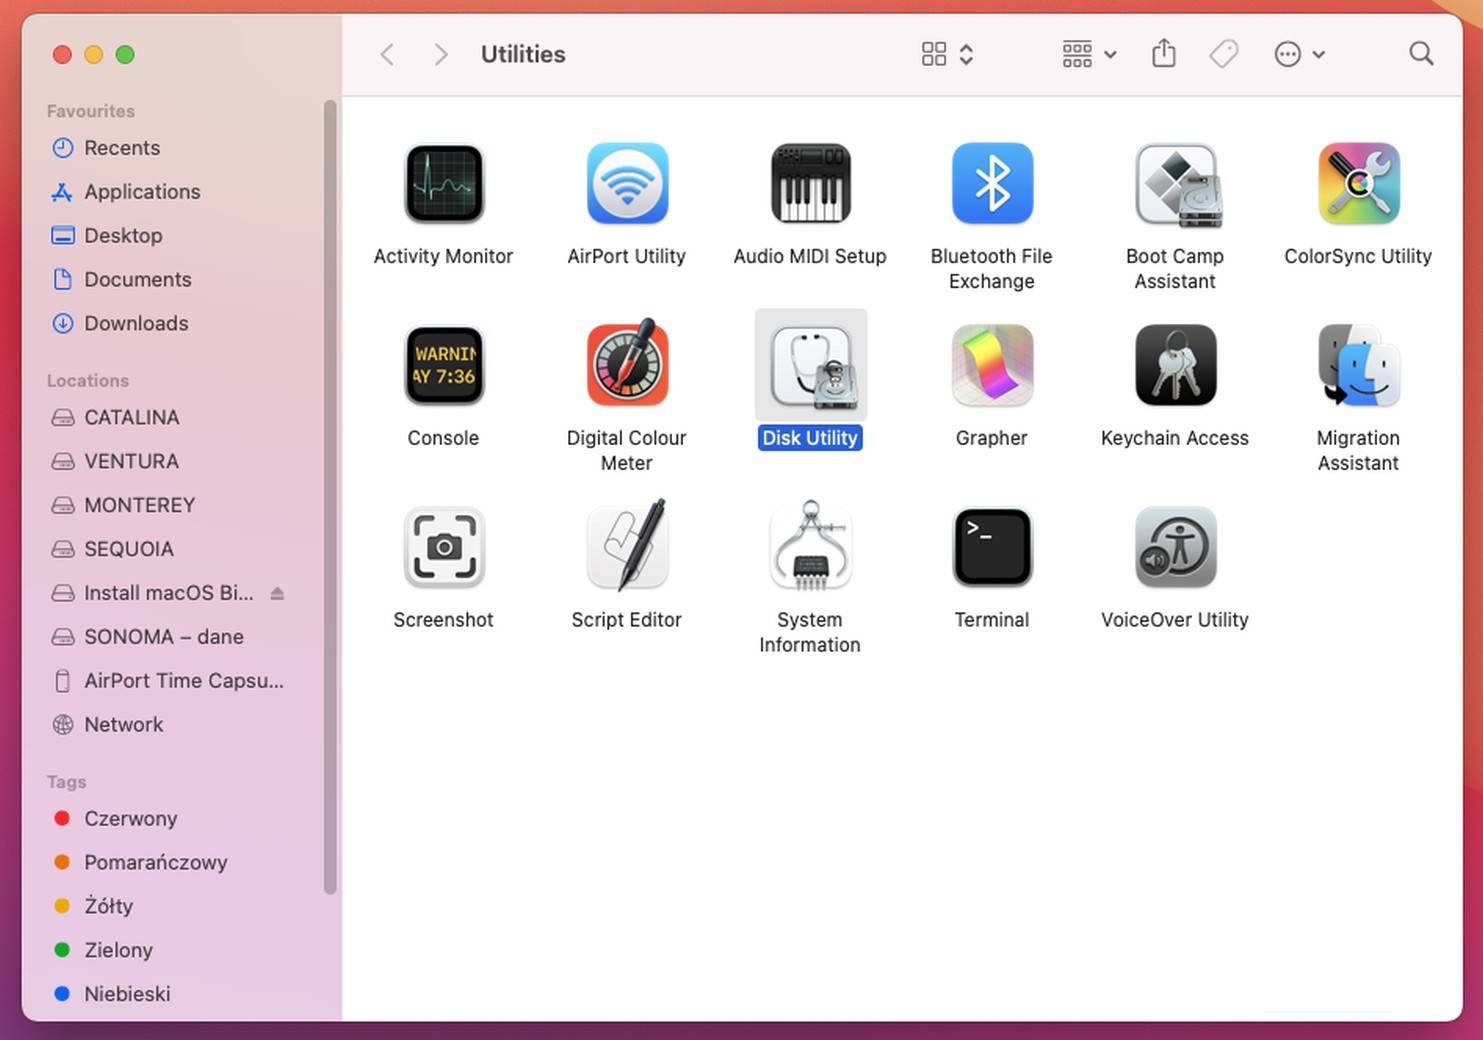
Step 8Double click Disk Utility icon to launch it. |
 |
|
|
|
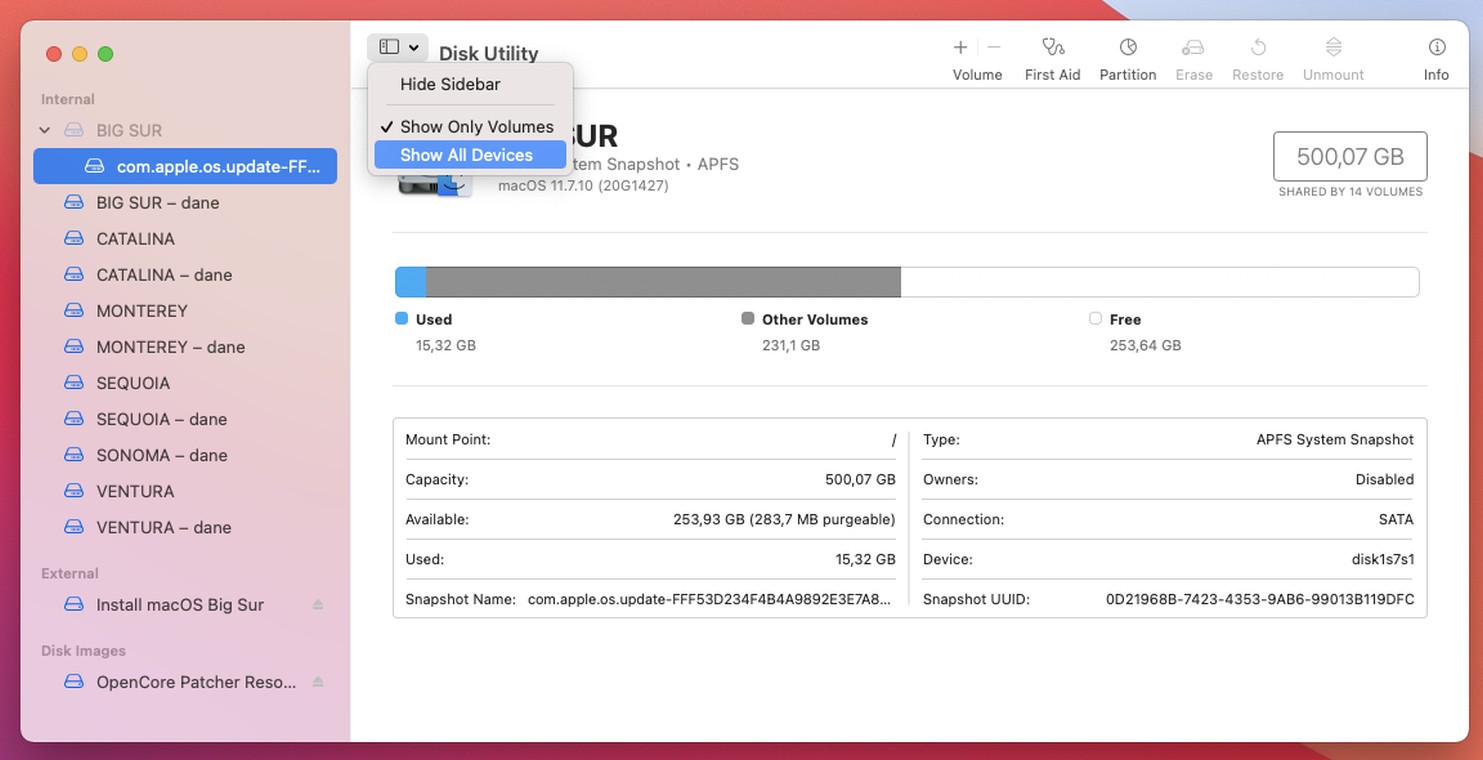
Step 9Click the button above View and choose Show All Devices from the list. |
 |
|
|
|
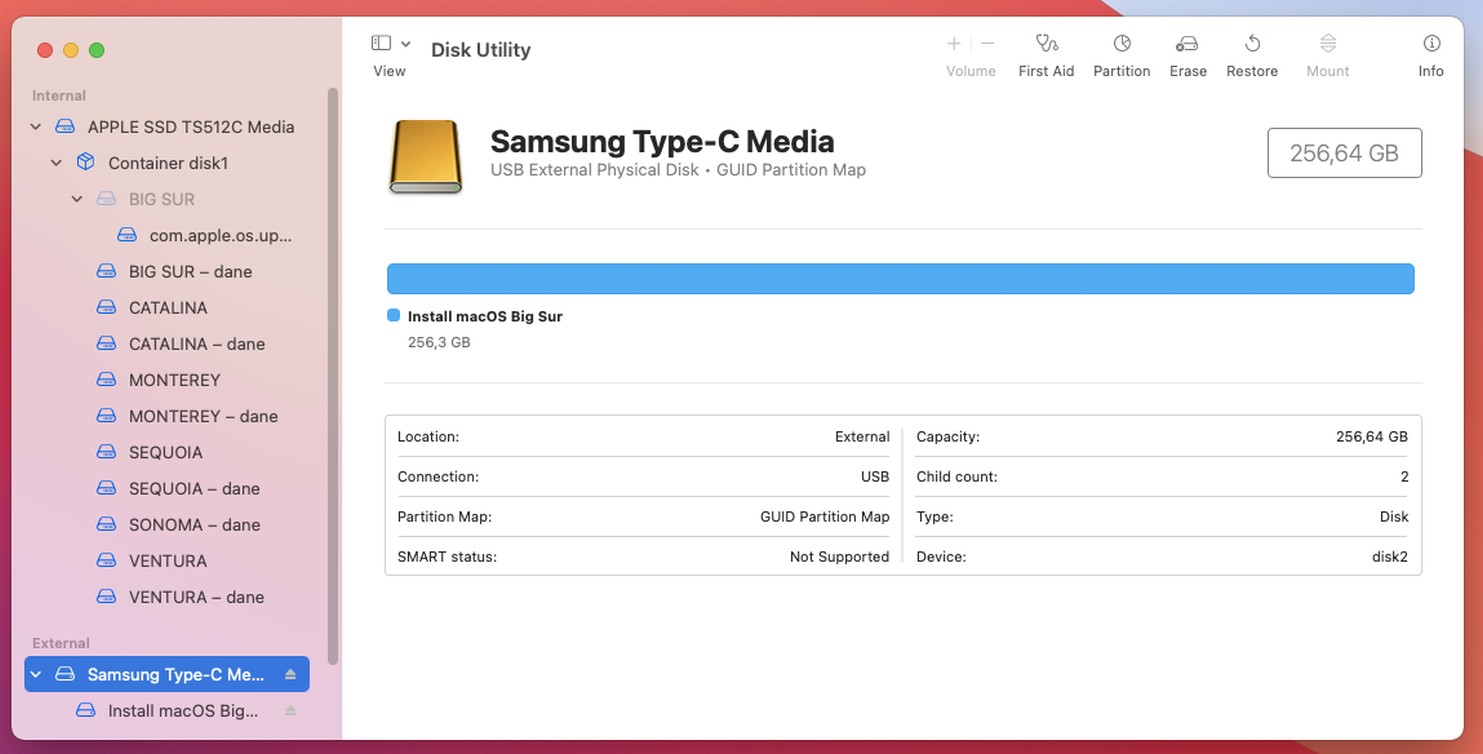
Step 10Select your USB flash drive from the left menu and click Erase button. |
 |
|
|
|
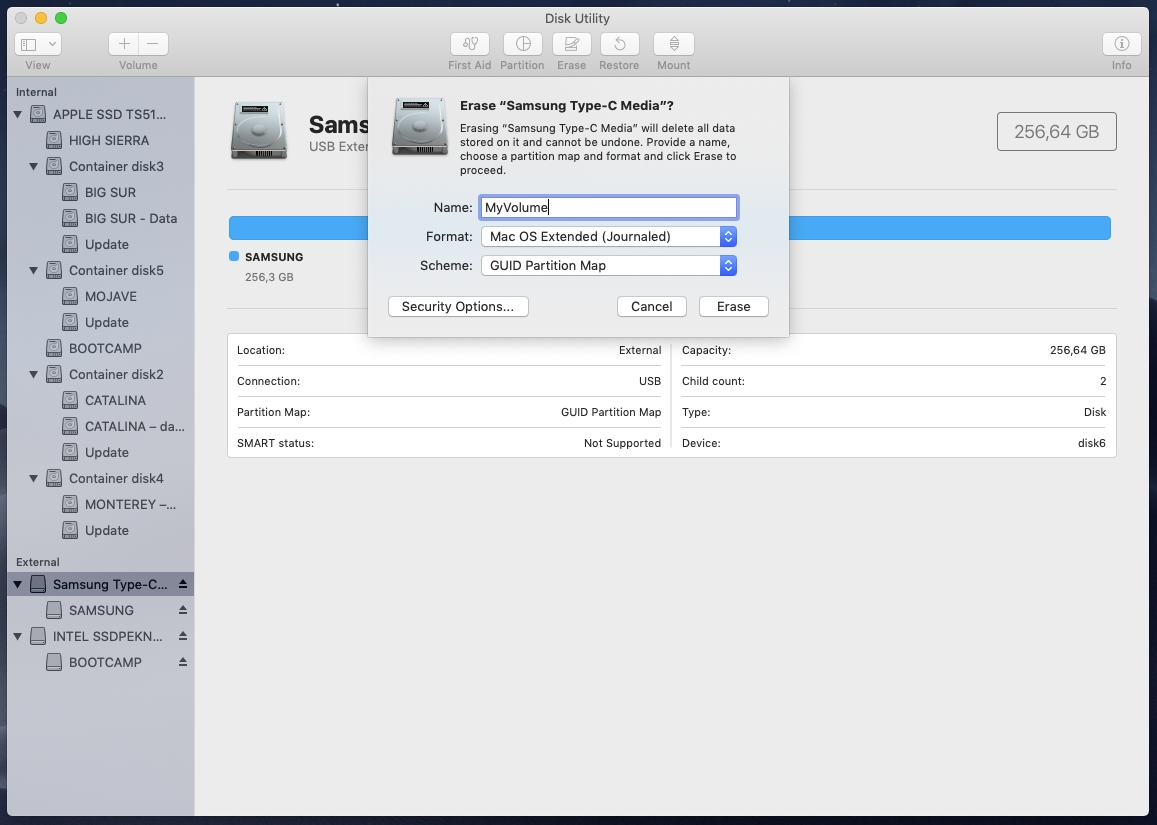
Step 11Type MyVolume in name field and select Mac OS Extended (Journaled) as format and GUID Partition Map as scheme. Then click Erase button to erase USB flash drive. |
 |
|
|
|
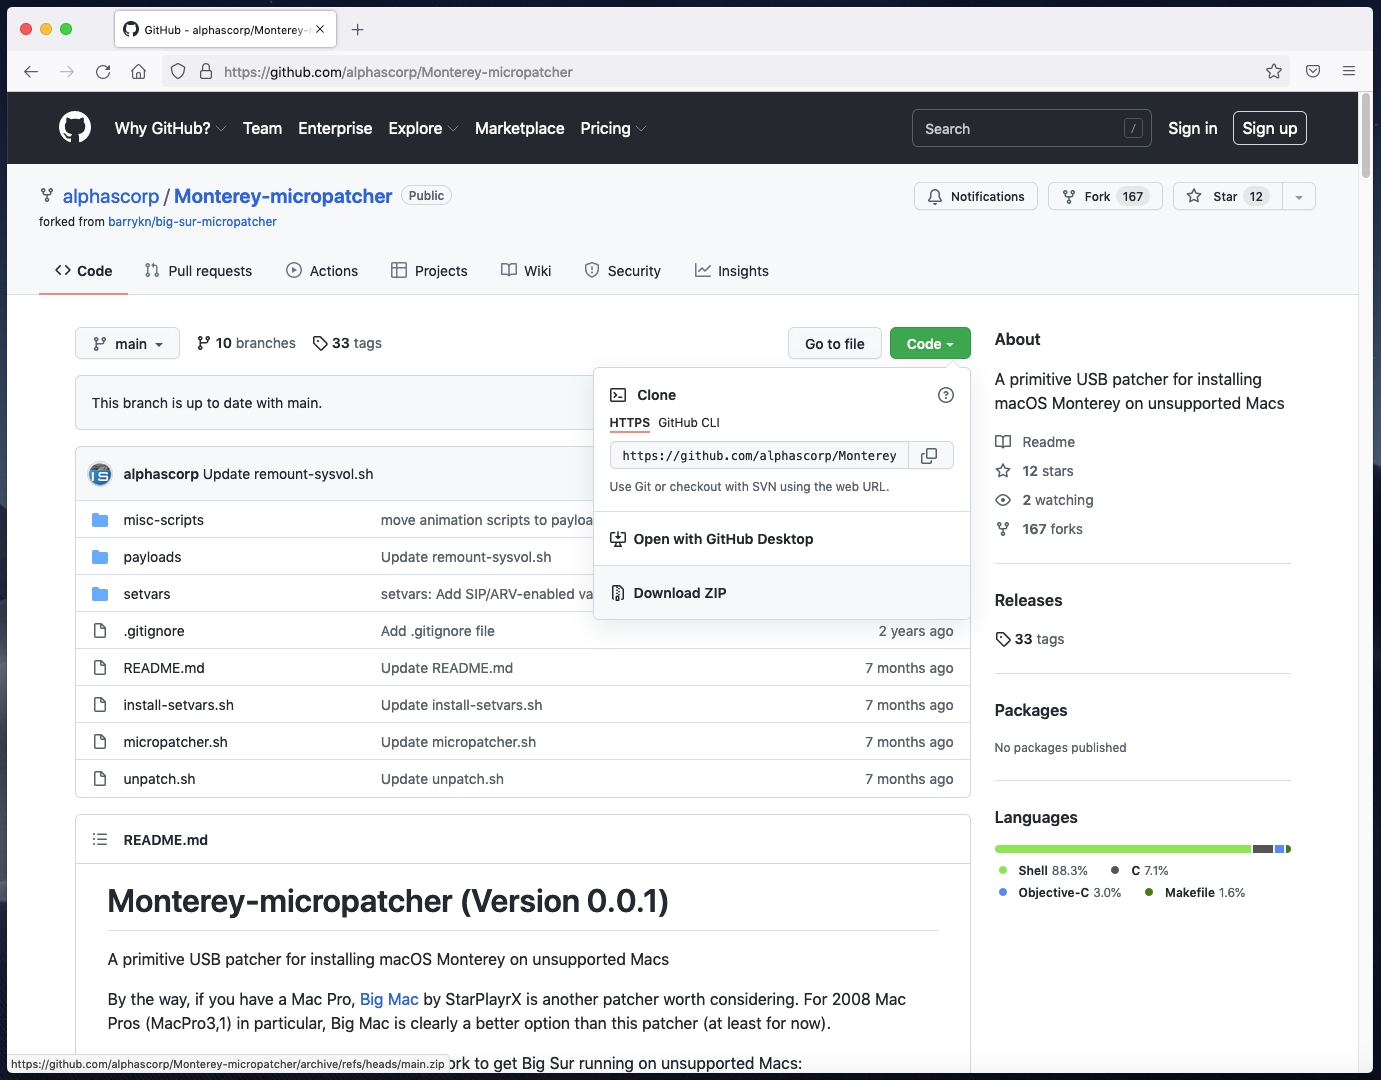
Step 12Visit https://github.com/alphascorp/Monterey-micropatcher and click Code button, then Download ZIP link.
The downloaded file should be automatically unpacked inside Downloads folder. |
 |
|
|
|
Step 13In Finder choose Go, then Utilities and double-click Terminal icon to launch Terminal. |
 |
|
|
|
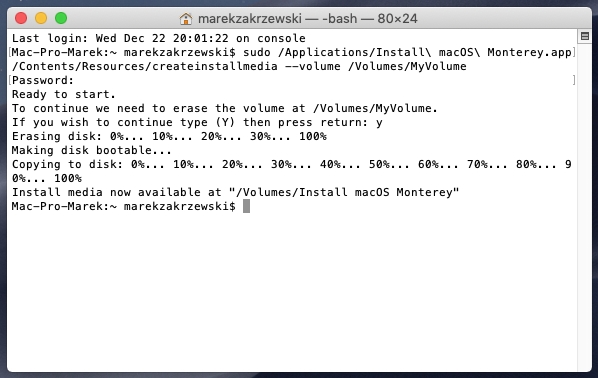
Step 14Create bootable macOS Monterey installer by typing a following command (all in one line), then press ENTER:
sudo /Applications/Install\ macOS\ Monterey.app/Contents/Resources/createinstallmedia --volume /Volumes/MyVolume
Terminal will ask for password. Type your user password and press ENTER (password won't be shown not even under asterisk).
Press Y key to confirm USB flash drive erase.
Creating bootable USB installer will take about 15-50 minutes depending on USB flash drive write speed. |
 |
|
|
|
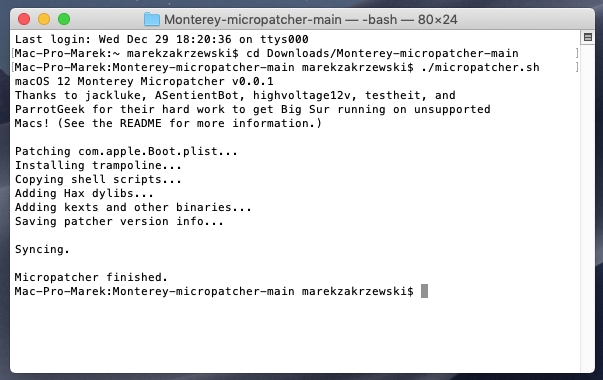
Step 15As soon creating bootable USB installer is finished, type another commands in Terminal to patch it and press ENTER after each of these (every command in one line):
cd Downloads/Monterey-micropatcher-main
./micropatcher.sh |
 |
|
|
|
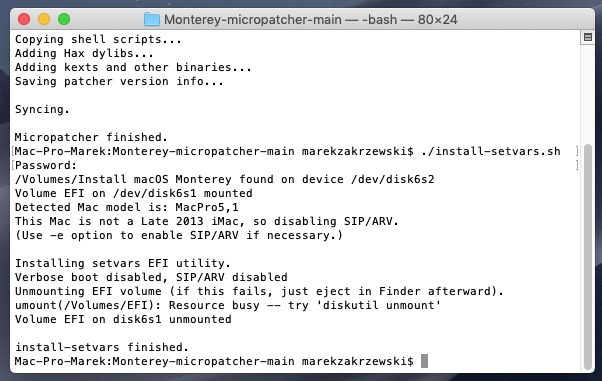
Step 16Finally enter such command and press ENTER (all in one line):
./install-setvars.sh
Terminal will ask for user password (it won't be shown not even under asterisk).
Your first USB flash drive is now patched.
You can now safely remove it from the computer, but it will be needed later. |
 |
|
|
|
Step 17Insert second USB flash drive and redo step 7, 8, 9, 10, 11, 13 and 14 to create another bootable Monterey USB flash drive.
Now we need OpenCore Legacy Patcher in version 0.3.3 just to be able to install macOS Monterey. OpenCore is only used for the installation and it's not needed anymore after it.
Download OpenCore Legacy Patcher in version 0.3.3 https://github.com/dortania/OpenCore-Legacy-Patcher/releases/download/0.3.3/OpenCore-Patcher-GUI.app.zip file (please don't use newer OpenCore Legacy Patcher versions or it won't work properly).
The downloaded file should be automatically unpacked inside Downloads folder.
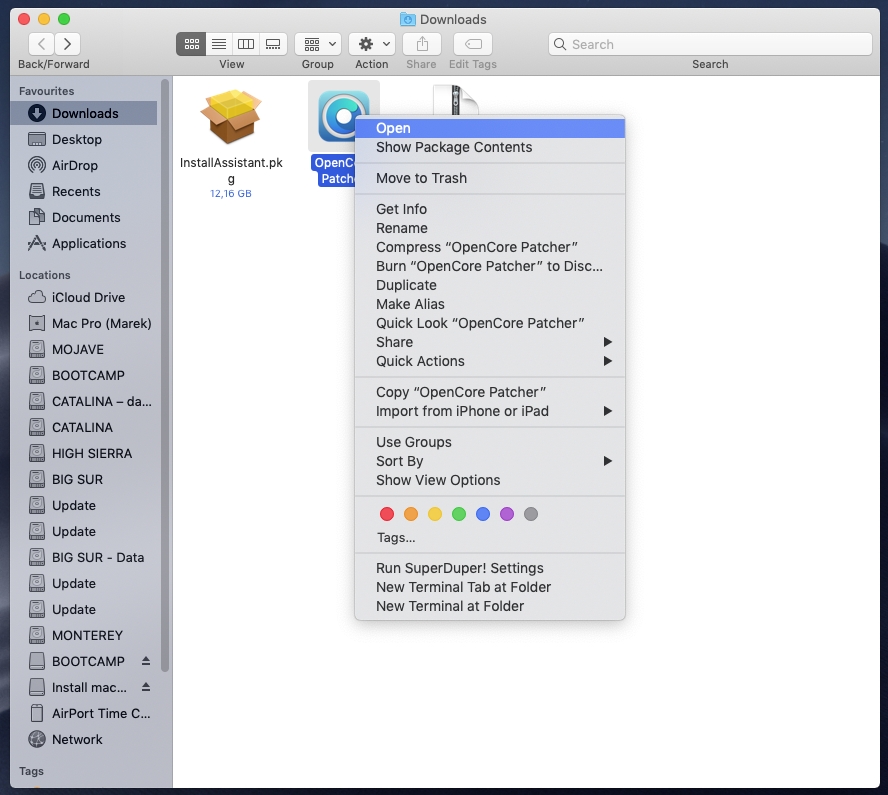
Click OpenCore Patcher file to run it. |
 |
|
|
|
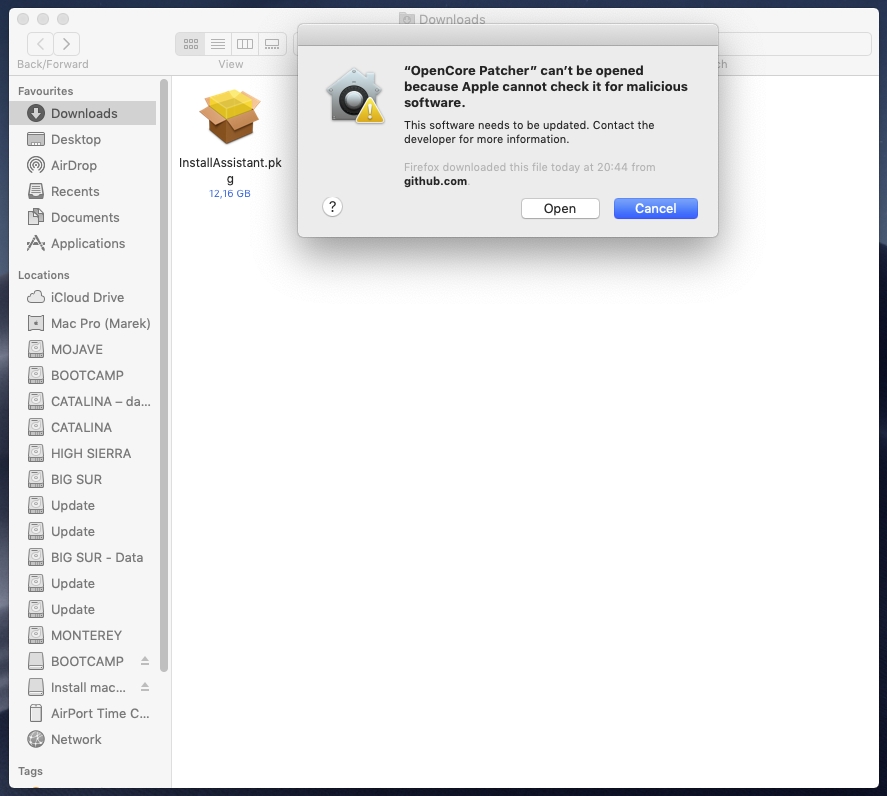
Step 18Click Open button. |
 |
|
|
|
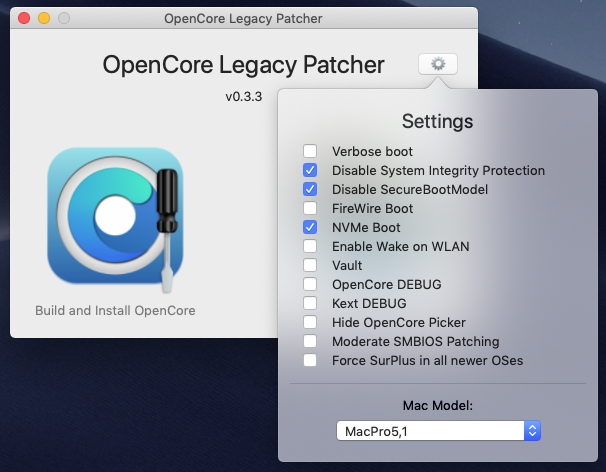
Step 19Upon launching OpenCore Legacy Patcher, click Settings icon and check Disable System Integrity Protection, Disable SecureBootModel and NVMe boot checkboxes. |
 |
|
|
|
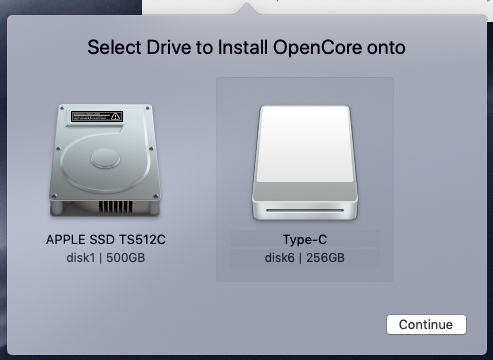
Step 20Click Build and Install OpenCore icon, then select your USB flash drive and click Continue button. |
 |
|
|
|
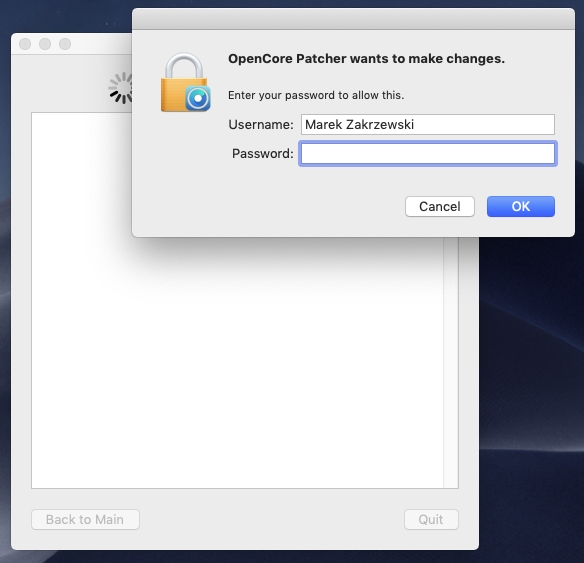
Step 21Enter your username password and click OK button to start patching. |
 |
|
|
|
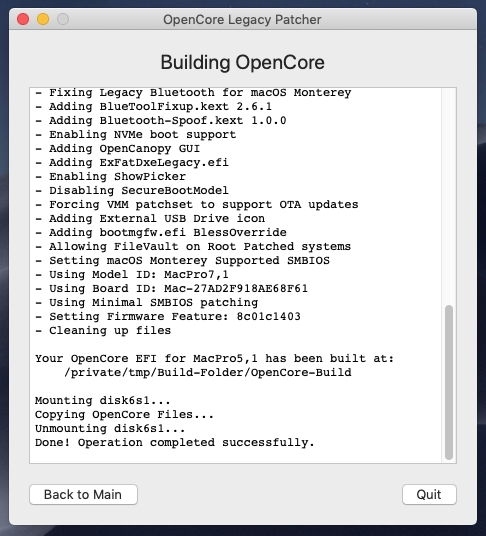
Step 22Finally click Quit button. |
 |
|
|
|
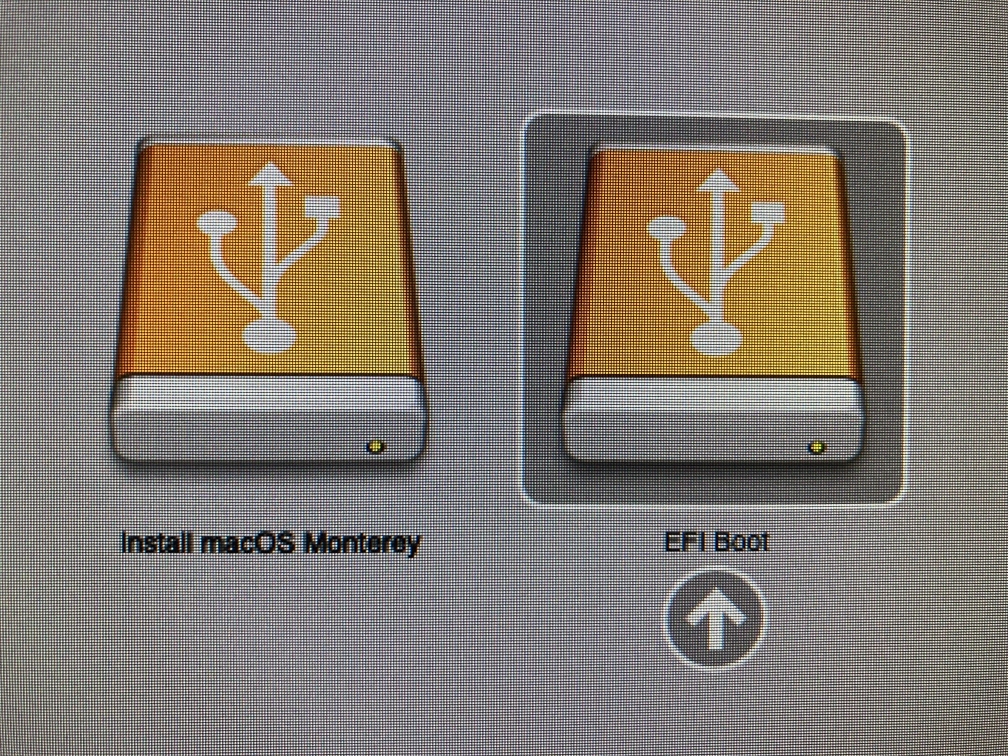
Step 23Restart your computer.
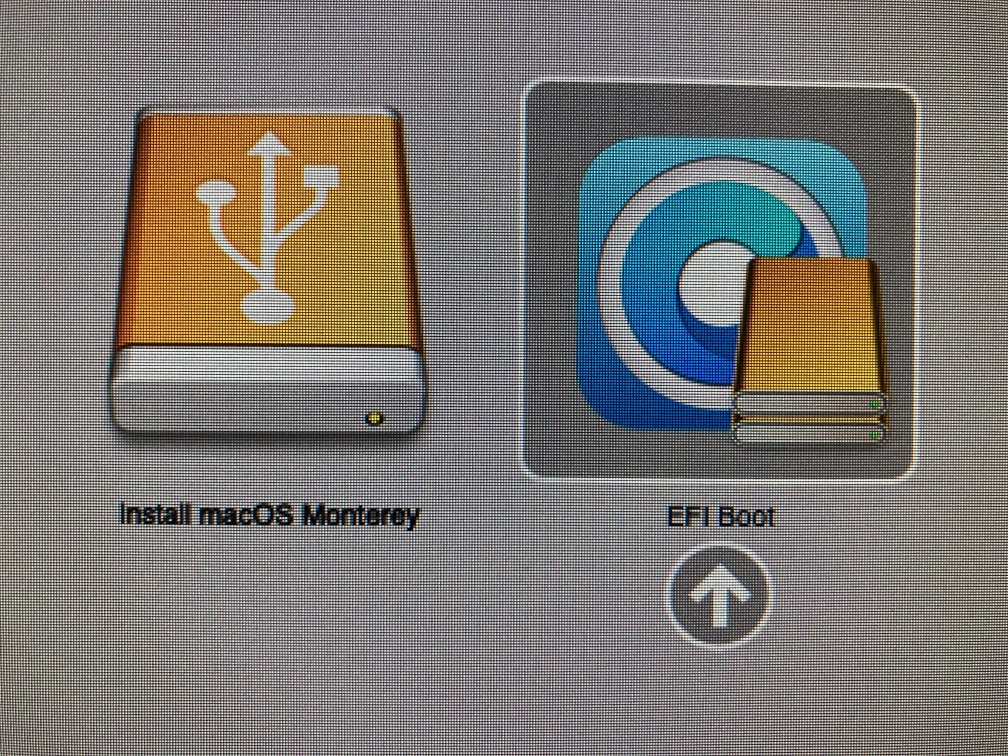
Press and hold Option key (on Mac keyboard) or ALT key (on Windows keyboard) and click an arrow under EFI boot icon.
Computer will launch OpenCore boot picker (on black background).
Make sure the USB flash drive is inserted into Mac Pro built-in USB hub (front or rear). Extra USB PCIe cards won't show a bootable flash drive. |
 |
|
|
|
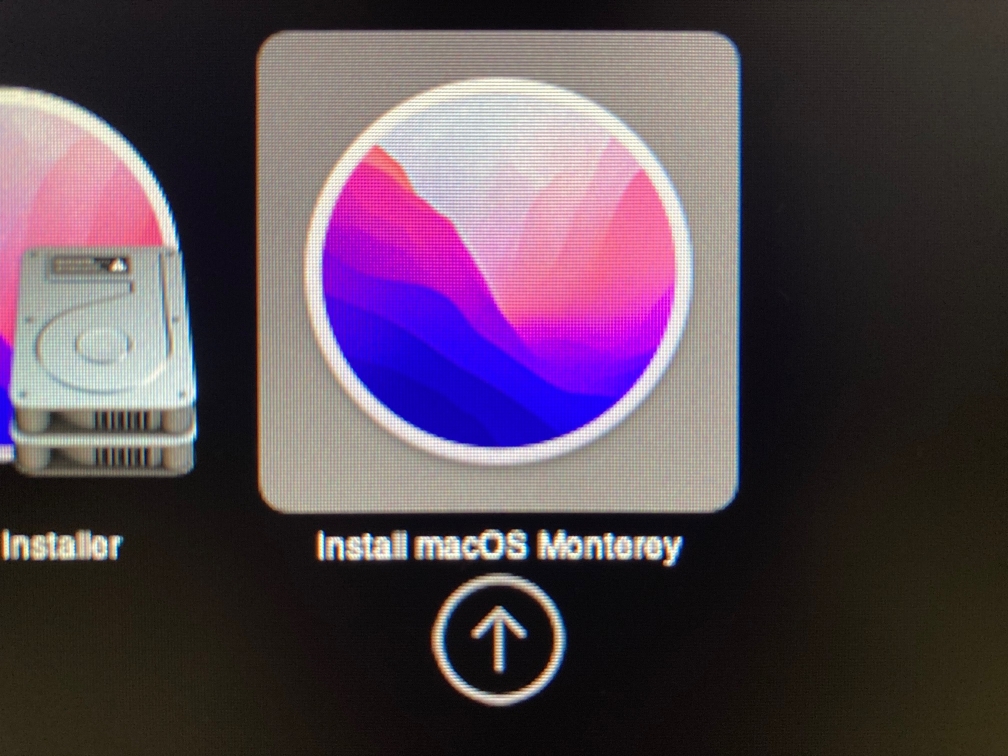
Step 24This time click an arrow under Install macOS Monterey to start macOS Monterey installer. |
 |
|
|
|
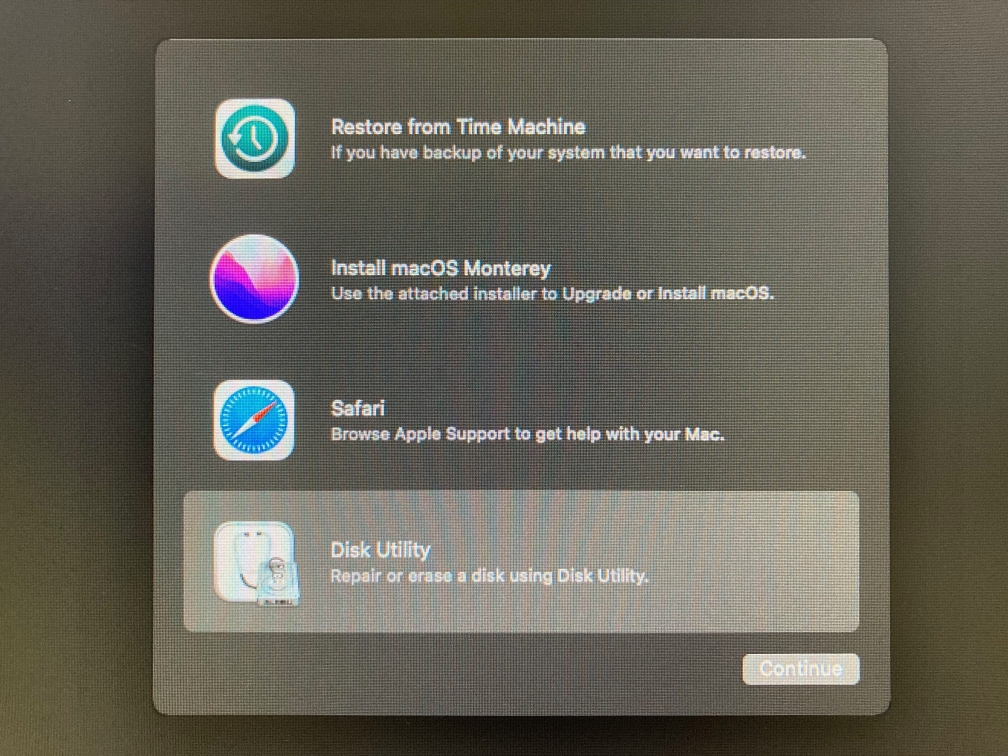
Step 25If you haven't created blank APFS partition needed for macOS Monterey yet, you can create one now by choosing Disk Utility. If you already have one, please skip to step 30. |
 |
|
|
|
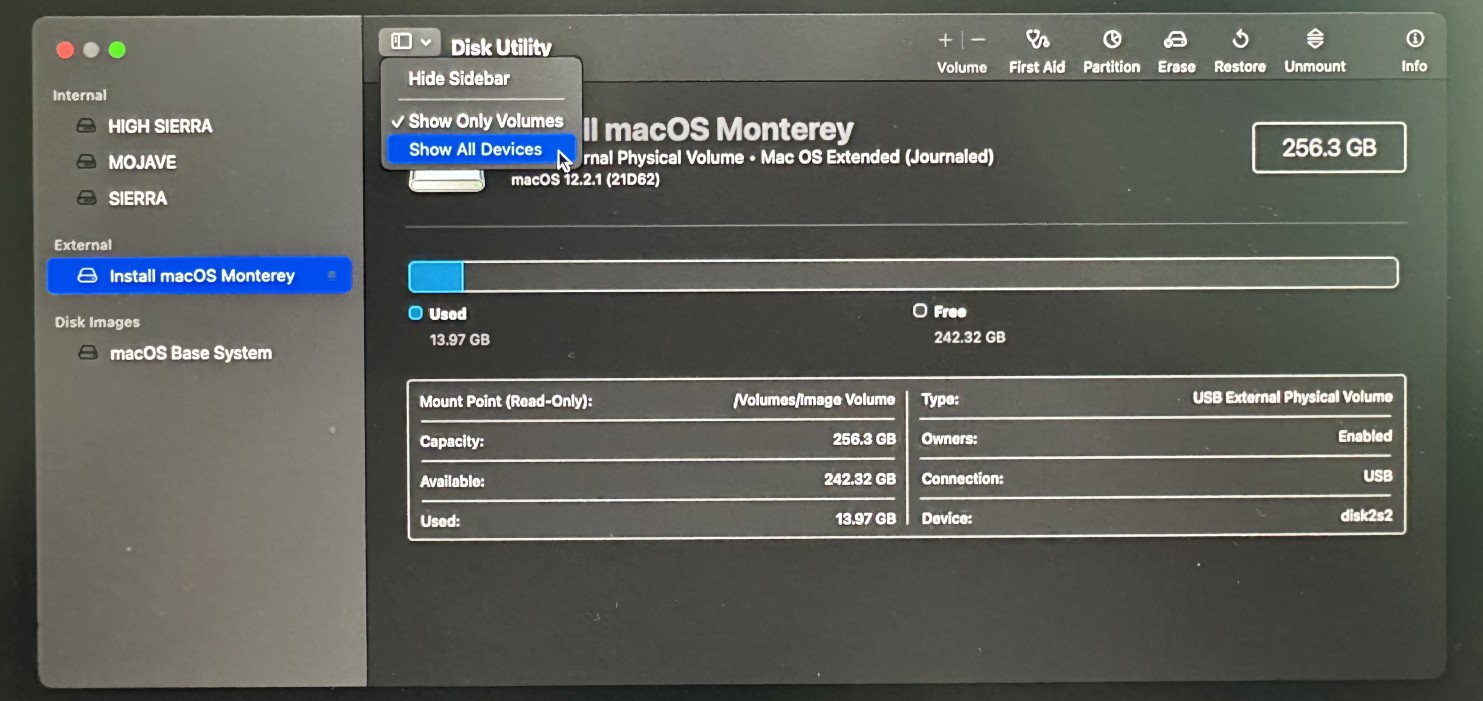
Step 26Click the button above View and choose Show All Devices from the list. |
 |
|
|
|
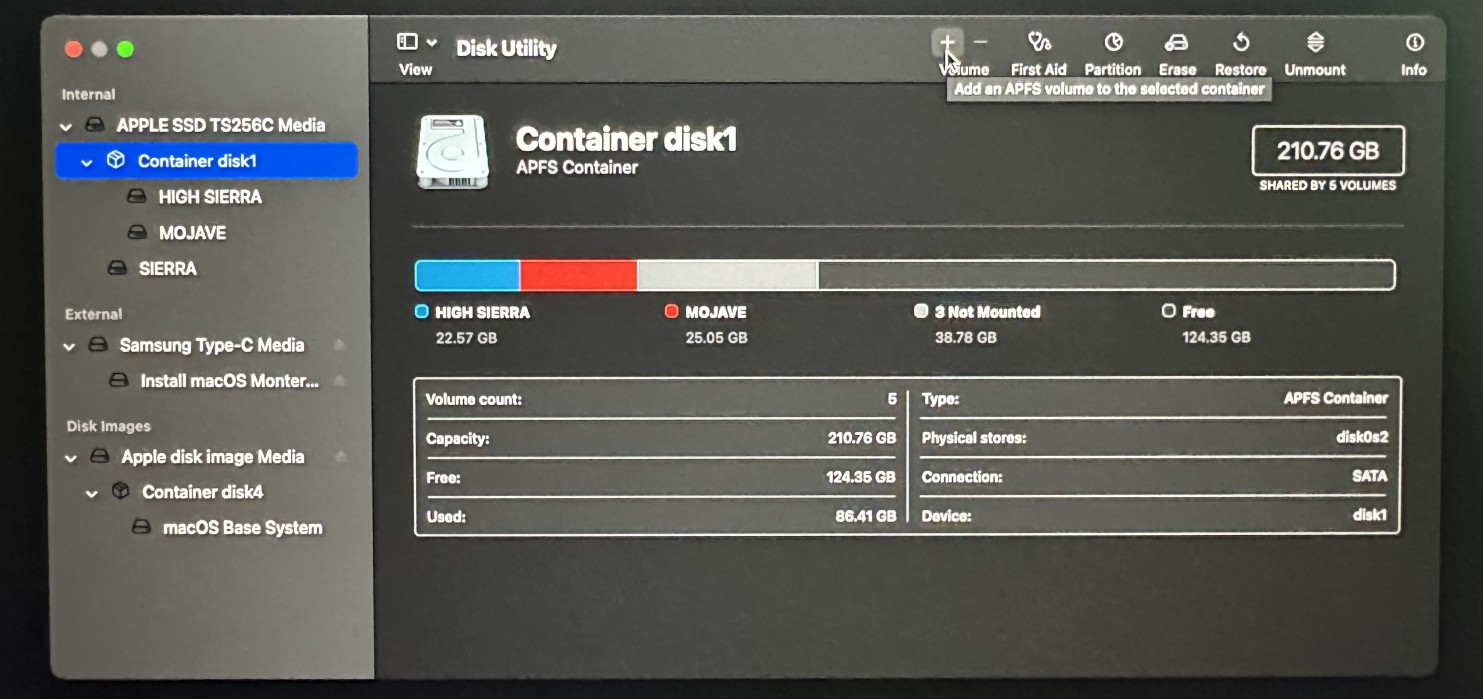
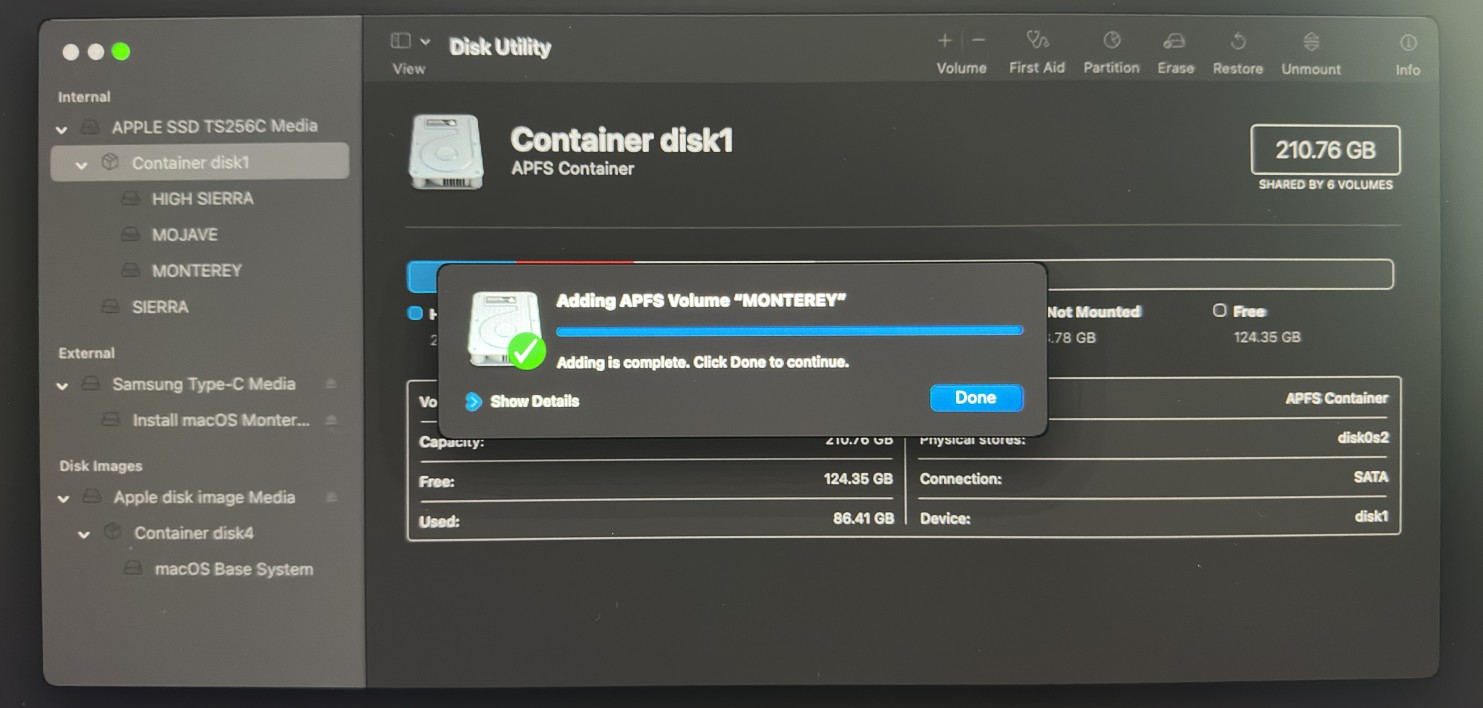
Step 27Click one of the existing APFS containers e.g. Container disk 1, then click + button above Volume buttons to add new APFS Volume to existing container.
If you are installing macOS Monterey on a blank drive you need to click Partition icon. |
 |
|
|
|
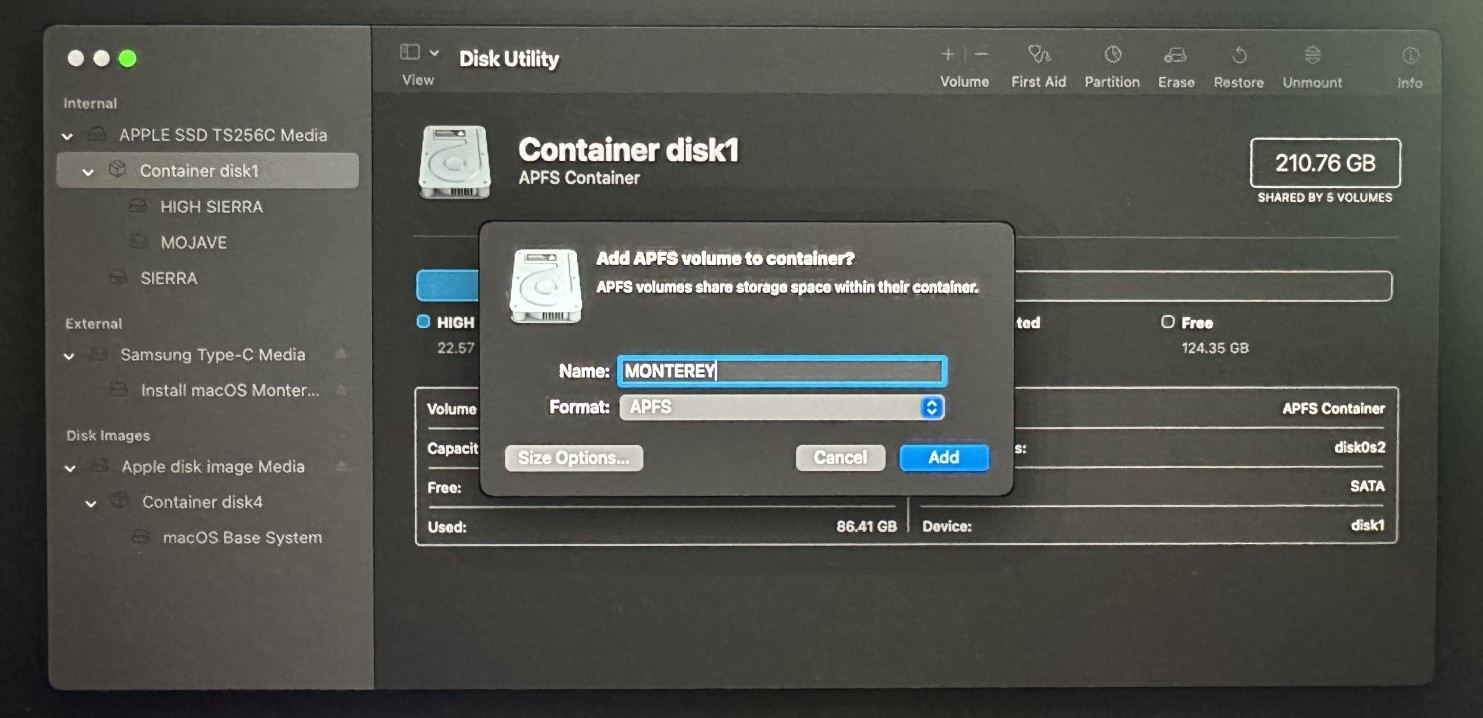
Step 28Type your name e.g. MONTEREY and click Add button to finish. |
 |
|
|
|
Step 29Click Done button to finish creating APFS volume. You can now safely close Disk Utility. |
 |
|
|
|
Step 30Now you can proceed with the installation itself.
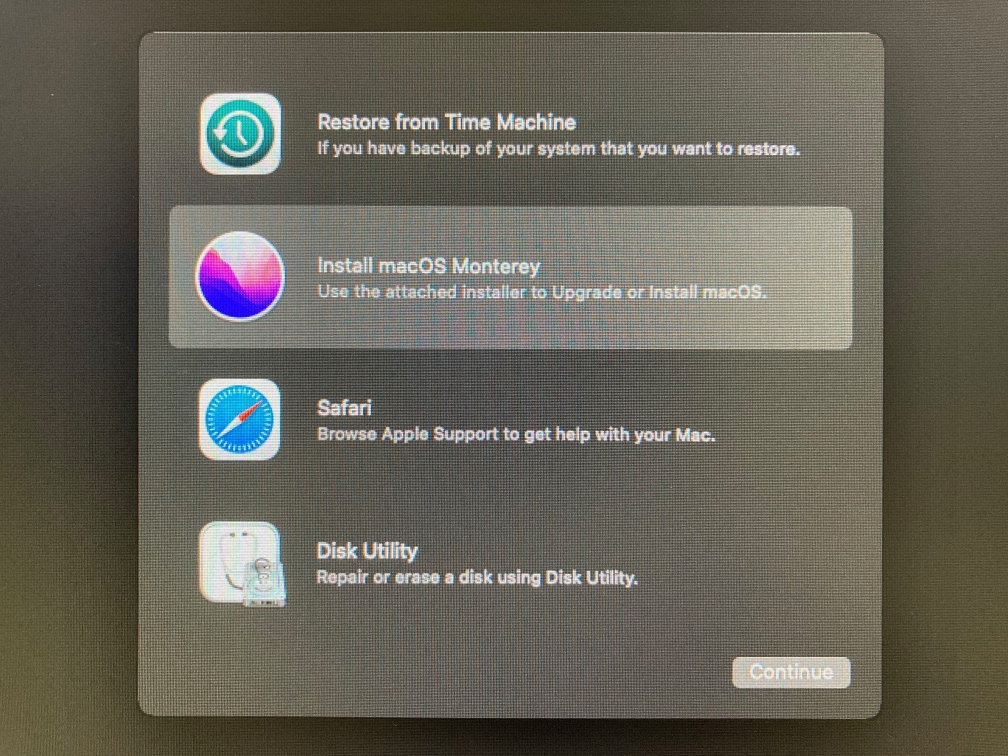
Select Install macOS Monterey from the list and click Continue button to start the installation. |
 |
|
|
|
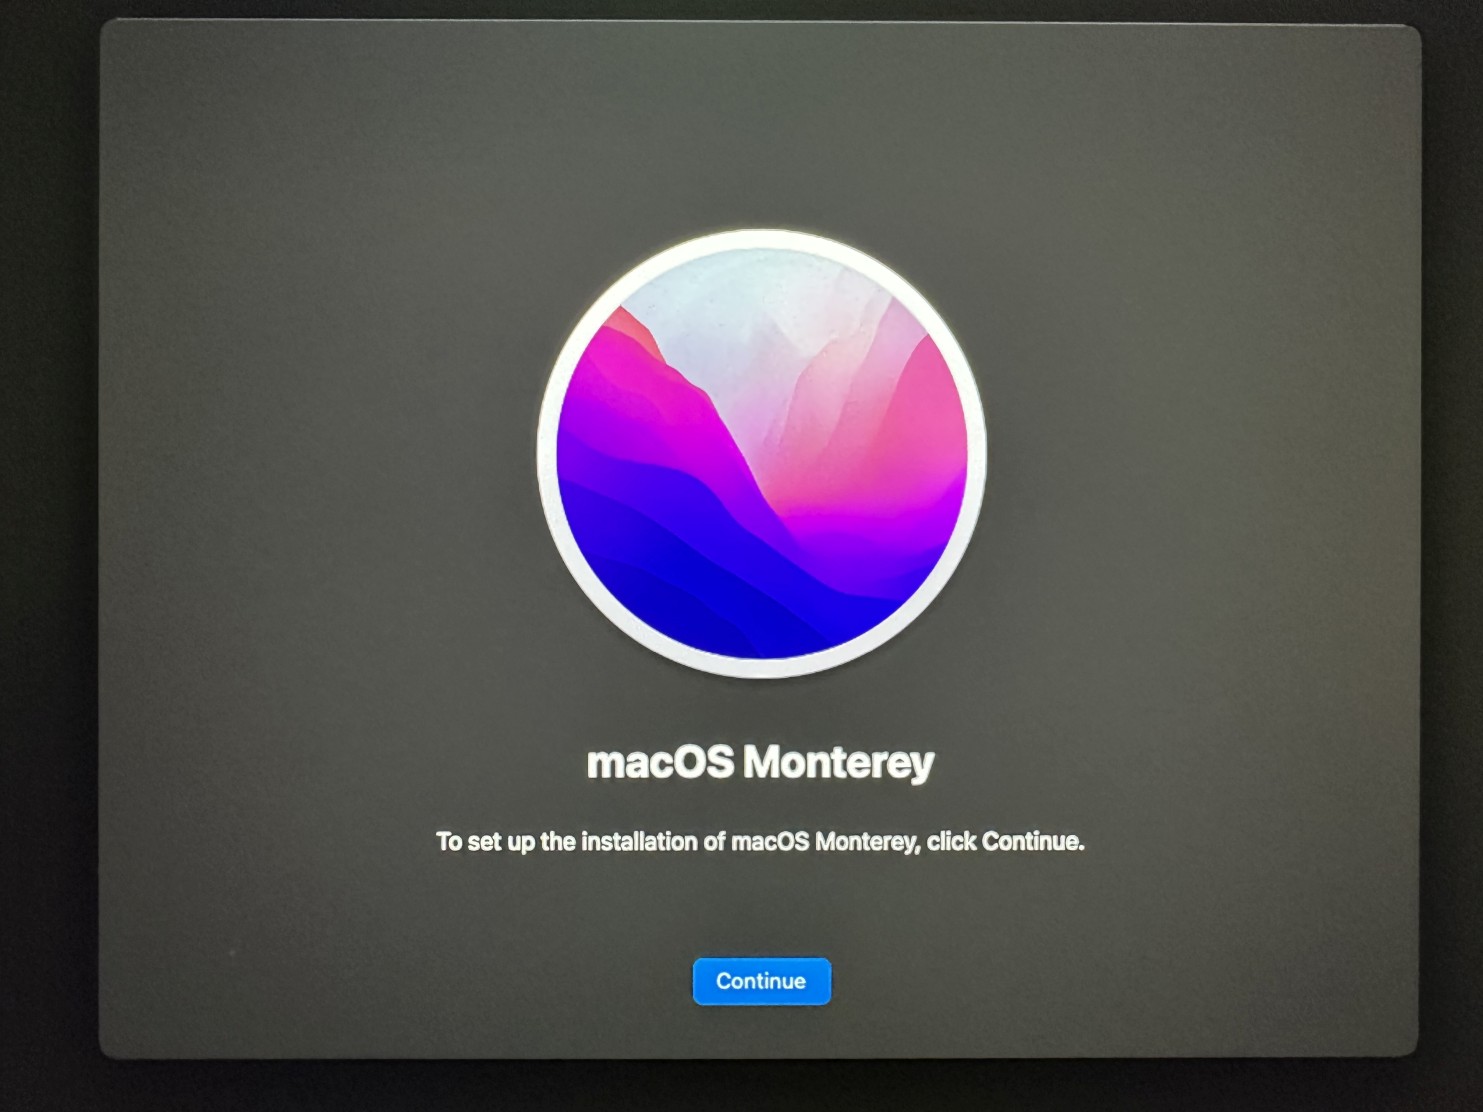
Step 31Click Continue button on installer splash screen. |
 |
|
|
|
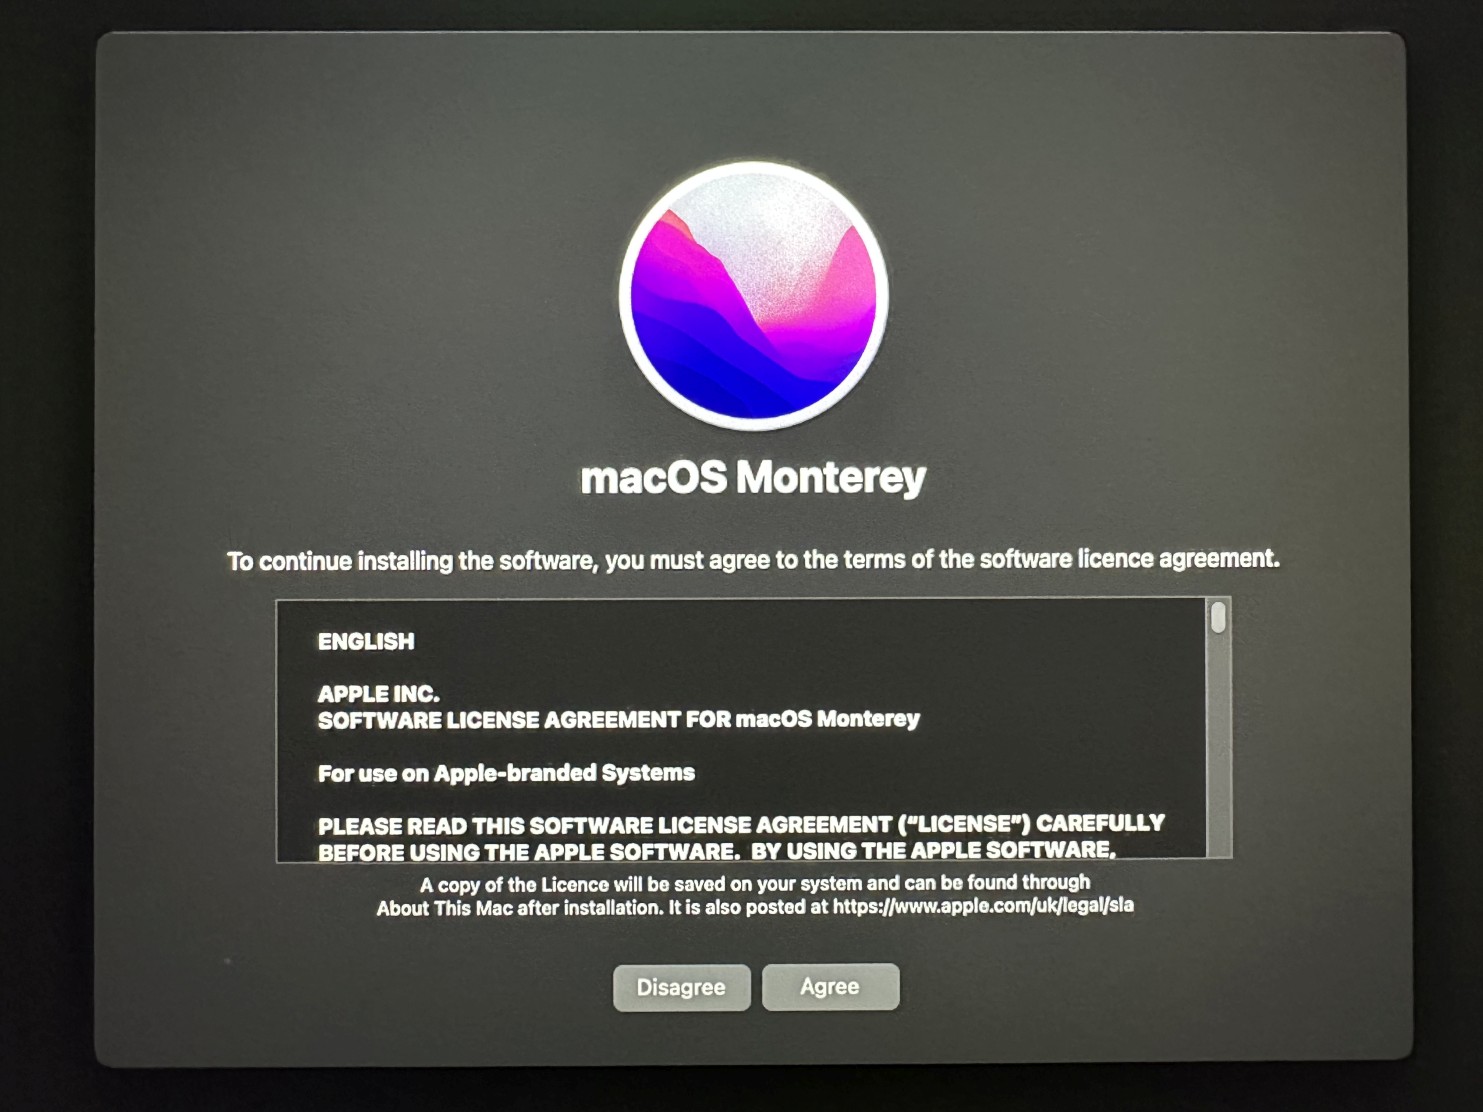
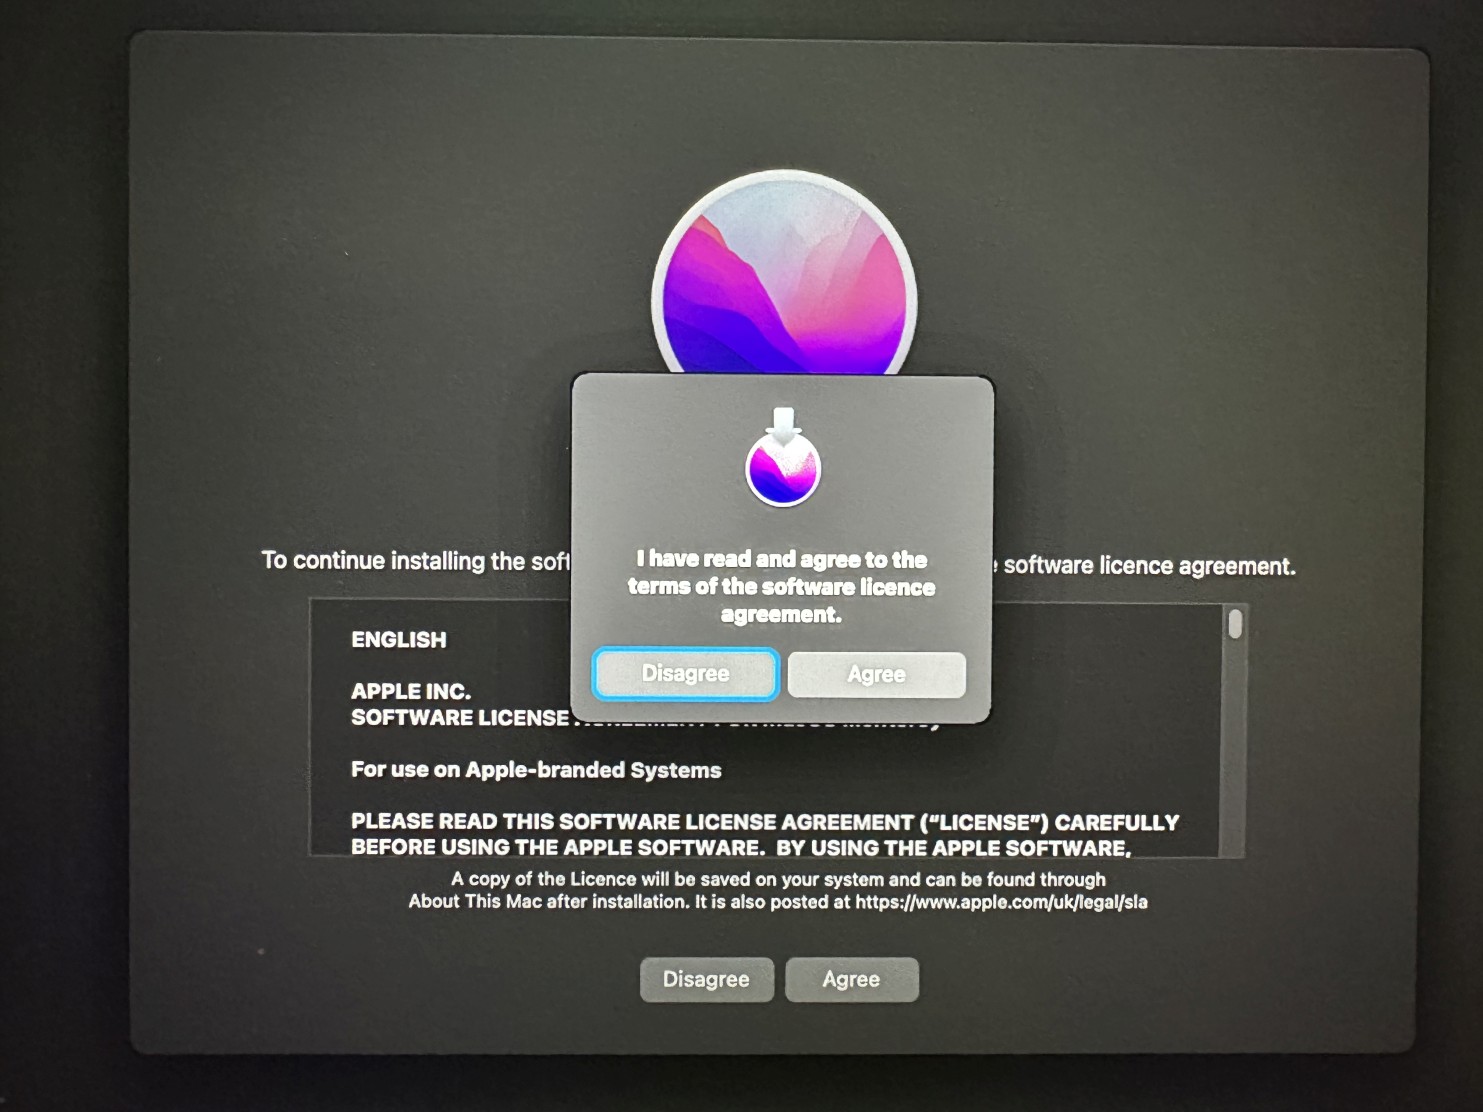
Step 32Click Agree button on software licence agreement screen. |
 |
|
|
|
Step 33Again click Agree button. |
 |
|
|
|
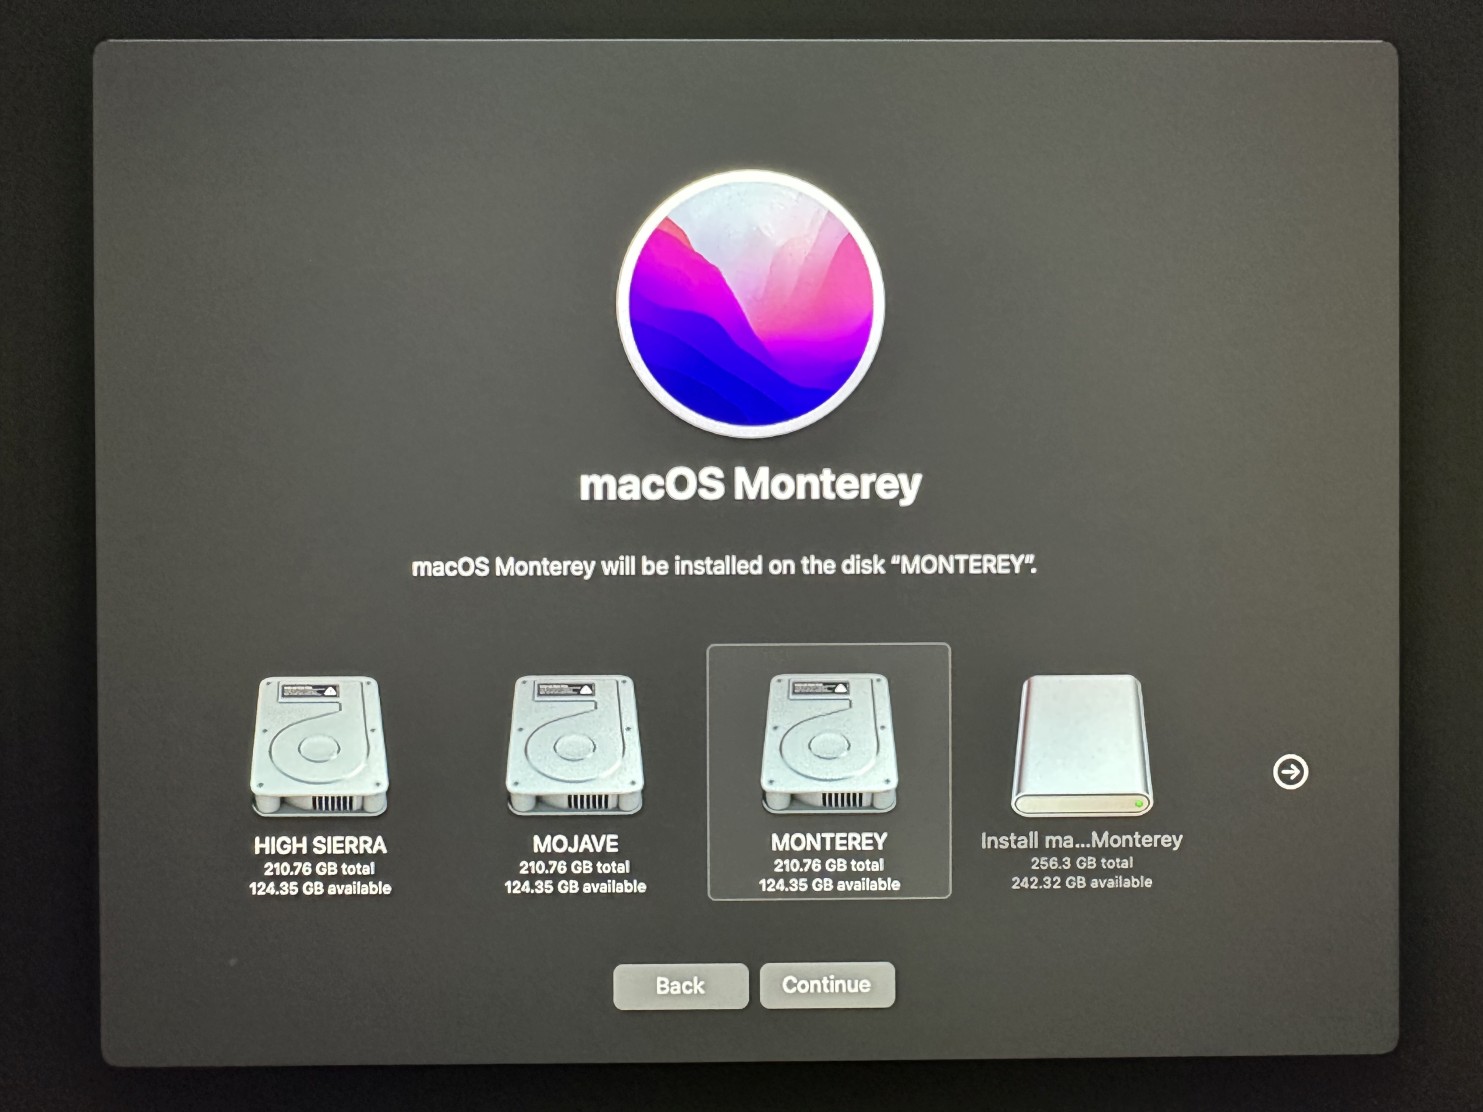
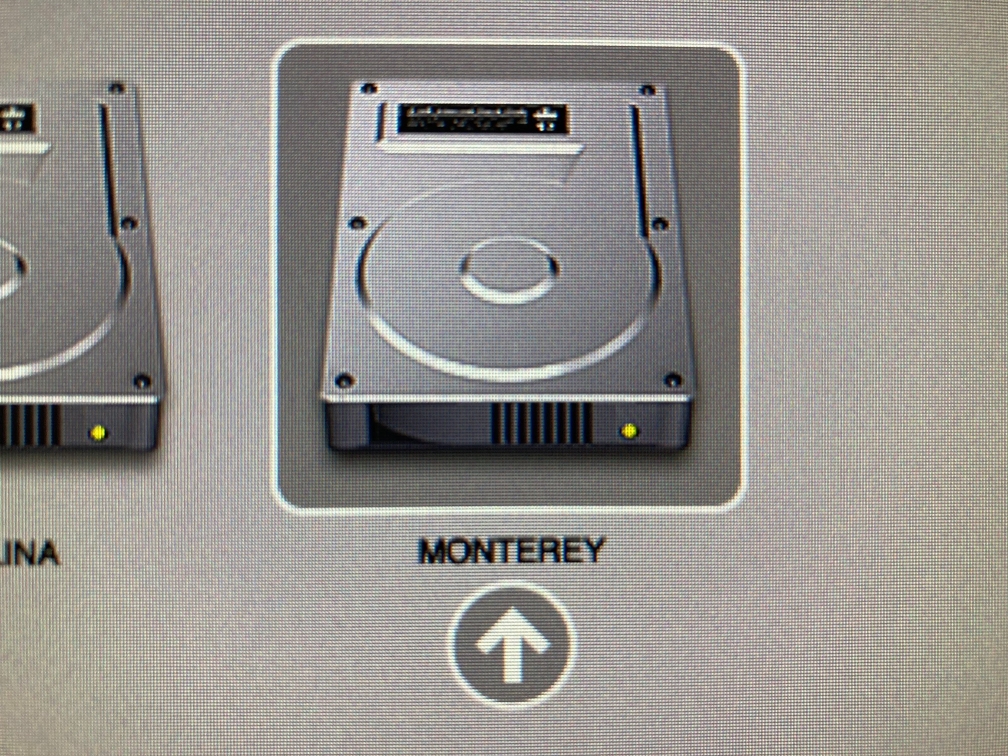
Step 34Choose your new MONTEREY volume and click Continue button to continue the installation. The system will be rebooted automatically several times. It might take about an hour to fully install macOS Monterey. |
 |
|
|
|
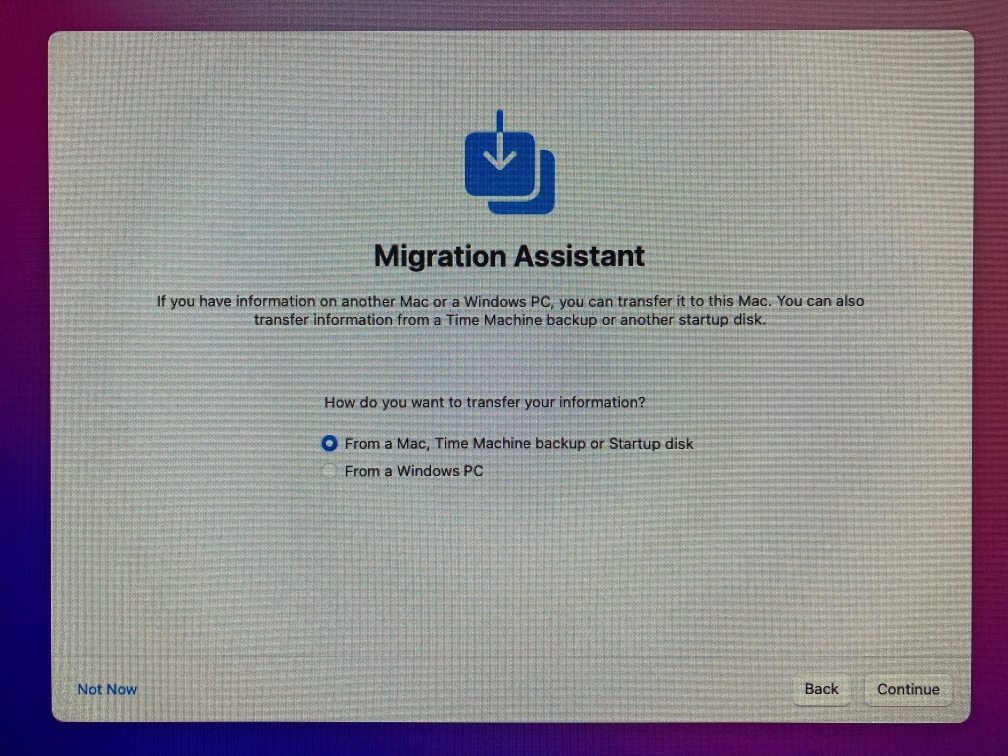
Step 35When the installation is ready you will be presented with Migration Assistant. Leave the default radio button as is and just click Continue button. If you want to make a clean installation, just click Not Now in the left lower corner. |
 |
|
|
|
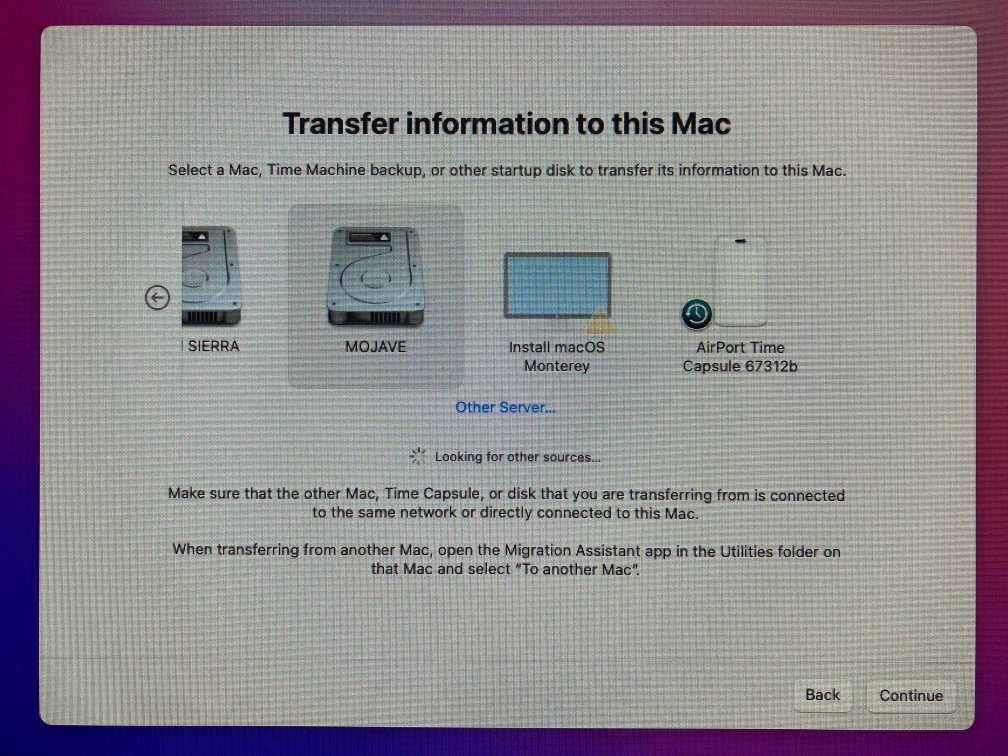
Step 36Now you can move data from your old macOS installation. Click your previous macOS drive and then Continue button. |
 |
|
|
|
Step 37As soon your data is moved you will see macOS Monterey desktop.
You need to remove your second OpenCore USB flash drive, and insert the first USB flash drive containing Monterey-micropatcher.
Reboot the system.
Press and hold Option key (on Mac keyboard) or ALT key (on Windows keyboard) to see boot picker and click an arrow below EFI boot icon.
Make sure the USB flash drive is inserted into Mac Pro built-in USB hub (front or rear). Extra USB PCIe cards won't show a bootable flash drive.
Computer will be rapidly turned off automatically. This will set all proper NVRAM values needed for macOS Monterey. You can now safely remove first USB flash drive as well.
WARNING: If you have no entry sign, then you need to redo this step to be able to boot macOS Monterey, so we recommend keeping the Monterey-micropatcher USB flash drive handy. |
 |
|
|
|
Step 38Power on the computer.
PLEASE NOTE: Sometimes, as a result of using OpenCore Legacy Patcher the standard boot picker might change its background from grey to black (just like on the new Macs). This can be cleared by resetting NVRAM, but then you would have to do the step above again. If you use NVIDIA Kepler based graphics card (GTX600/GTX700 series or Quadro K series), post the installation you also need to install GeForce Kepler patcher to install proper drivers: Installing GeForce Kepler patcher for NVIDIA GeForce GTX600/GTX700 and Quadro K series cards under macOS Monterey 12.0.1 or later |
 |