
Installing NVIDIA drivers under Windows
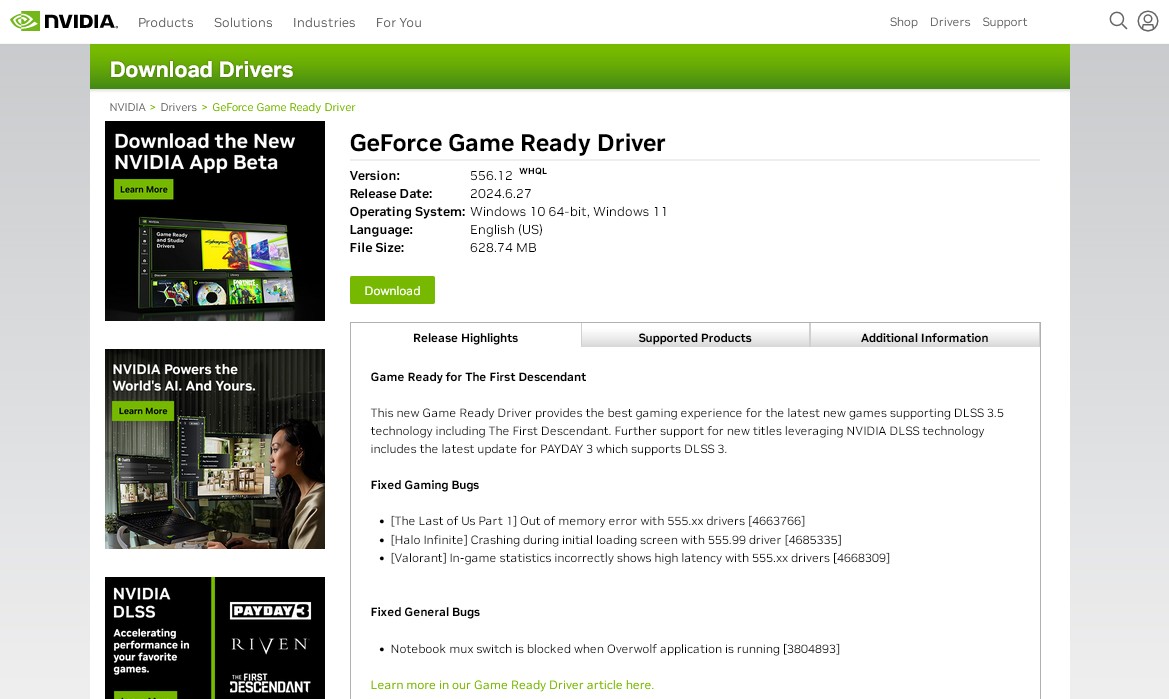
Step 1Open NVIDIA drivers download page in any web browser: https://www.nvidia.com/en-us/drivers/
Choose proper product type GeForce, TITAN or NVIDIA RTX PRO / RTX / Quadro.
Then choose product series e.g. GeForce 10 Series and a specific product e.g. GeForce GTX 1080 Ti.
Next, choose your Windows version e.g. Windows 10 32-bit / Windows 10 64-bit or Windows 11.
Select your language e.g. English (US).
Finally, click Find button to continue. |
 |
|
|
|
Step 2Choose driver type.
If you want to have the latest and fastest driver for gaming, then click View button in GeForce Game Ready Driver section.
If you want to have the most stable driver for professional applications, then click View button in NVIDIA Studio Driver section. |
 |
|
|
|
Step 3Click Download button to start downloading the driver. |
 |
|
|
|
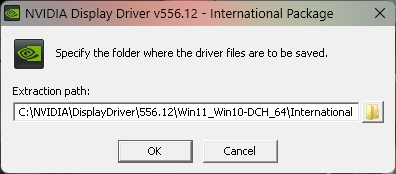
Step 4Run the downloaded driver package, and choose a folder to extract files, then click OK button. |
 |
|
|
|
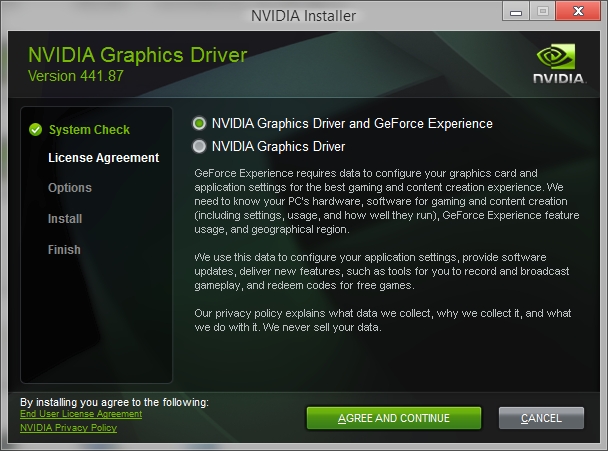
Step 5Click NVIDIA Graphics Driver and NVIDIA App radio button, then click Agree and continue button. |
 |
|
|
|
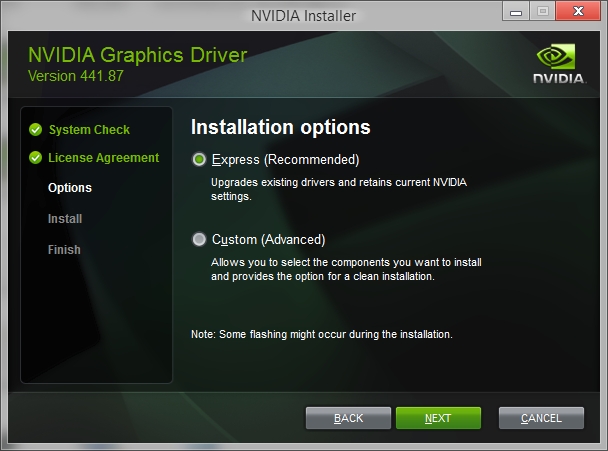
Step 6Click Express (Recommended) radio button and then click Next button. |
 |
|
|
|
Step 7Select both checkboxes and click Close button to finish. |
 |
|
|
|
Step 8Your Windows graphics drivers are now installed. Restarting the computer might be necessary.
Choose the default Game Ready Driver For Gamers or choose NVIDIA Studio Driver for Creators and click Next button. |
 |
|
|
|
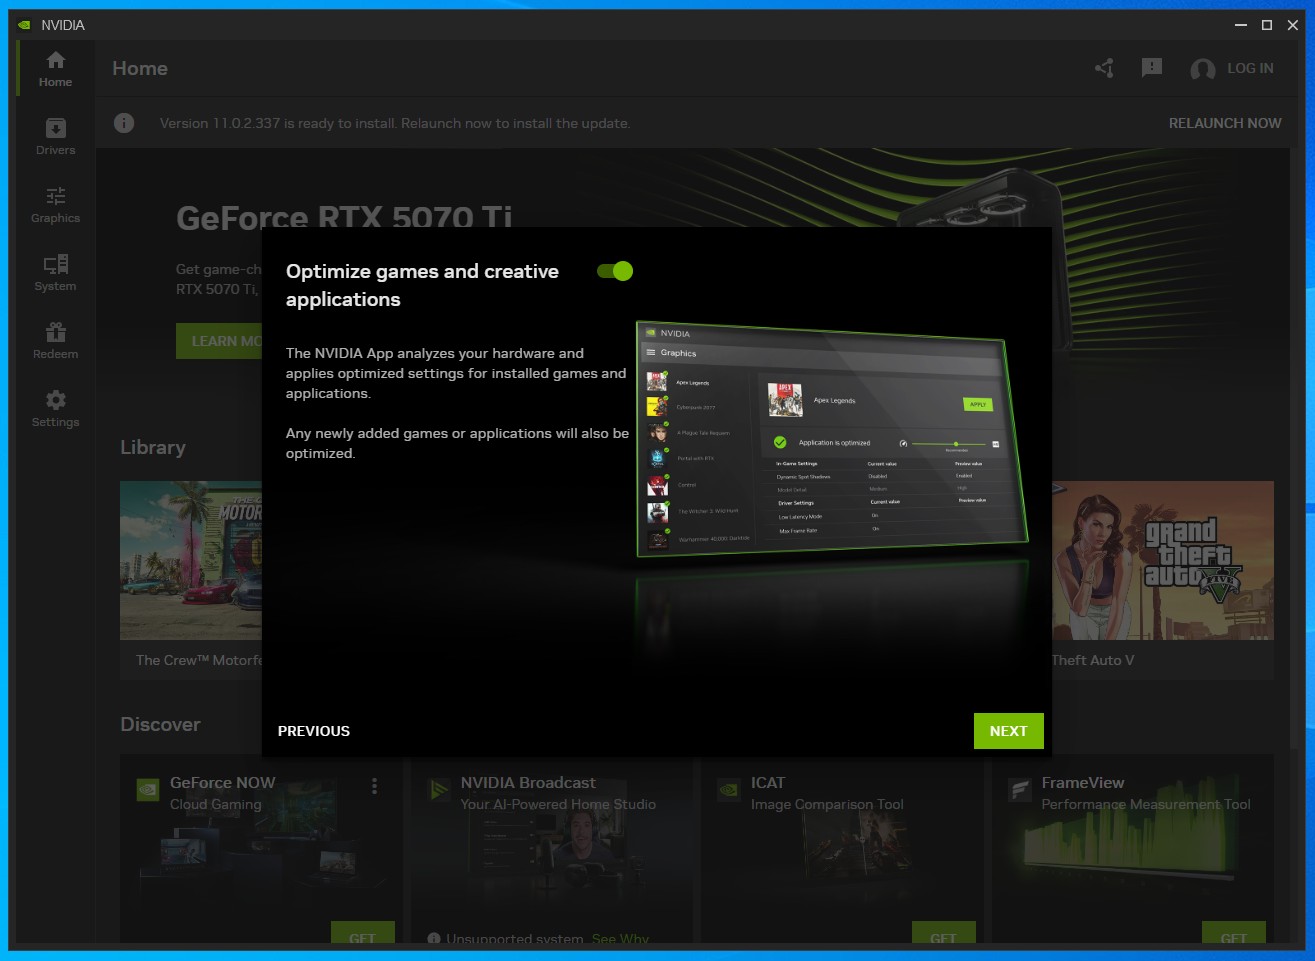
Step 9Make sure Optimize games and creative applications option is selected and click Next button to continue. |
 |
|
|
|
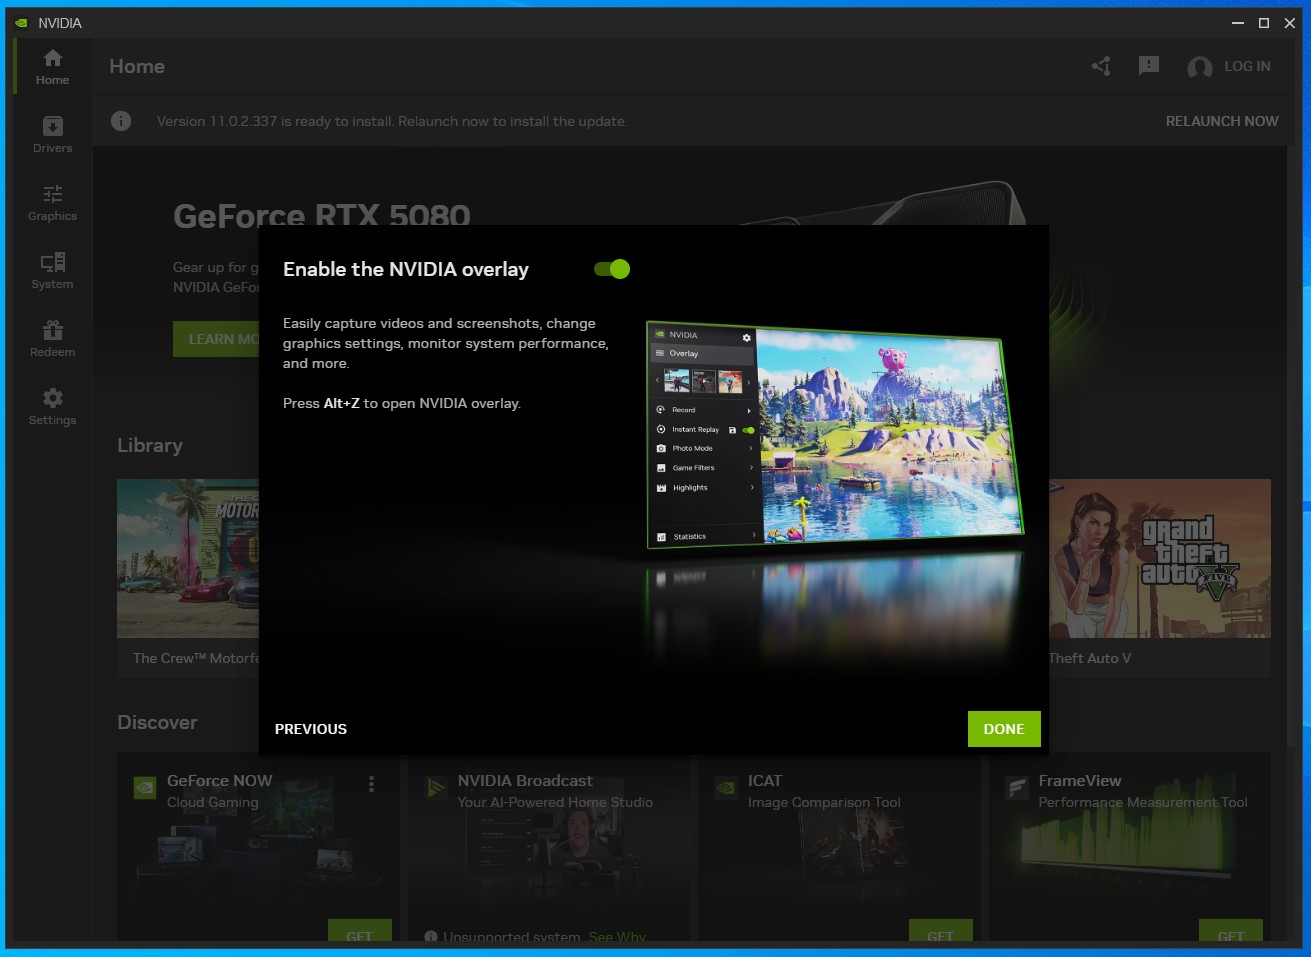
Step 10You can leave Enabled the NVIDIA overlay enabled, or if you don't need it you can disable it. Finally, click Done button to finish. |
 |