
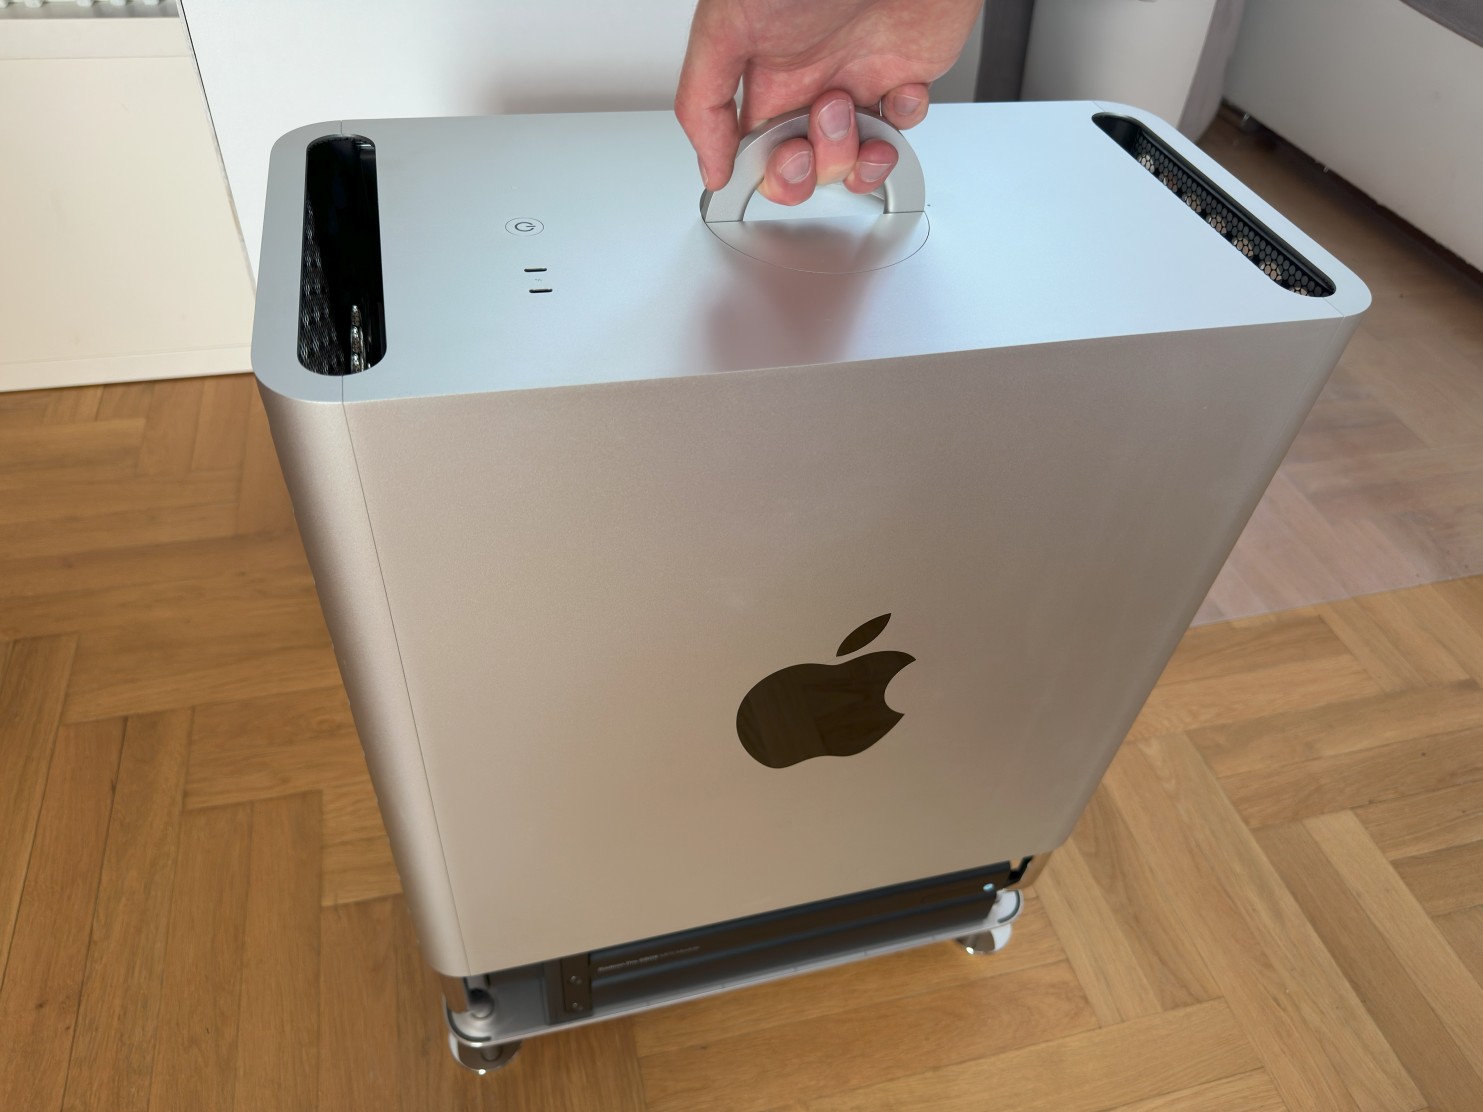
Installation in a Mac Pro 7,1 (2019) using standard graphics cards
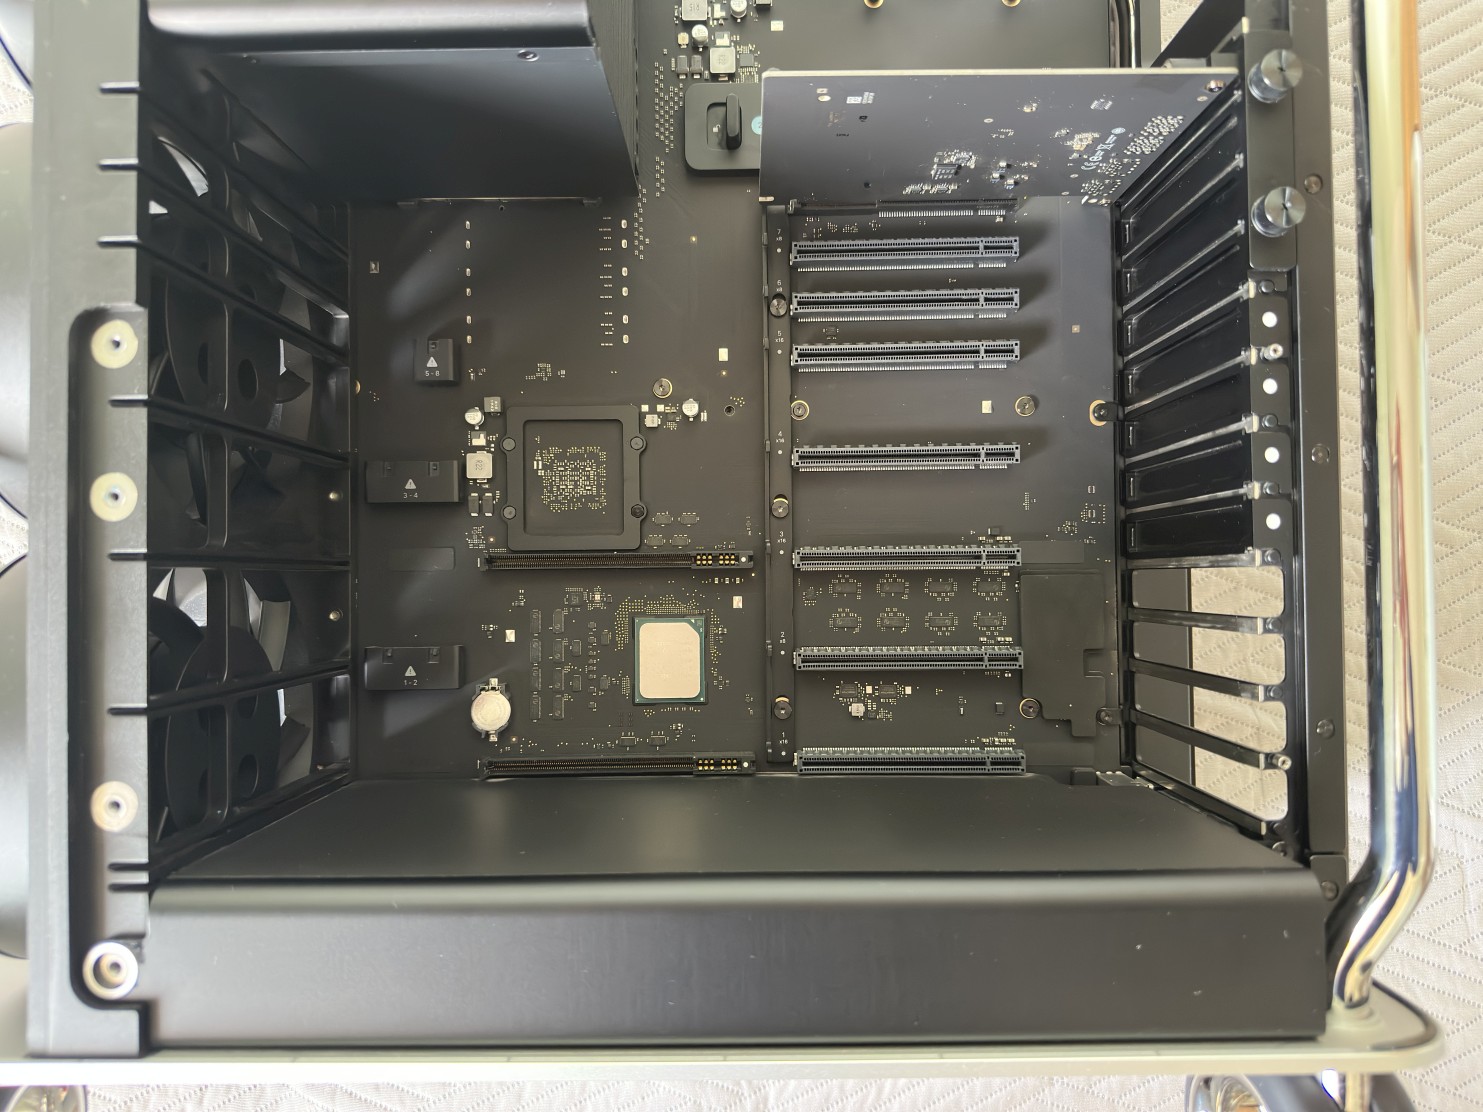
You can install standard graphics cards inside Mac Pro 7,1 in place of Apple MPX modules, to save a lot of money. Standard graphics cards should be installed in slot 1 or 3, as only these two slots got direct connection to the CPU and both are PCI-Express 3.0 x16, which give enough bandwidth for all graphics cards.
You will need extra power cables, which we provide together with the card or get Belkin AUX Power Cable Kit for Mac Pro.
If you have Windows installed via Apple Boot Camp and plan to use standard graphics card instead of the MPX module, you need to first remove MPX module drivers.
In Control Panel, click Programs, then click Programs and Features.
Right-click the program named AMD Radeon Software, then choose Change.
Click Clean Uninstall, then follow the onscreen instructions to remove the drivers.
Now you can safely remove the MPX module.
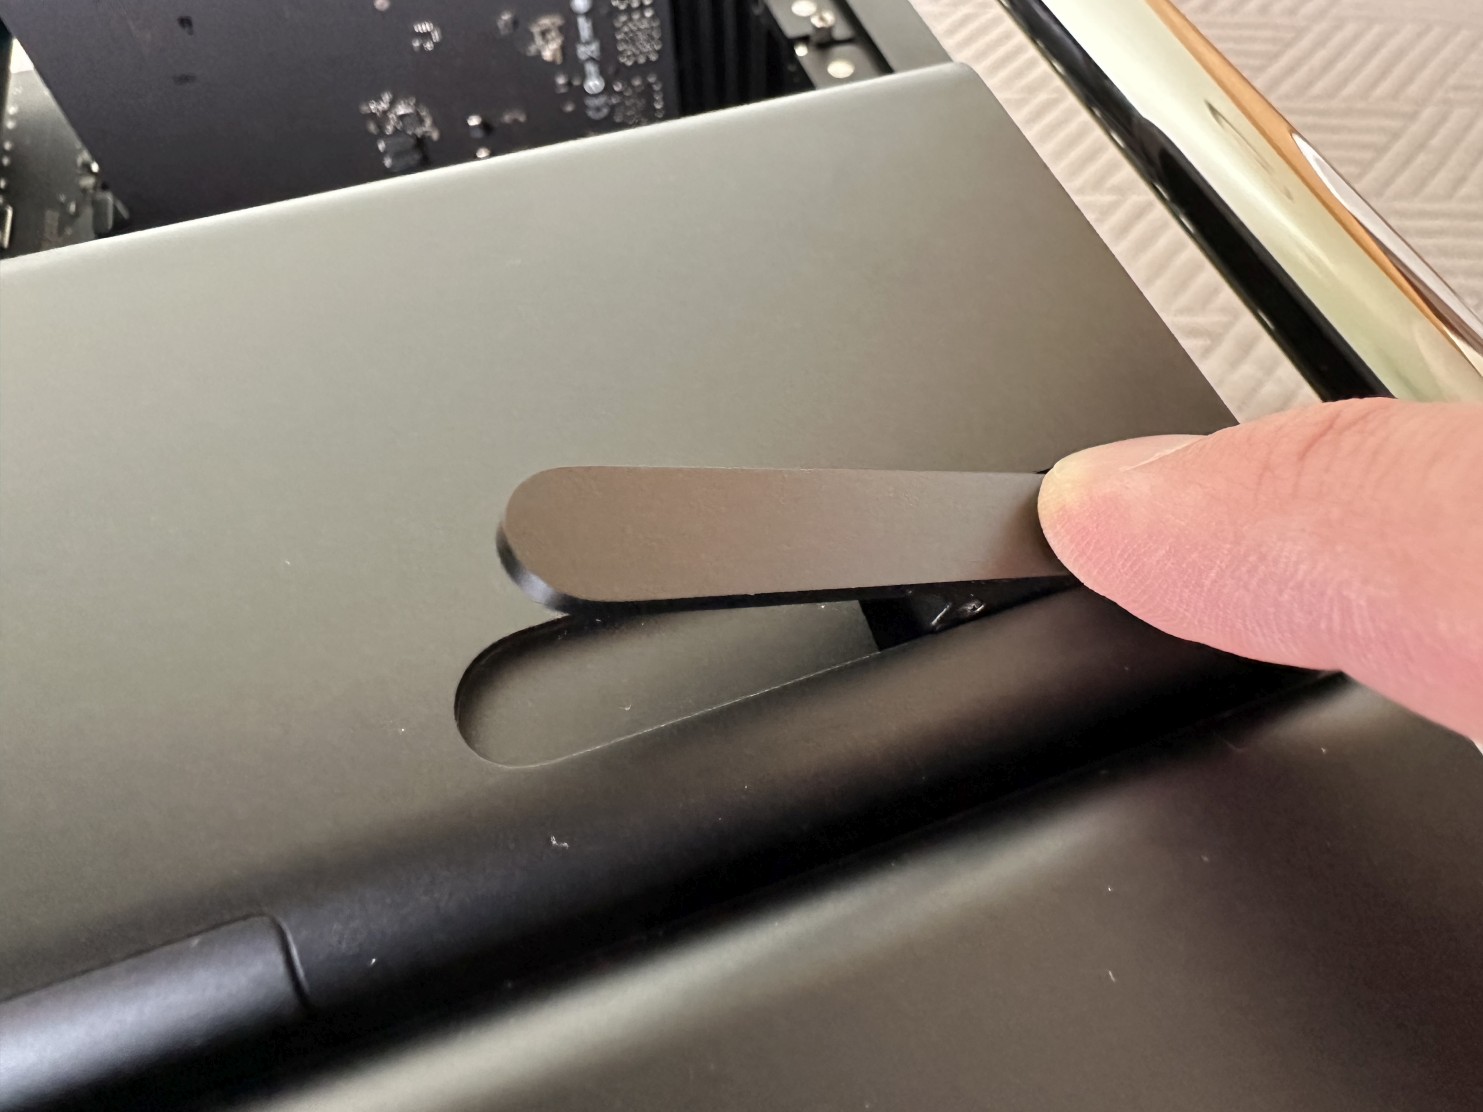
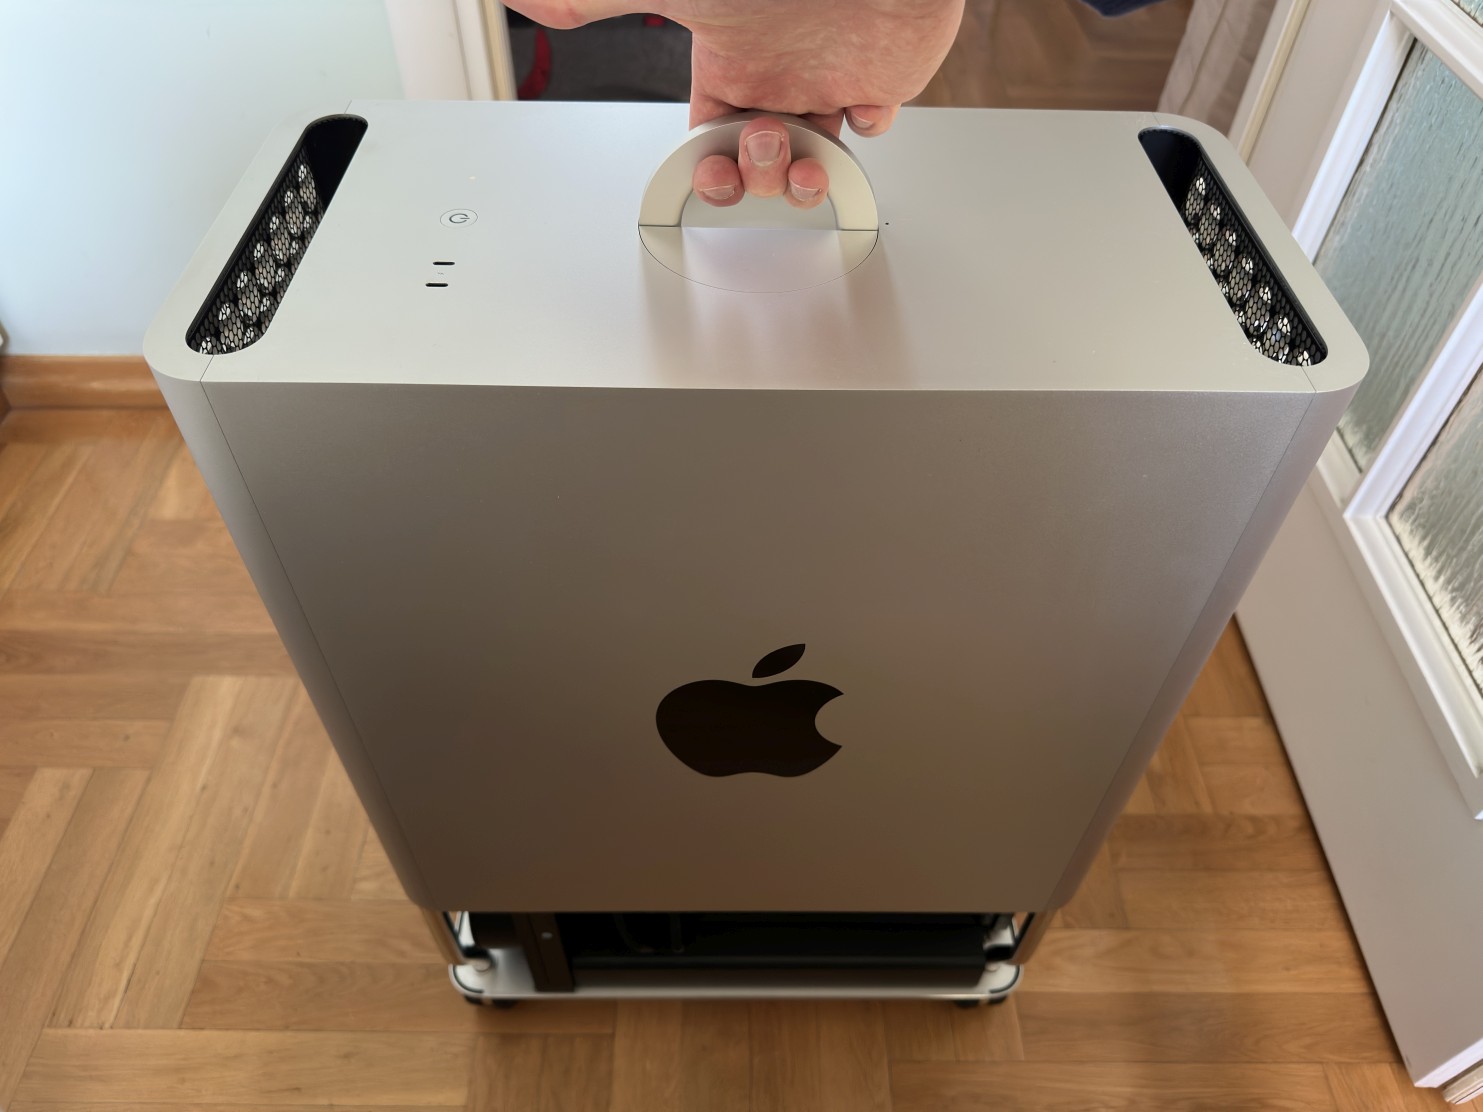
Step 1Lift the housing latch with your finger. |
 |
|
|
|
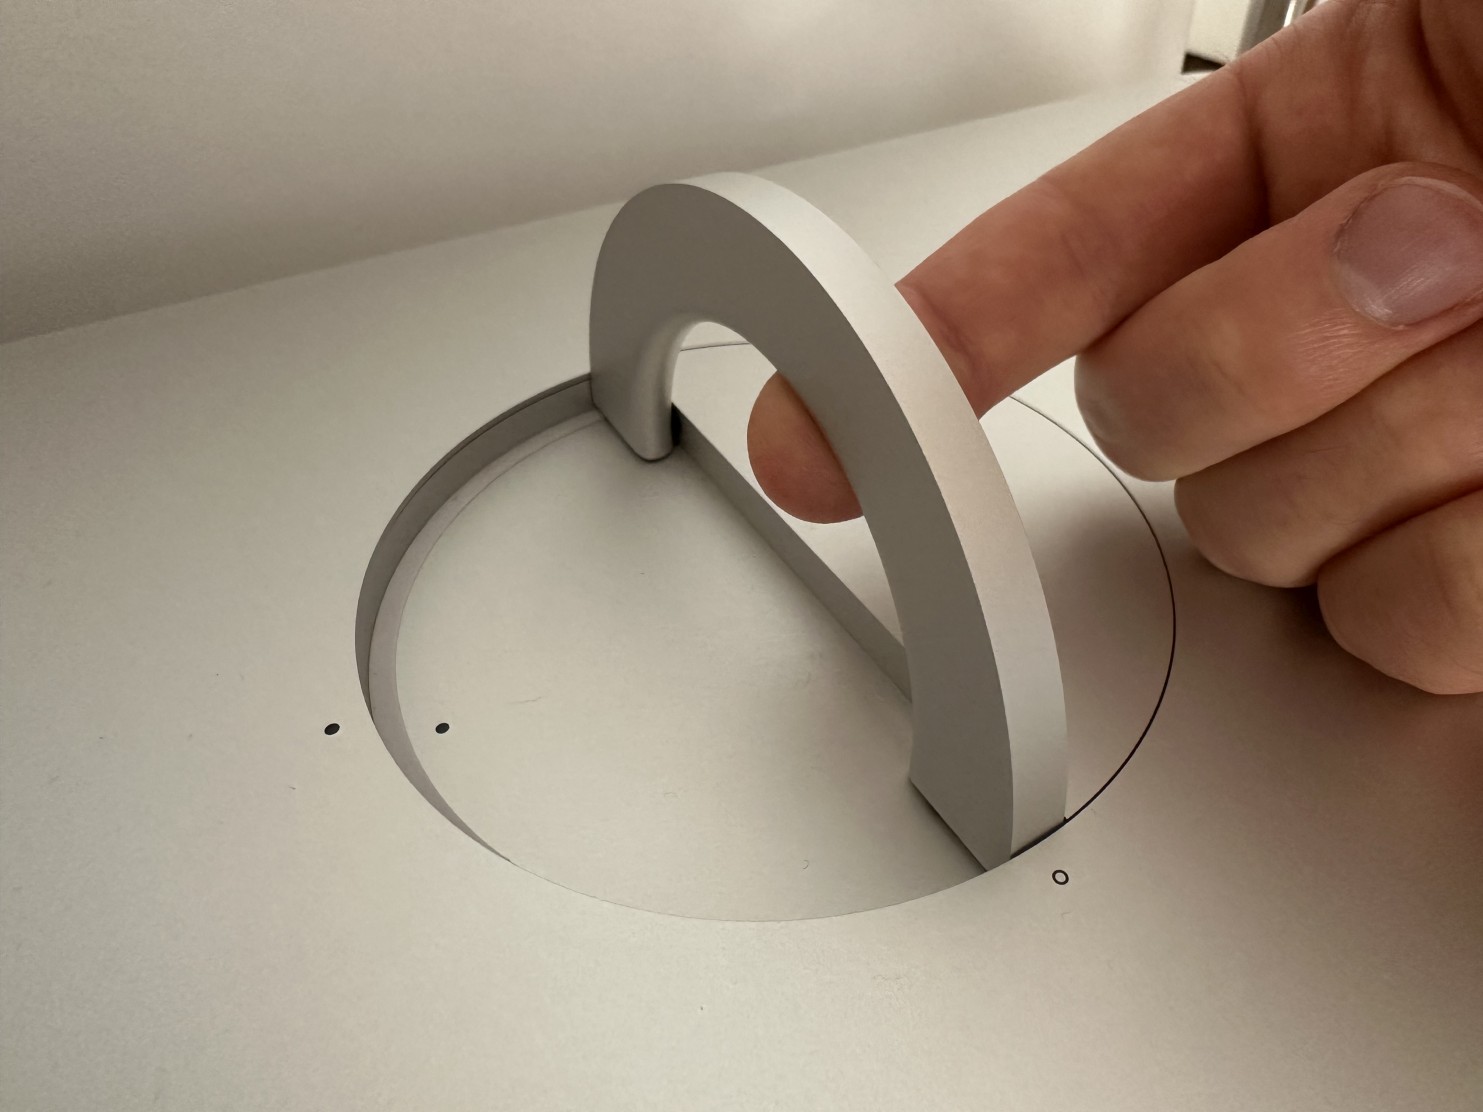
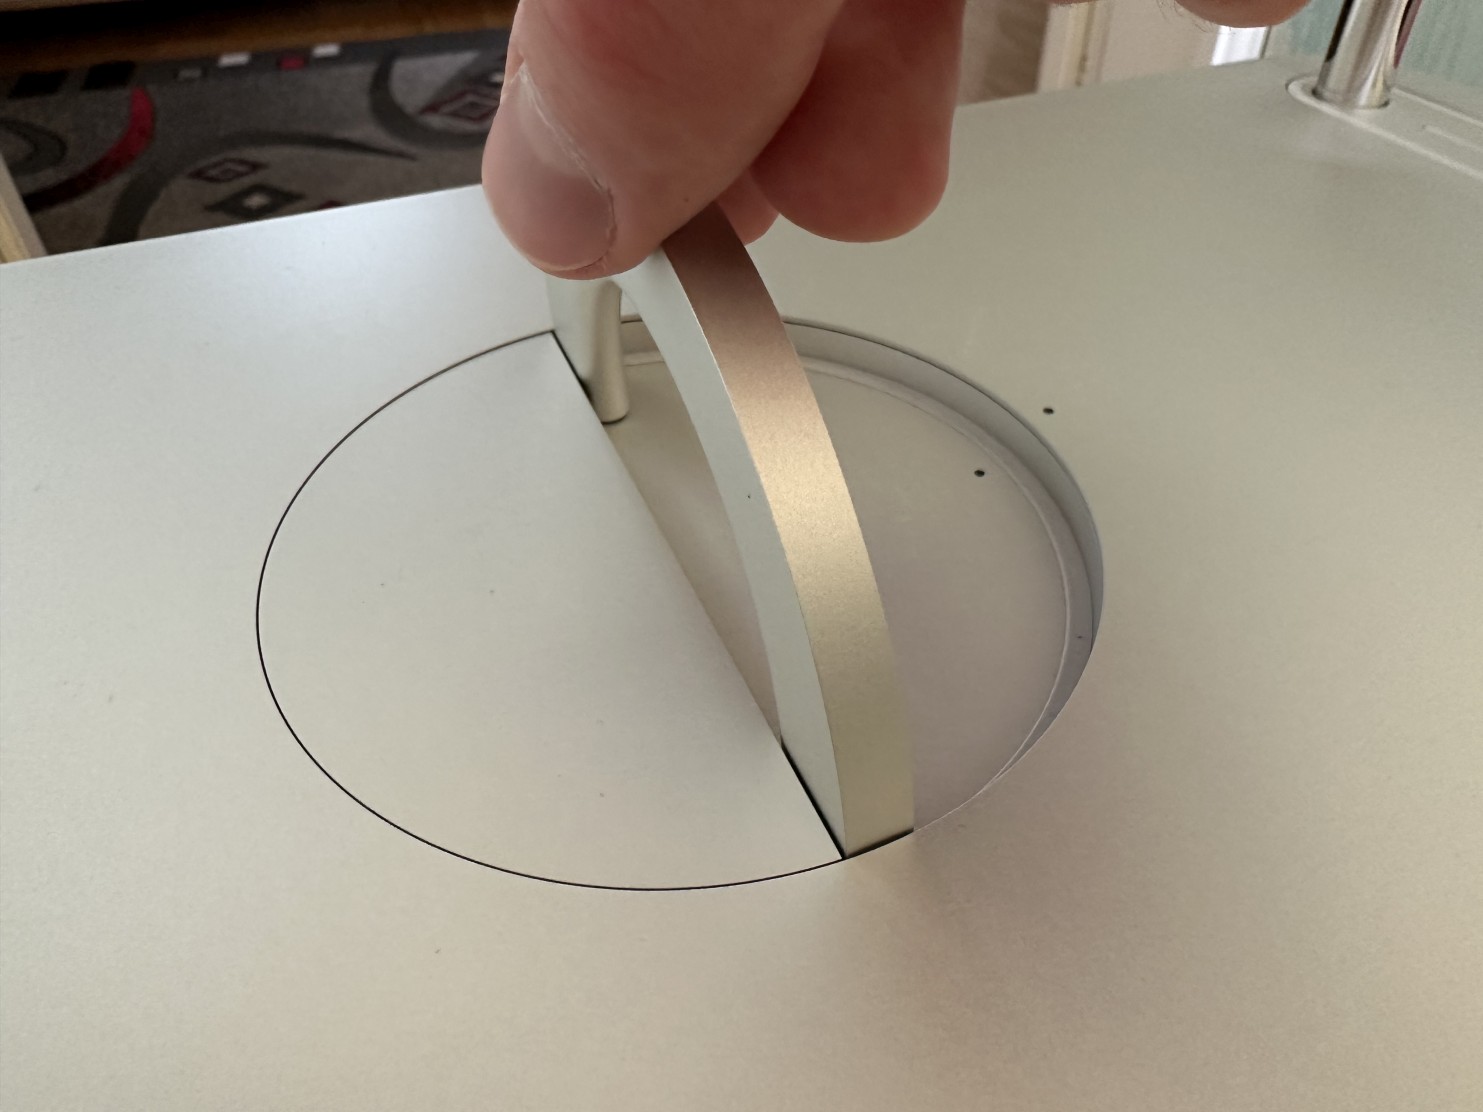
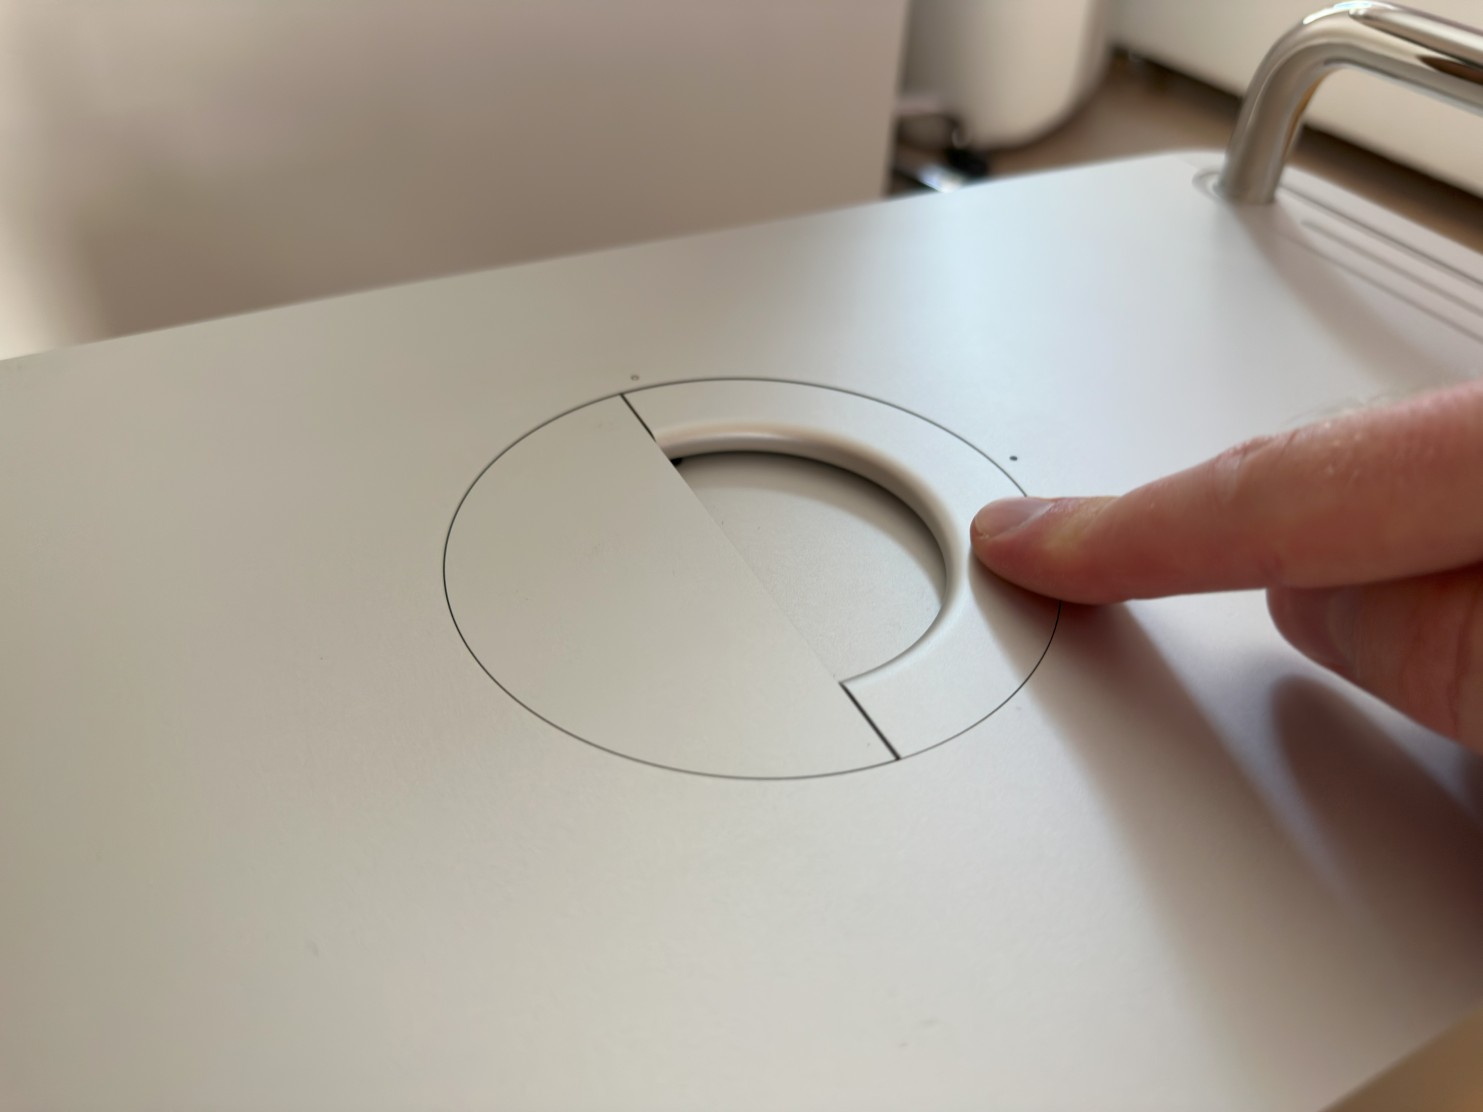
Step 2Rotate the latch into unlocked position (empty dot). |
 |
|
|
|
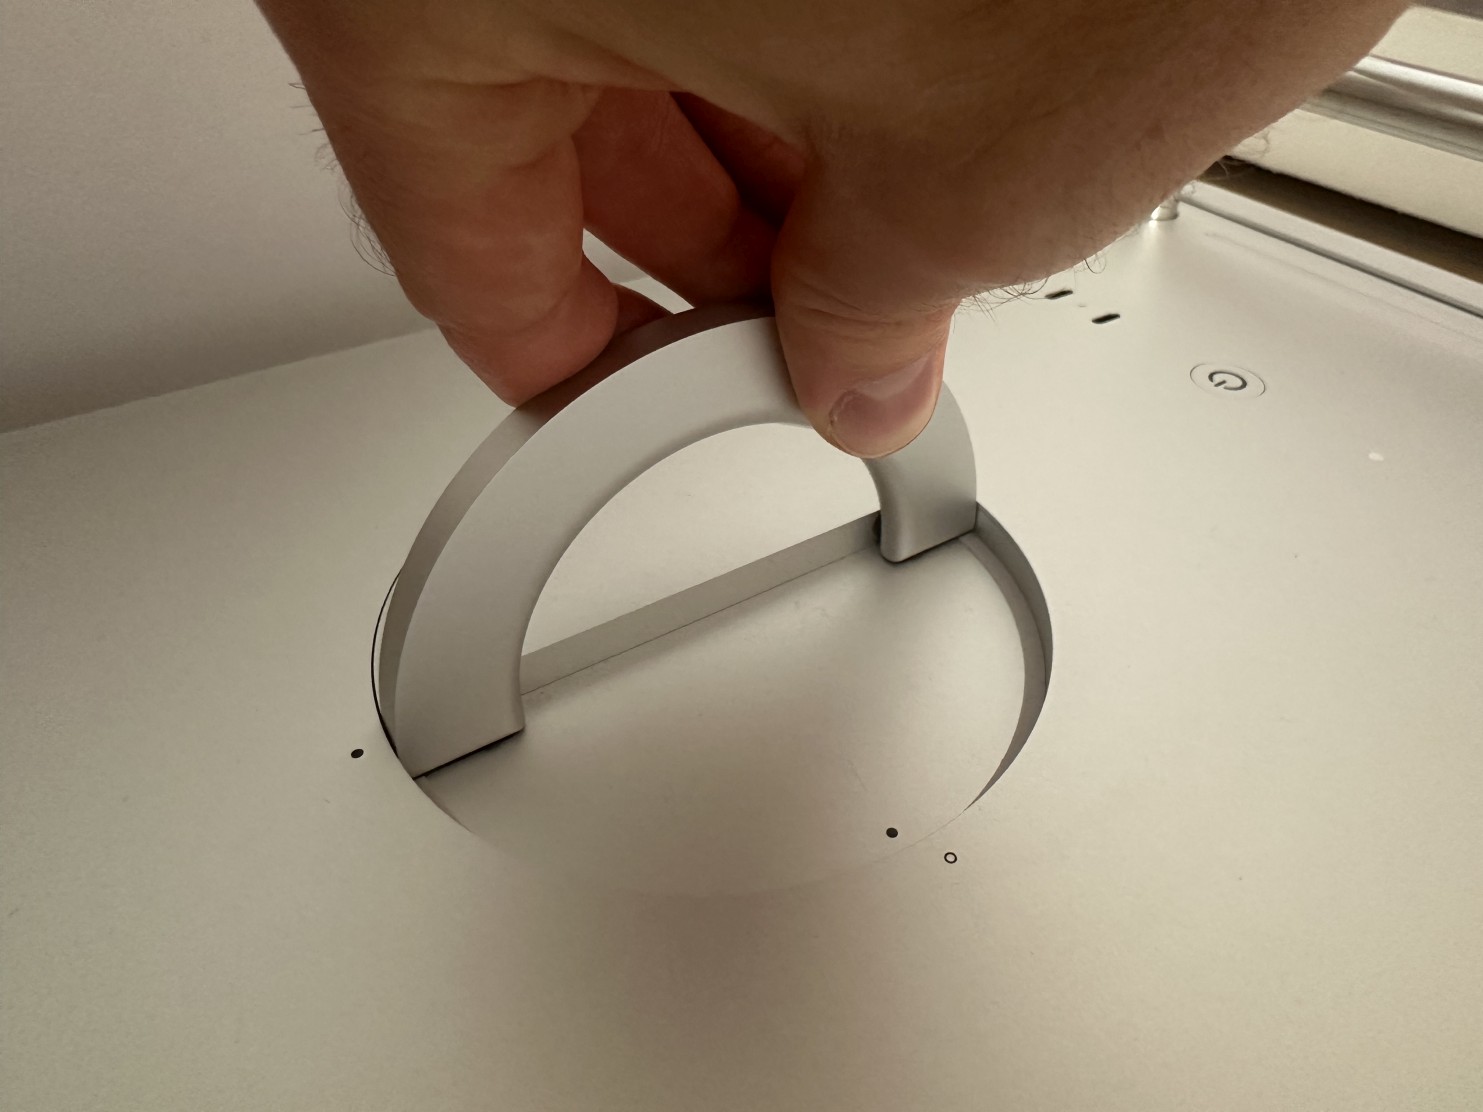
Step 3Lift the housing straight up and set it aside. |
 |
|
|
|
Step 4Put the computer horizontally on side. |
 |
|
|
|
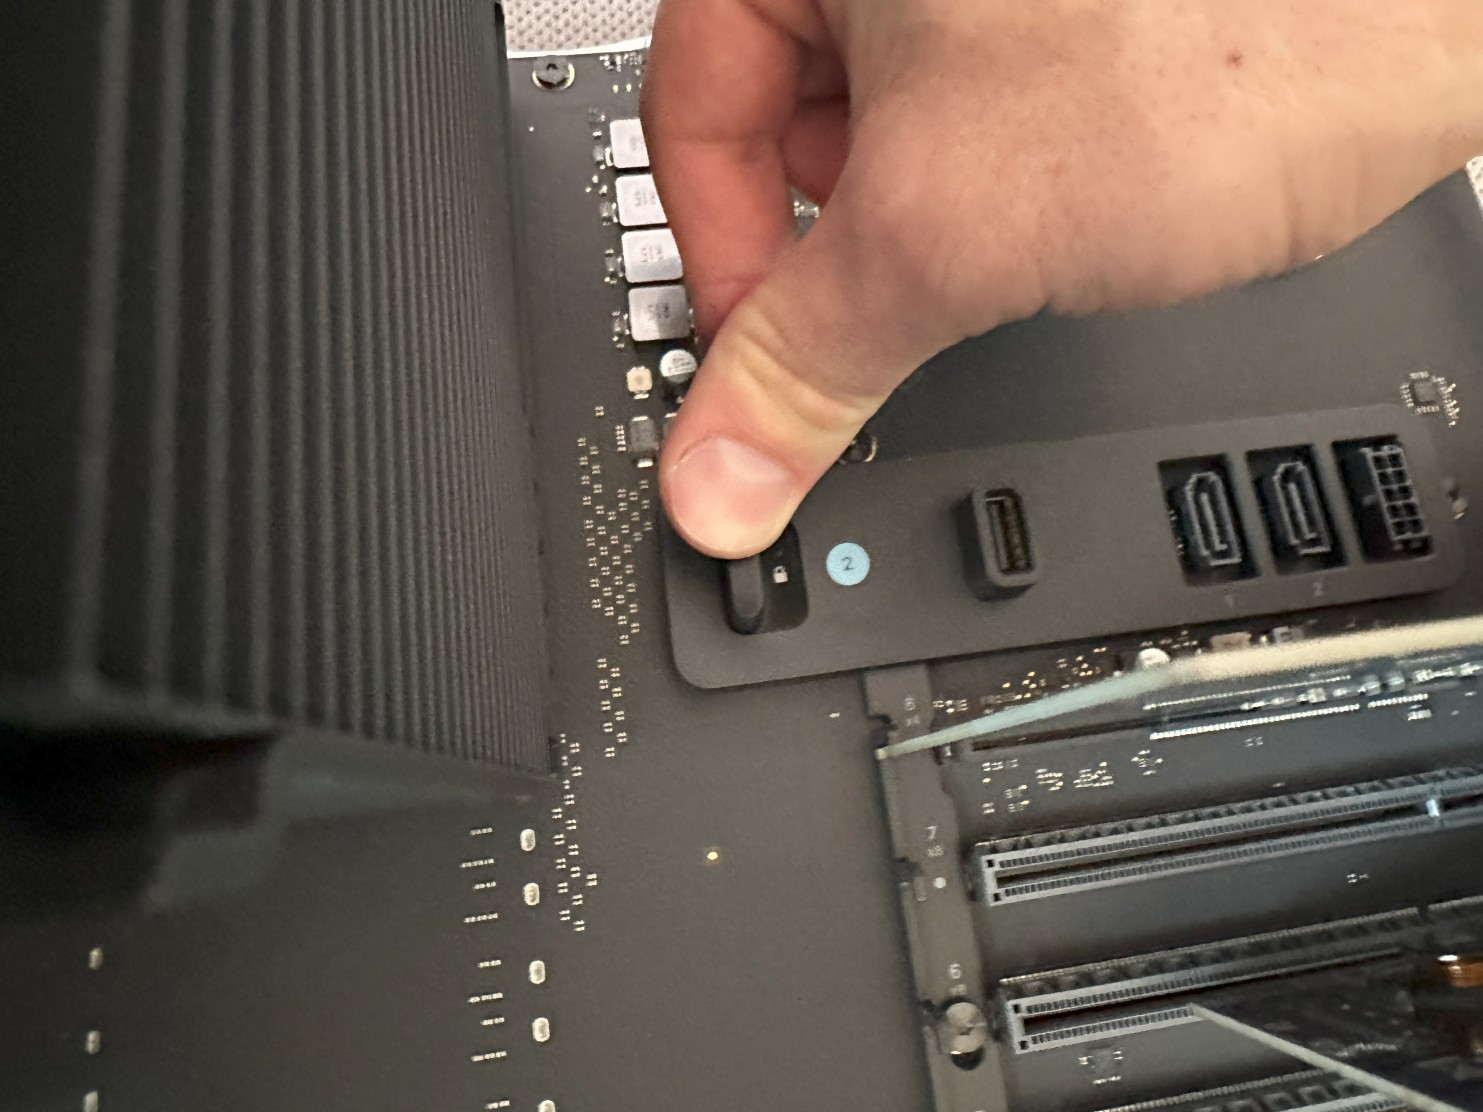
Step 5Slide the PCIe retention latch to the right (into unlocked position). |
 |
|
|
|
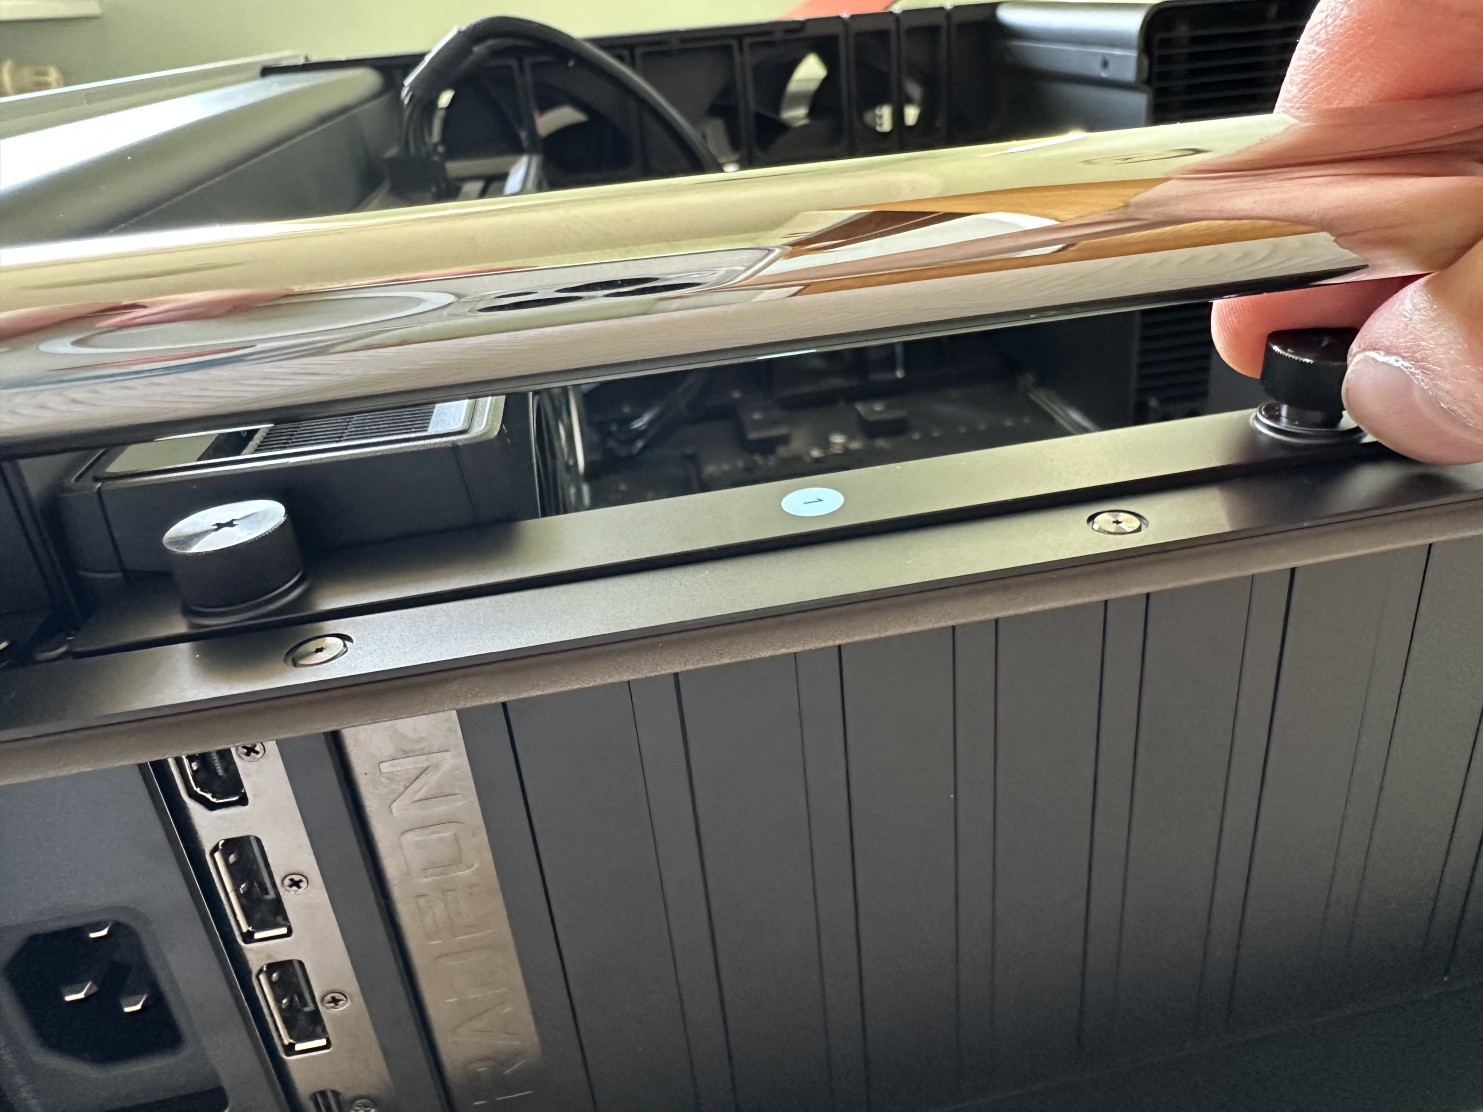
Step 6Remove the four captive Philips screws from the left clamp plate. |
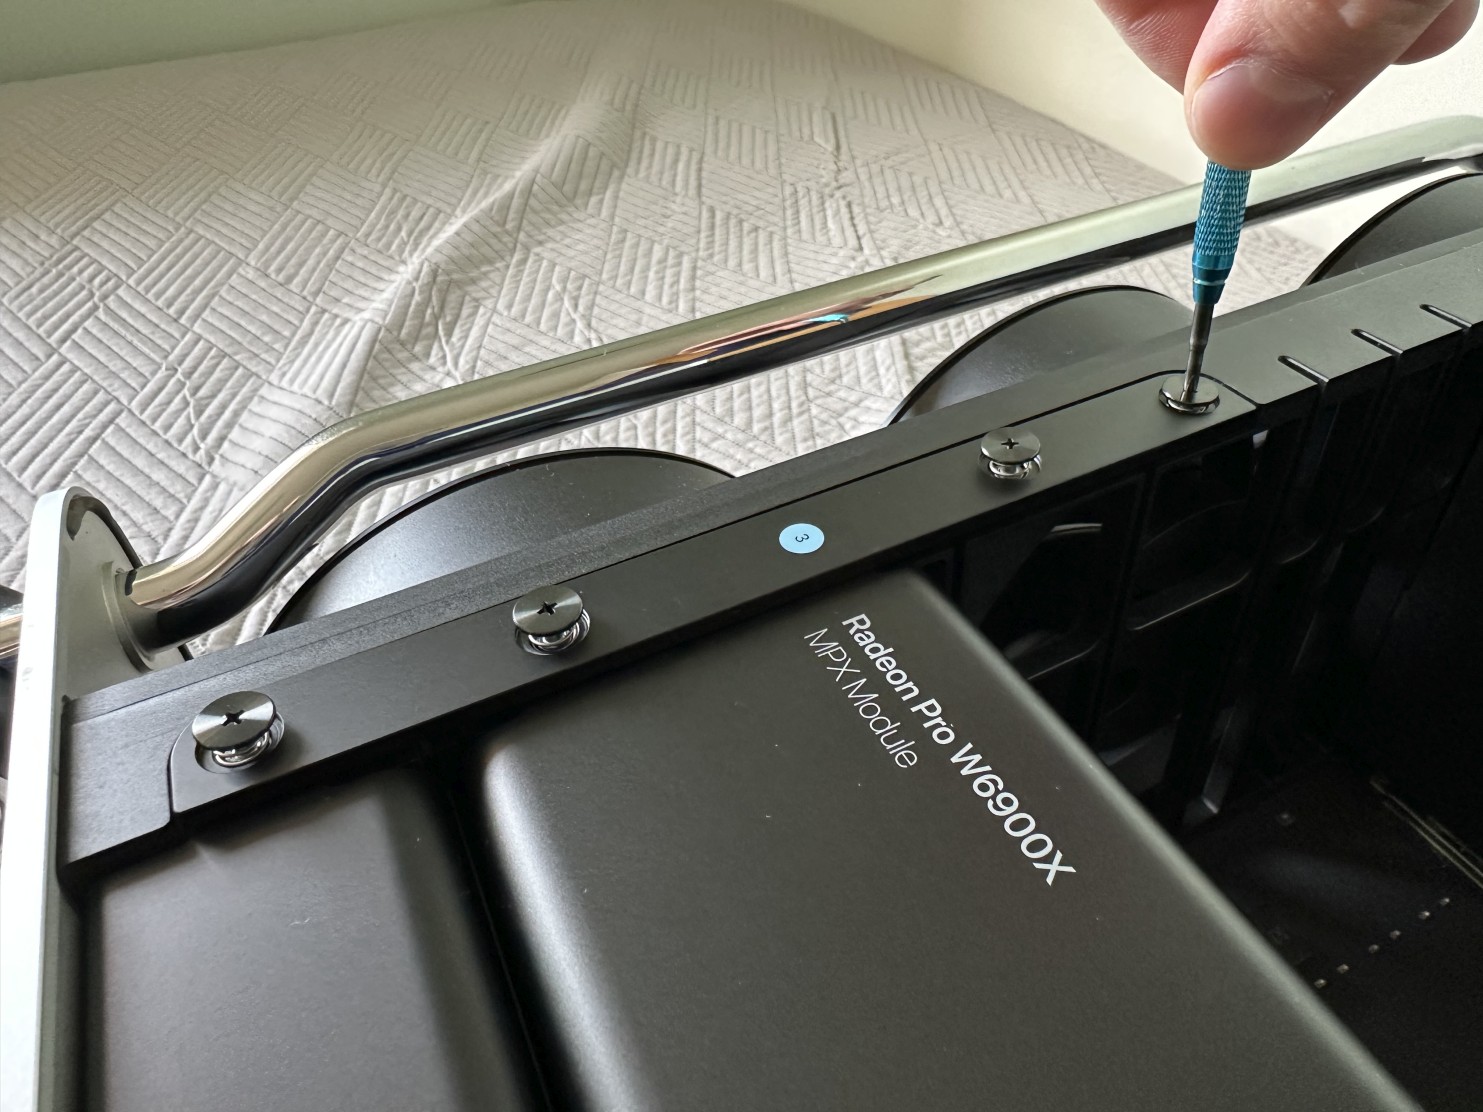 |
|
|
|
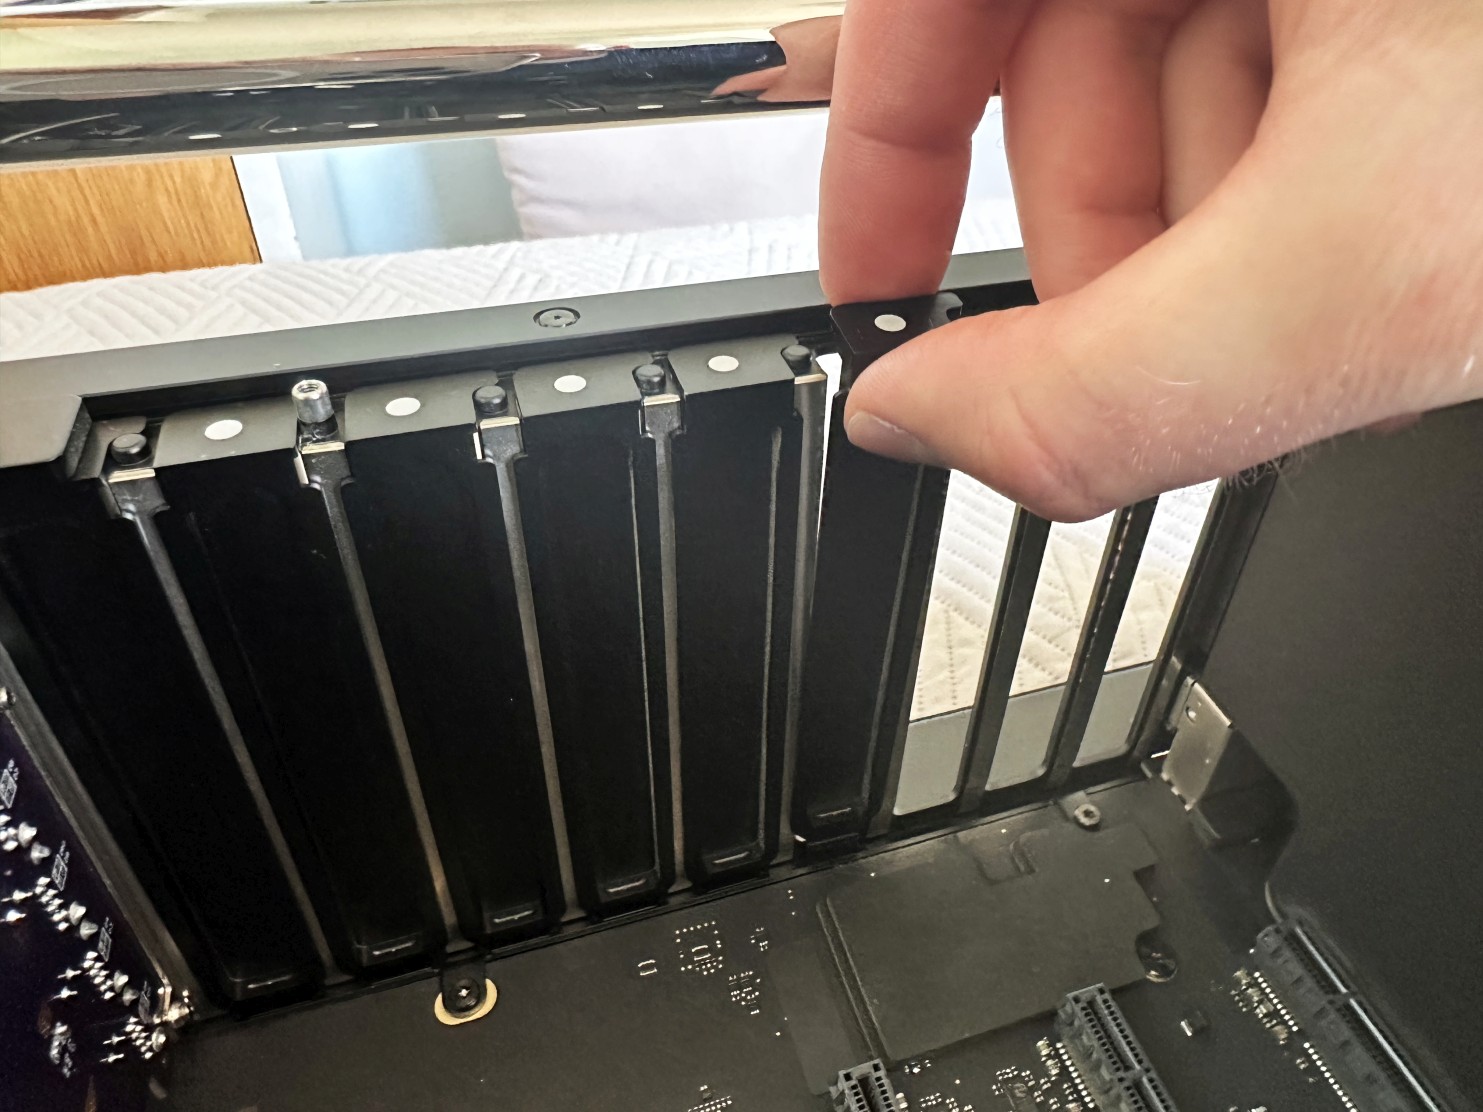
Step 7Lift the clamp plate and remove it. |
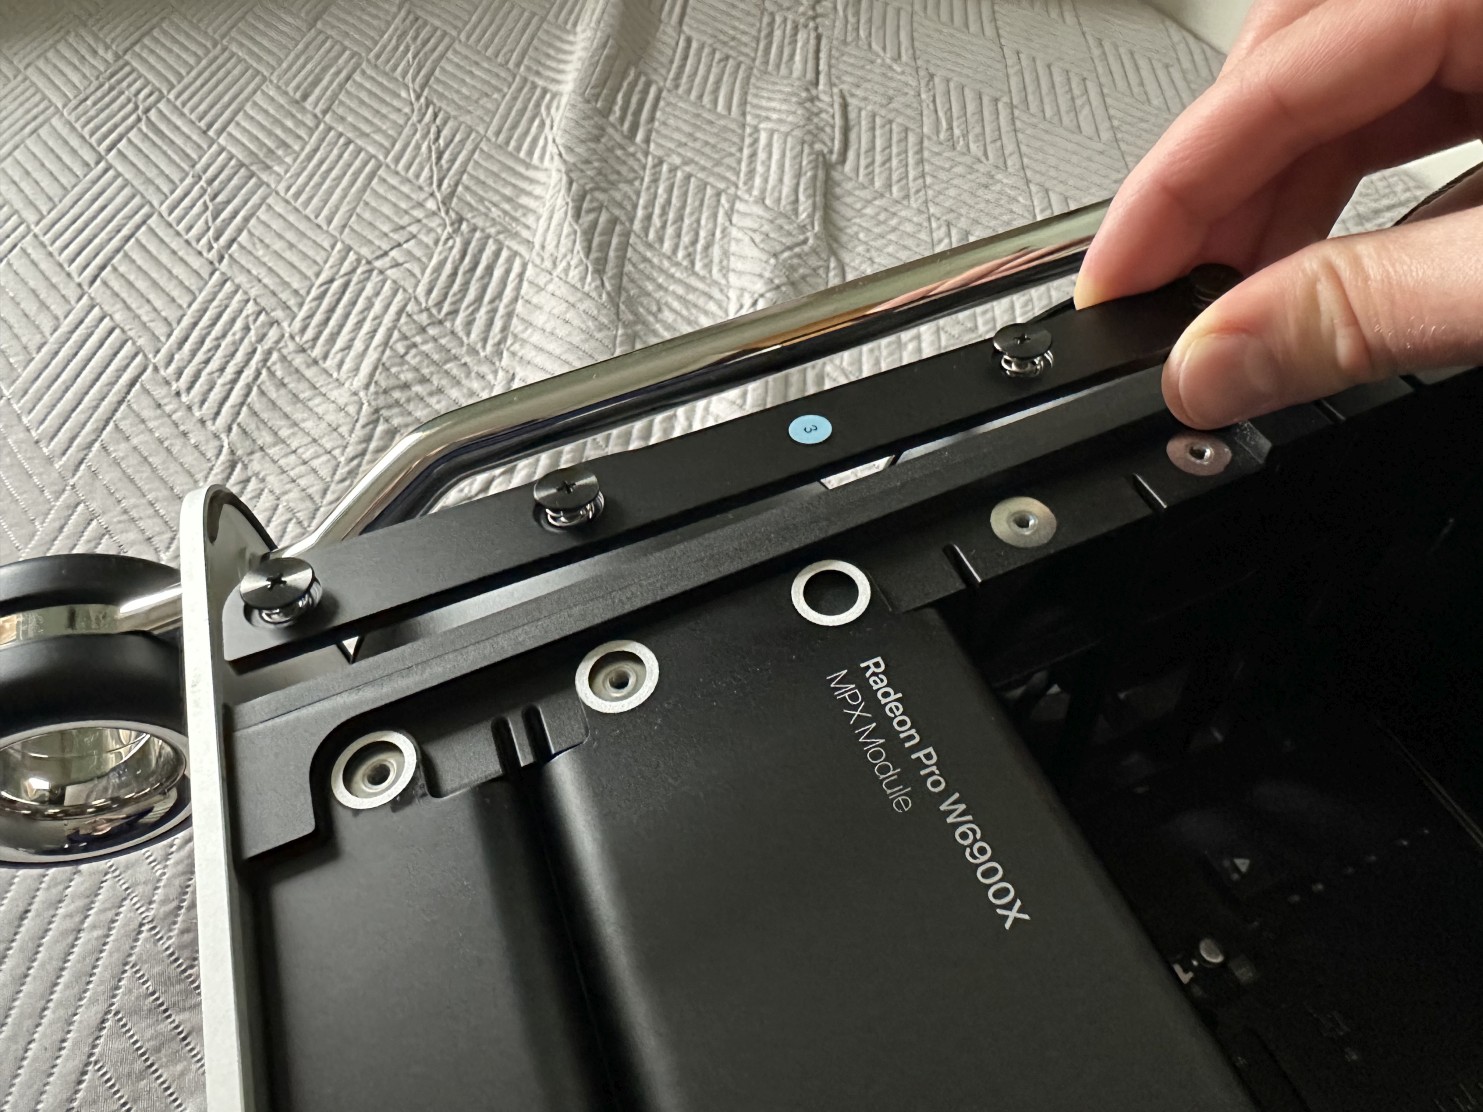 |
|
|
|
Step 8Unscrew another two captive screws this time from the right clamp plate using your fingers. If they are tightened too much you can use a Philips screw driver to unscrew them. |
 |
|
|
|
Step 9Remove the right clamp plate. |
 |
|
|
|
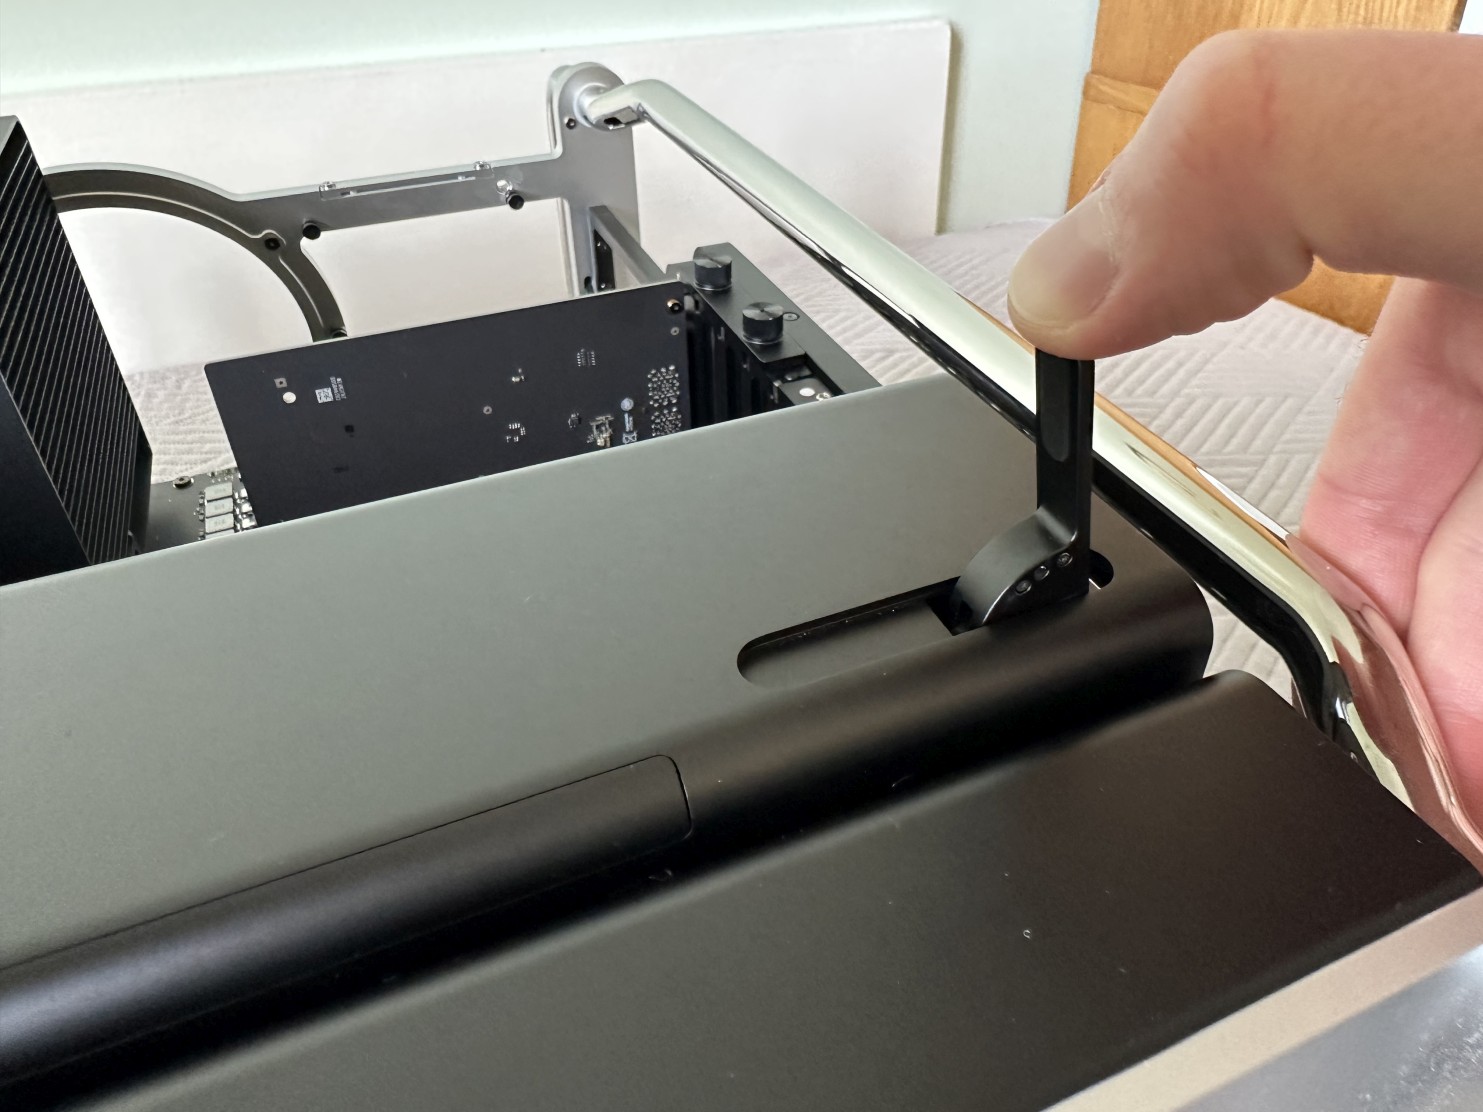
Step 10Push the eject lever on the MPX module on it to reveal it. |
 |
|
|
|
Step 11Pull the eject lever to disconnect the MPX module from the logic board. |
 |
|
|
|
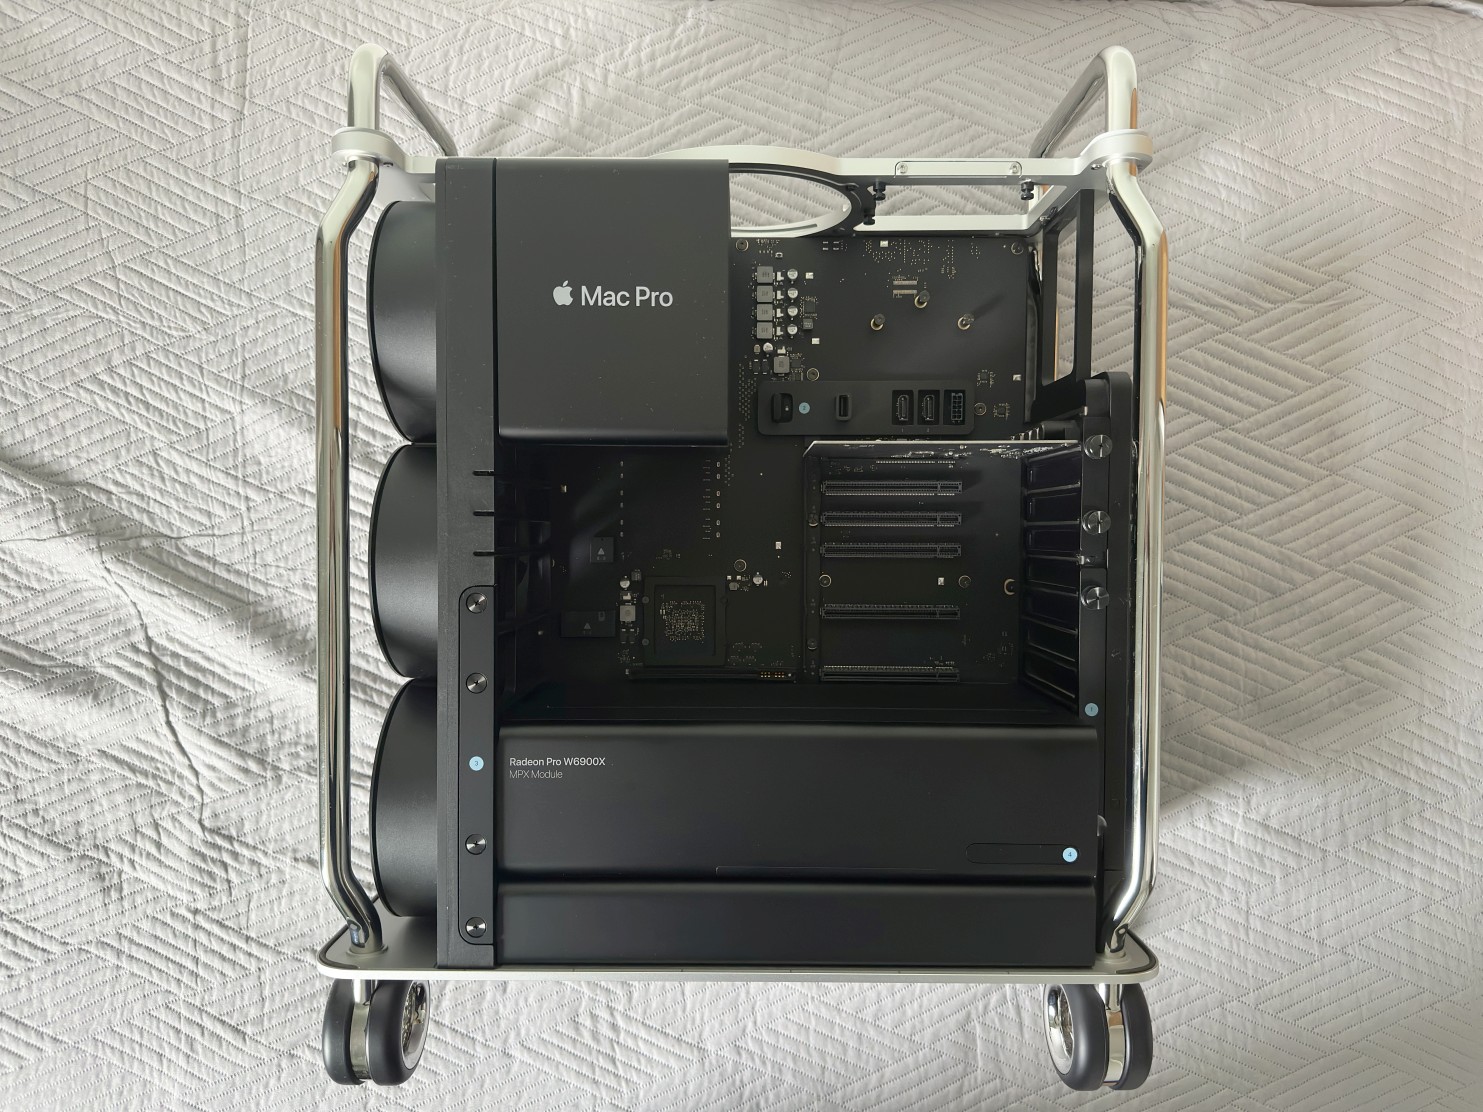
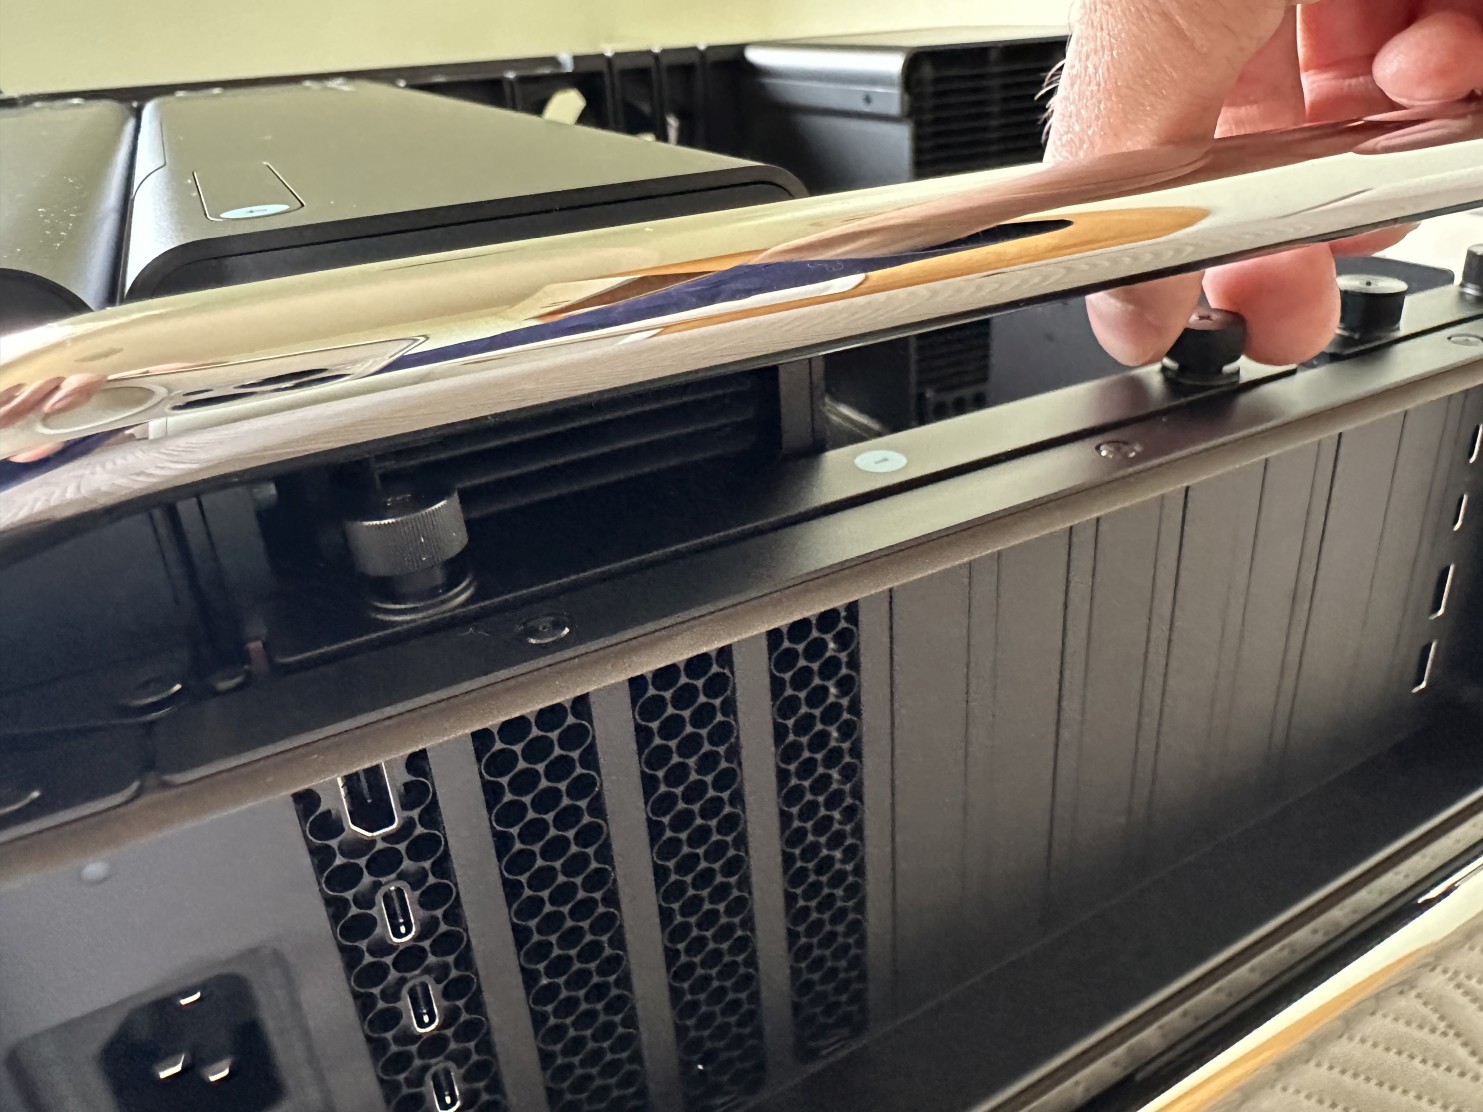
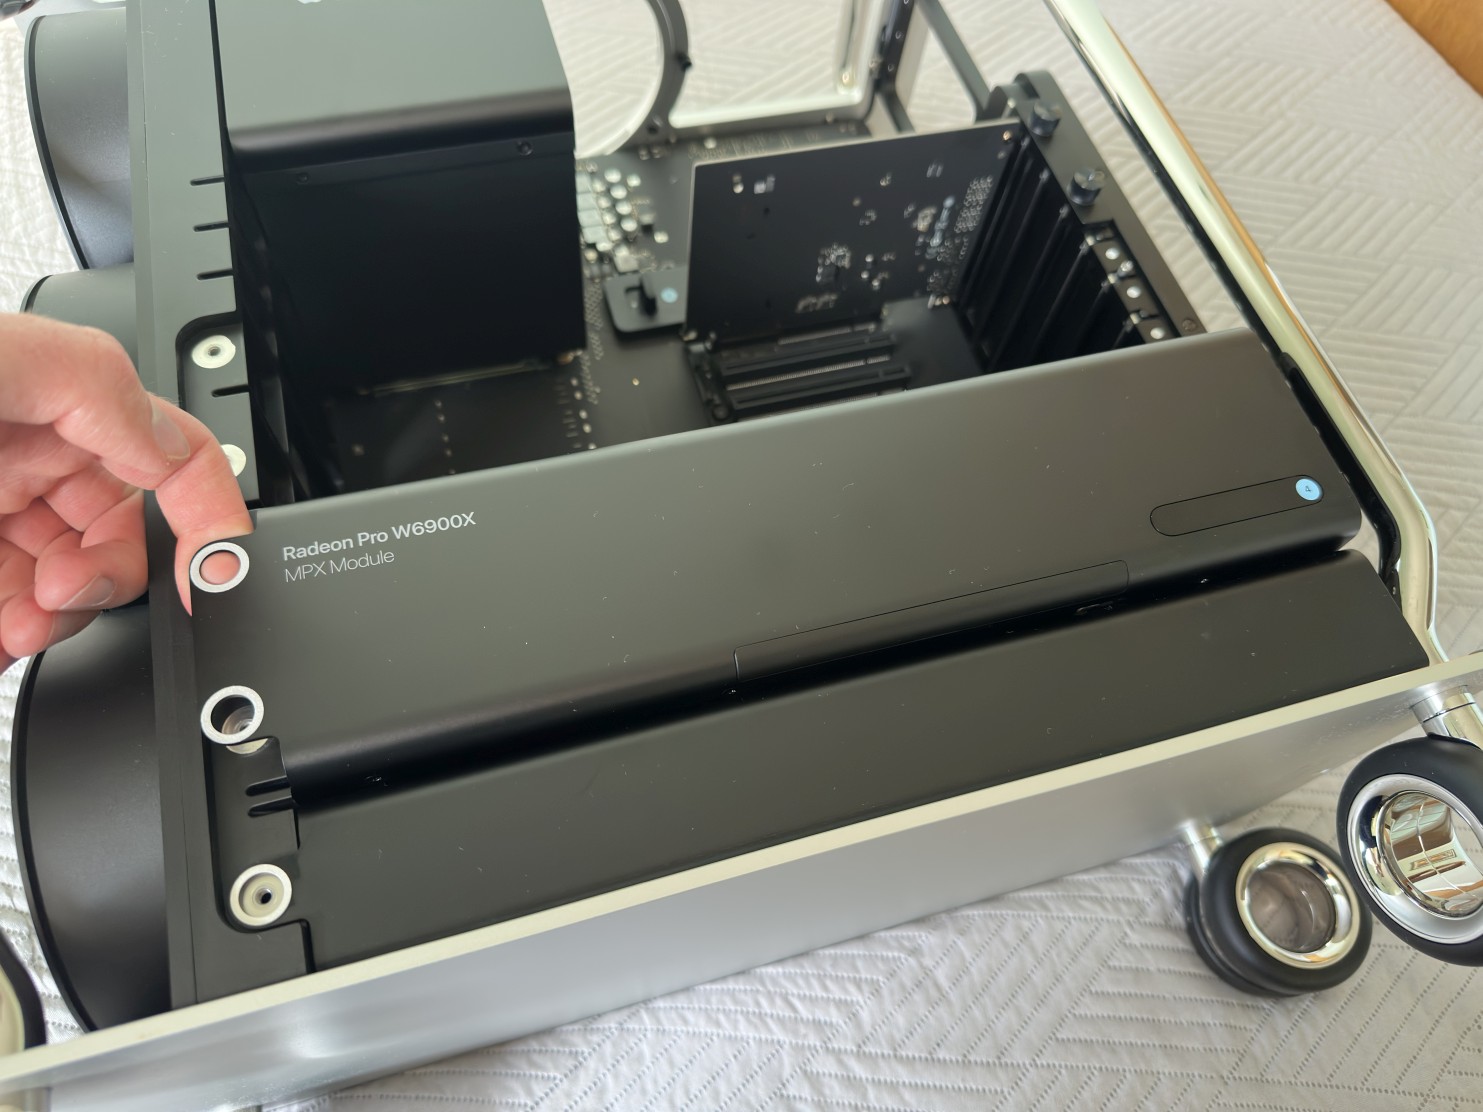
Step 12Use both hands to safely remove the MPX module from the computer. |
 |
|
|
|
Step 13If your MPX module was was wider than the card you are going to install, then you can reinstall the two or three missing PCIe brackets to prevent dust getting into the chassis. |
 |
|
|
|
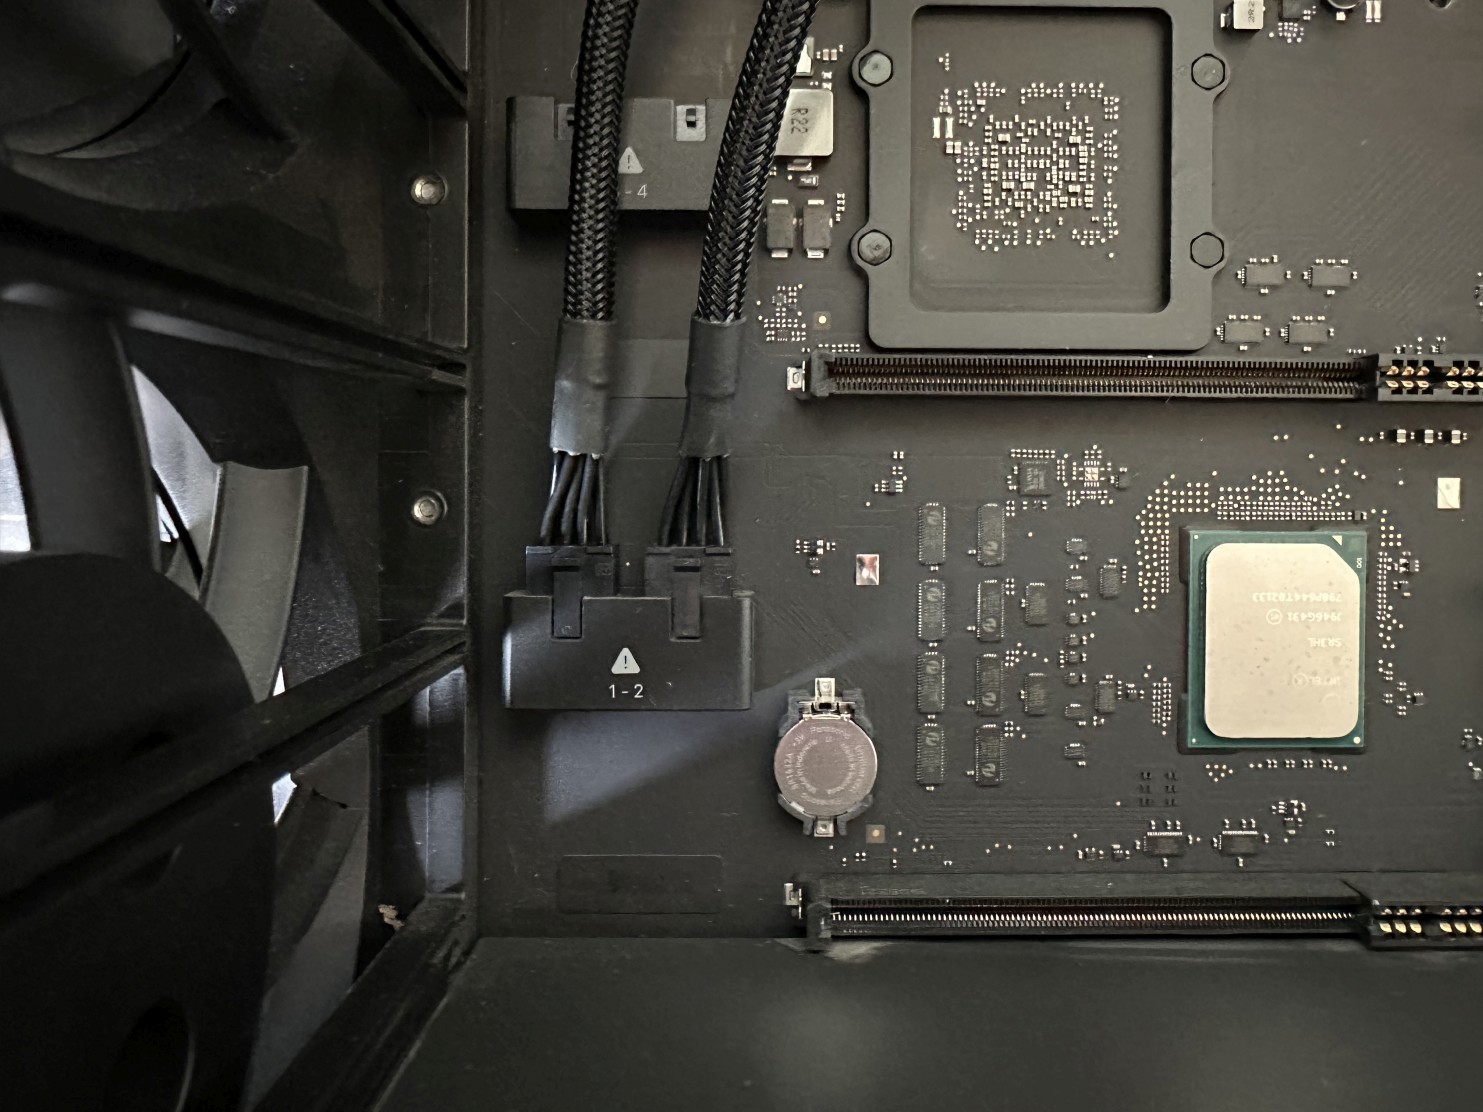
Step 14Locate three power connector on the left side of the chassis. Connectors 1-2 are 8-pin and provide 150W each. Connectors 3-4 are also 8-pin and provide 150W each. Connector 5-8 is single 6-pin and provide 75W. |
 |
|
|
|
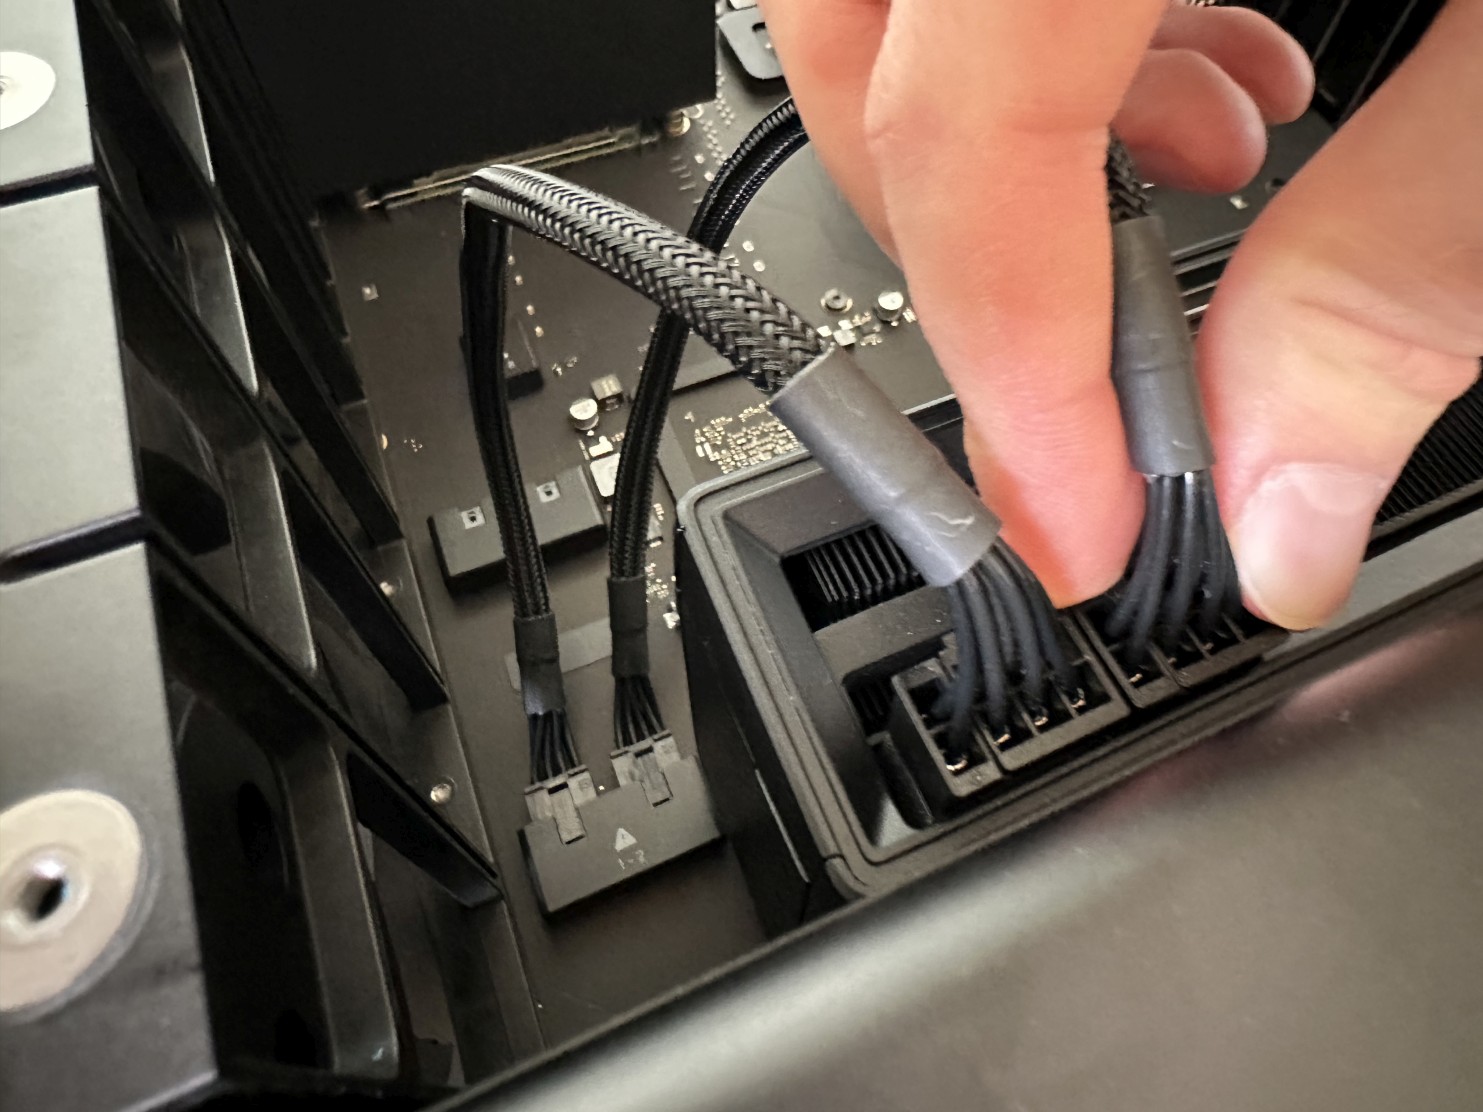
Step 15Connect the power cables.
For cards with a single 6-pin power connector you need to use connector 5-8 and a single mini 6-pin to large 6-pin power cable.
For cards with a single 8-pin power connector you need to use one of the connectors, either 1, 2, or 3, 4 with a single mini 8-pin to large 8-pin power cable.
For cards with 6+8-pin power connectors you need to use connector 5-8 with a a single mini 6-pin to large 6-pin power cable and one of the connectors, either 1, 2, or 3, 4 with a single mini 8-pin to large 8-pin power cable.
For cards with 8+8-pin power connectors you need to use both connectors, either 1 and 2, or 3 and 4 and two mini 8-pin to large 8-pin power cables.
For cards with 8+8+8-pin power connectors you need to use both connectors 1 and 2 or 3 and 4, and one additional connector, either 3 or 4, or 1 or 2 with three mini 8-pin to large 8-pin power cables. |
 |
|
|
|
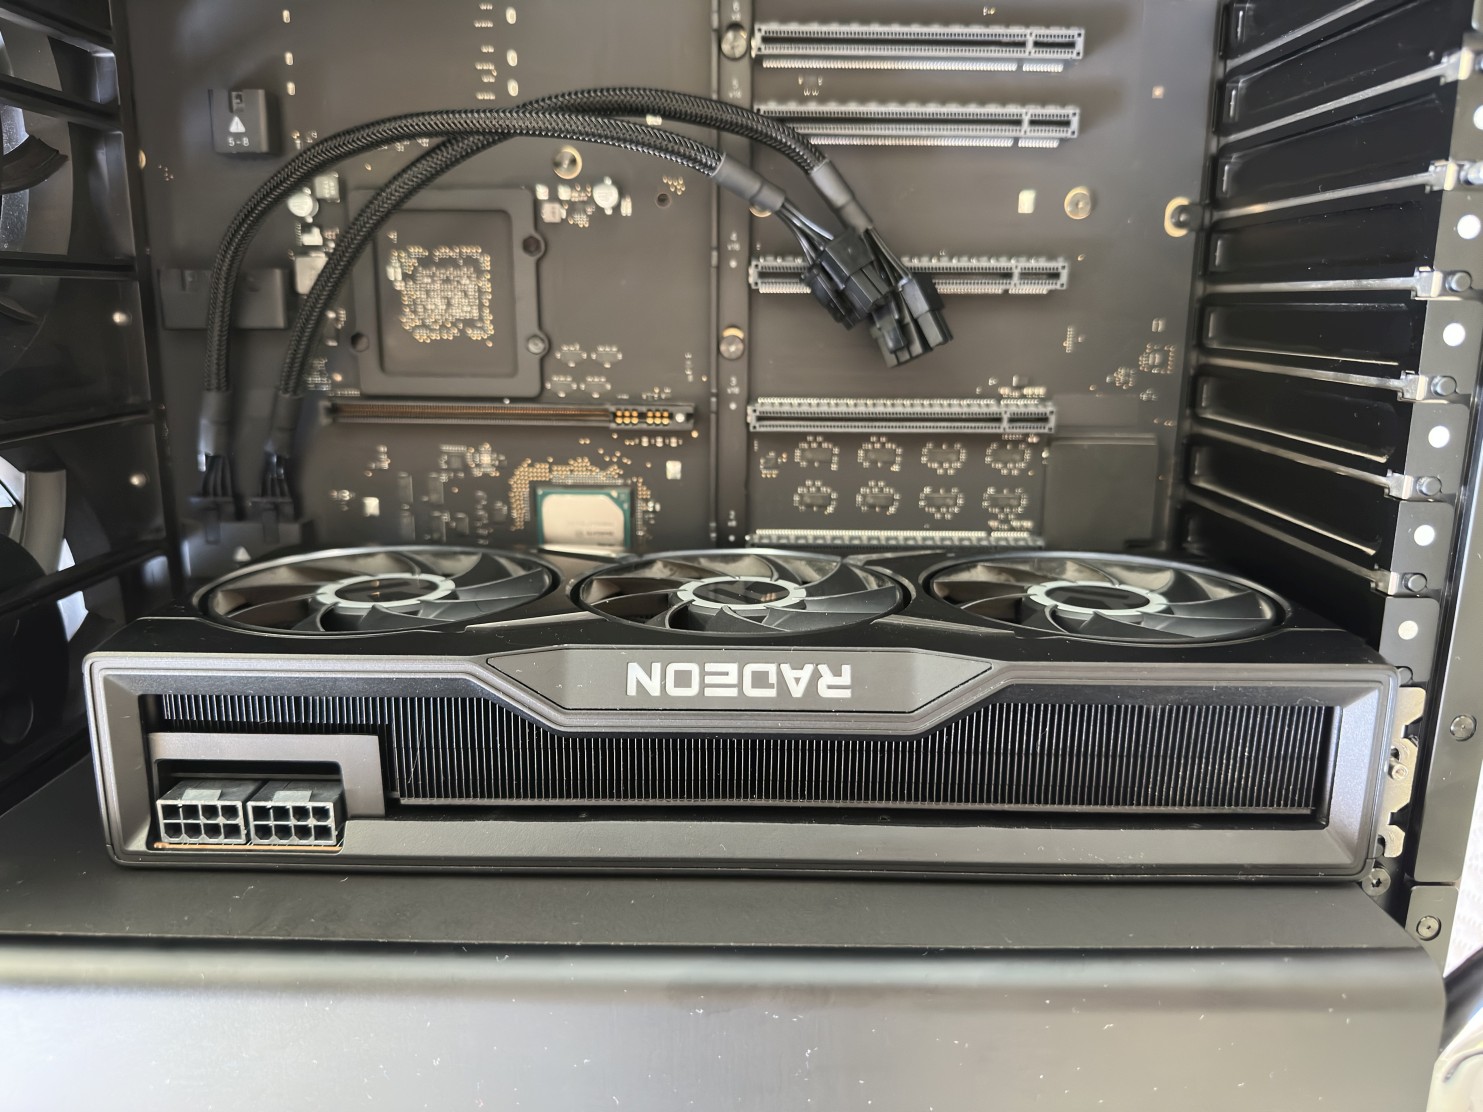
Step 16Insert the card to the slot 1 x16, or to slot 3 x16 if you plan to keep the MPX module. |
 |
|
|
|
Step 17Connect the large ends of the power cables to the graphics card (order doesn't matter). |
 |
|
|
|
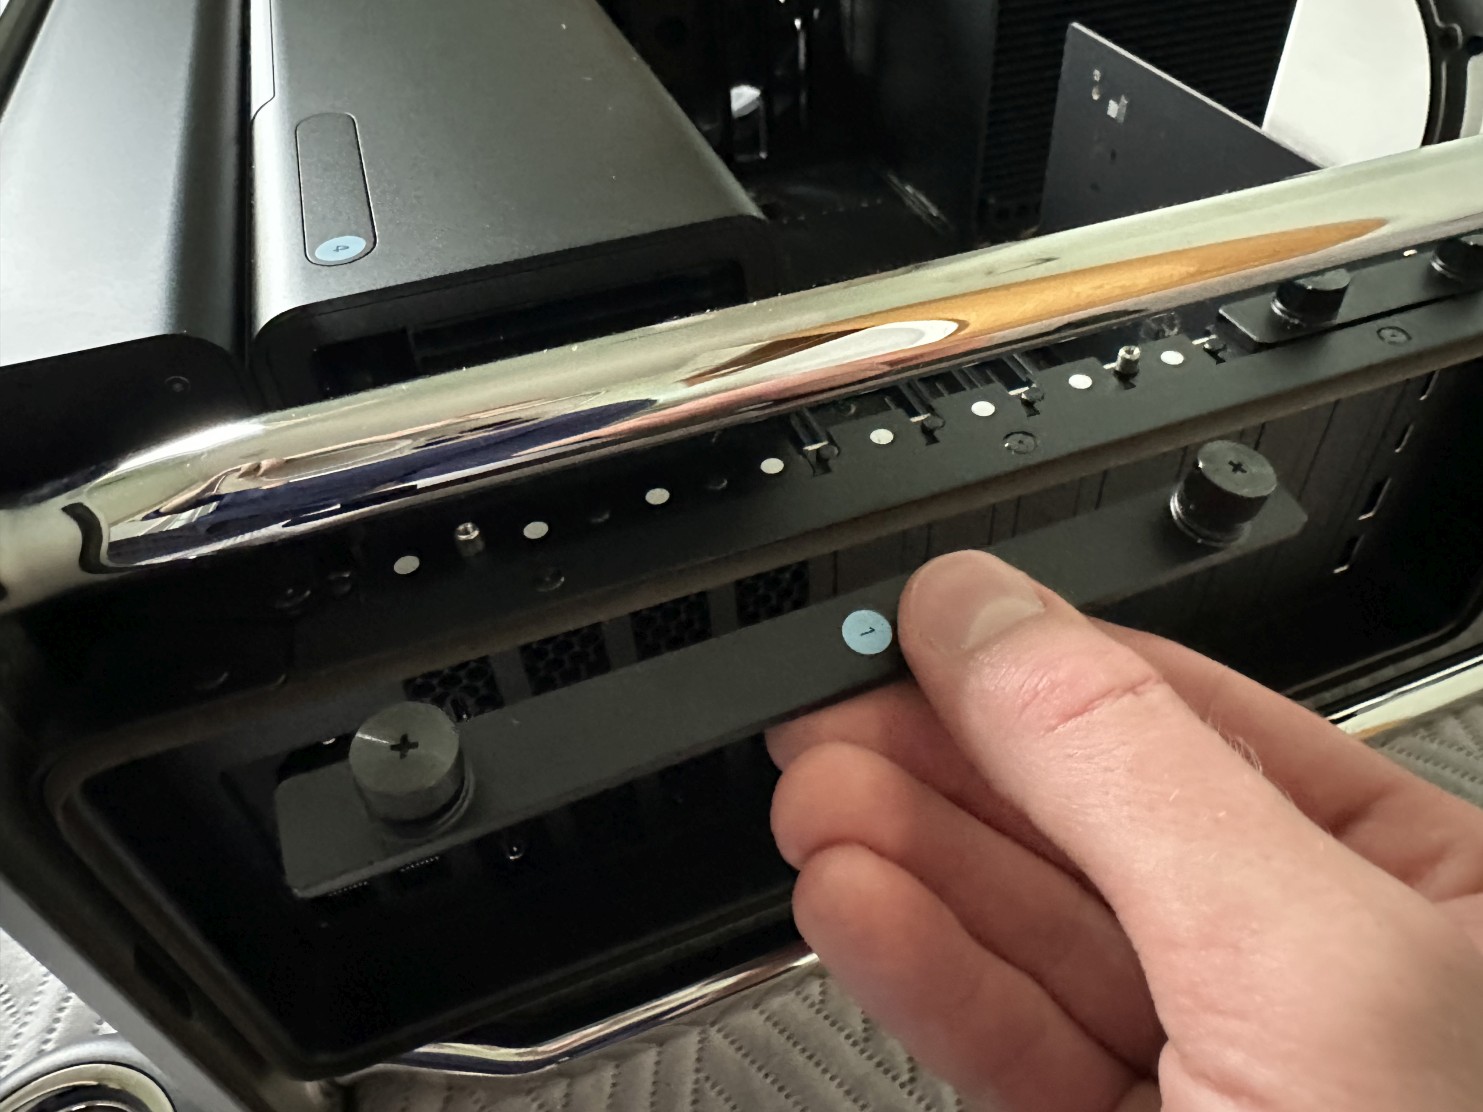
Step 18Reinstall the right clamp plate and tighten the two captive screws with your fingers or Philips screwdriver. |
 |
|
|
|
Step 19Reinstall the left clamp plate and tighten the four captive screws with Philips screwdriver. |
 |
|
|
|
Step 20Slide the PCIe retention latch to the left (into locked position). |
 |
|
|
|
Step 21Make sure the latch is in unlocked position and slowly slide back the housing over the frame. |
 |
|
|
|
Step 22Rotate the latch into locked position (filled dot). |
 |
|
|
|
Step 23Finally, lay the latch flat. |
 |
|
|
|
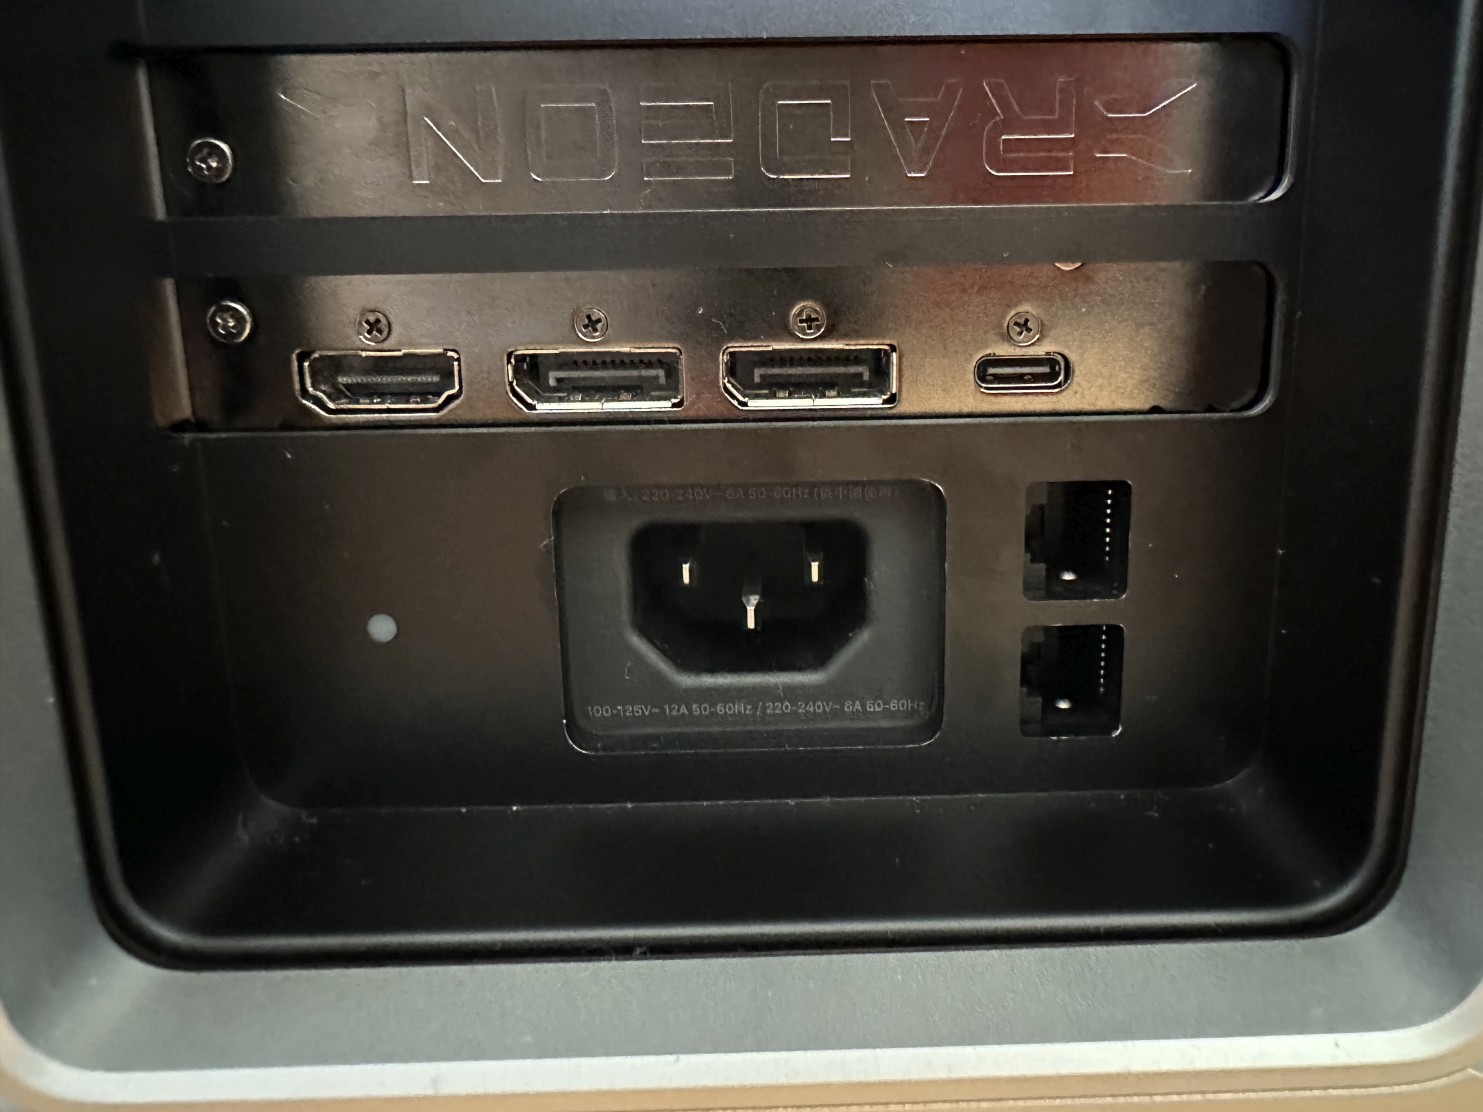
Step 24You can use all the outputs on your graphics card. PLEASE NOTE: A USB-C port is not Thunderbolt 3, so it won't support Thunderbolt 3 cables directly. You will need to use WJESOG USB-C to DisplayPort adapter with an extra USB-A connector and any DisplayPort to USB-C adapter to get output via a USB-C port. In most cases it would be to just easier to use standard HDMI or DisplayPort connection. Also when there is no MPX module inside the Mac Pro you won't be able to use Apple I/O card to drive displays. |
 |