
Installation in a Mac Pro 4,1 (2009) or 5,1 (2010-2012) using additional SATA power connector (for cards with 8+8-pin power connector)
Use this guide only if you encounter power issues when using some Radeon RX Vega 56 graphics card and on all RX Vega 64 and RX 6800 XT / RX 6900 XT graphics cards.
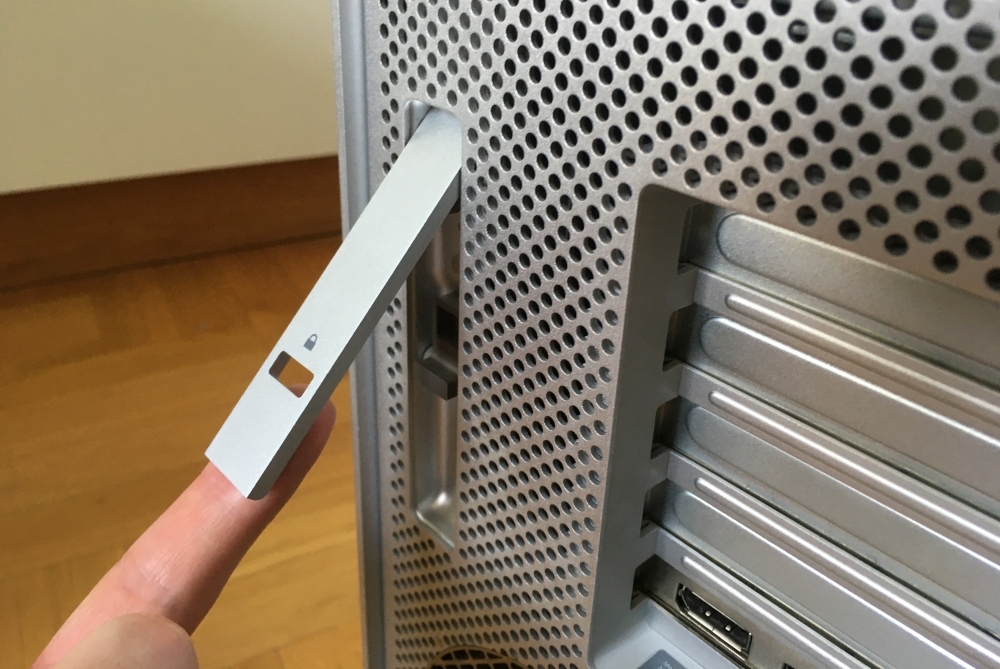
Step 1Begin by disconnecting Mac Pro power cable and all other cables from the back of Mac Pro. Lift the lever on the back and remove the side panel. |
 |
|
|
|
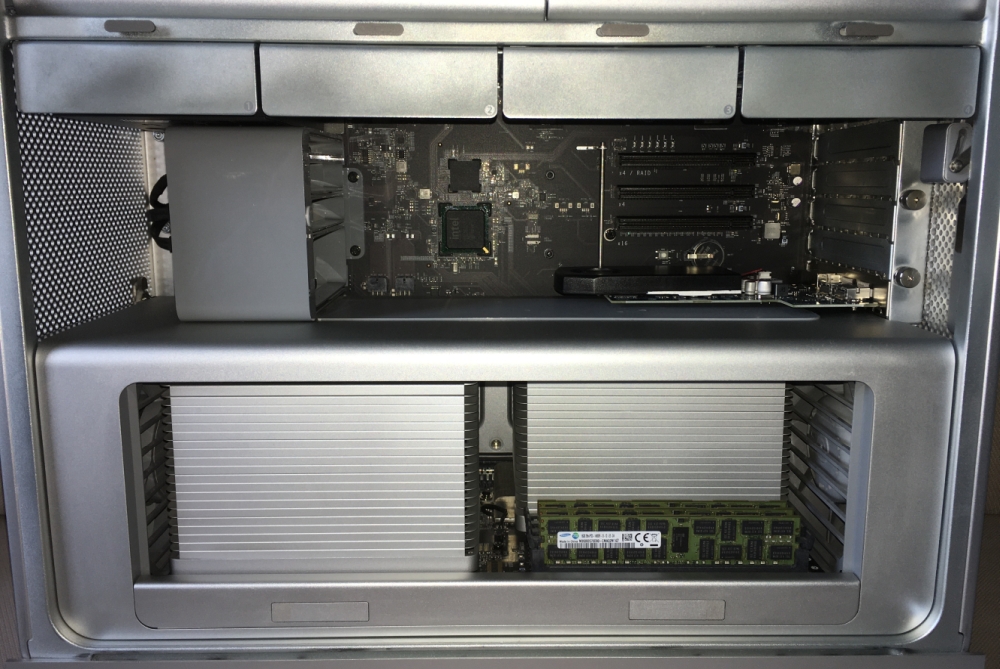
Step 2Locate your current graphics card. It should be right above CPU and memory compartment in the lowest PCI-Express slot. |
 |
|
|
|
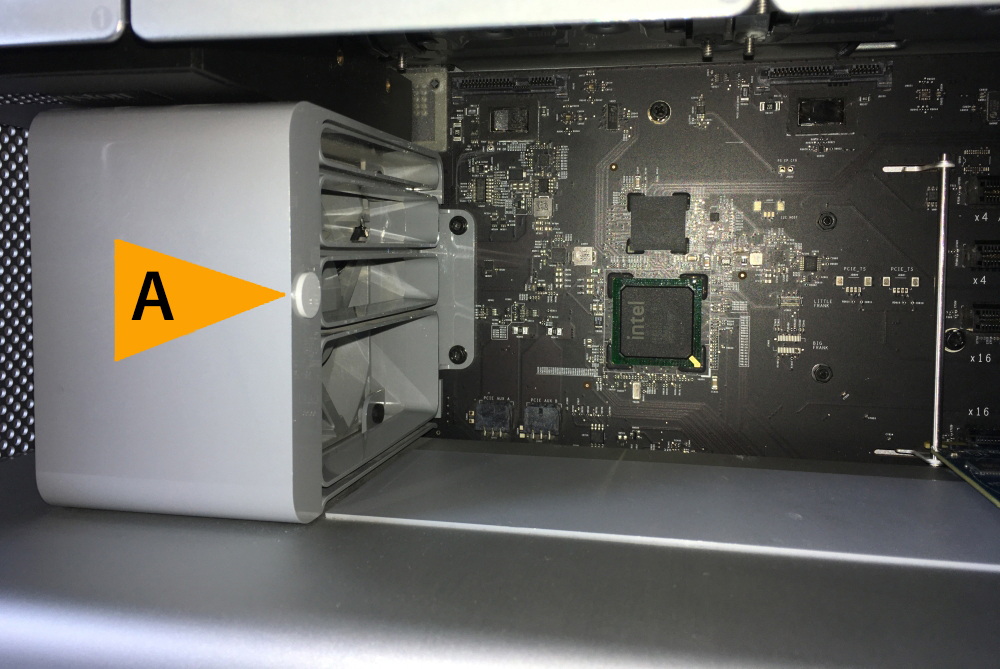
Step 3Locate a gray button on the Mac Pro front fan (A). |
 |
|
|
|
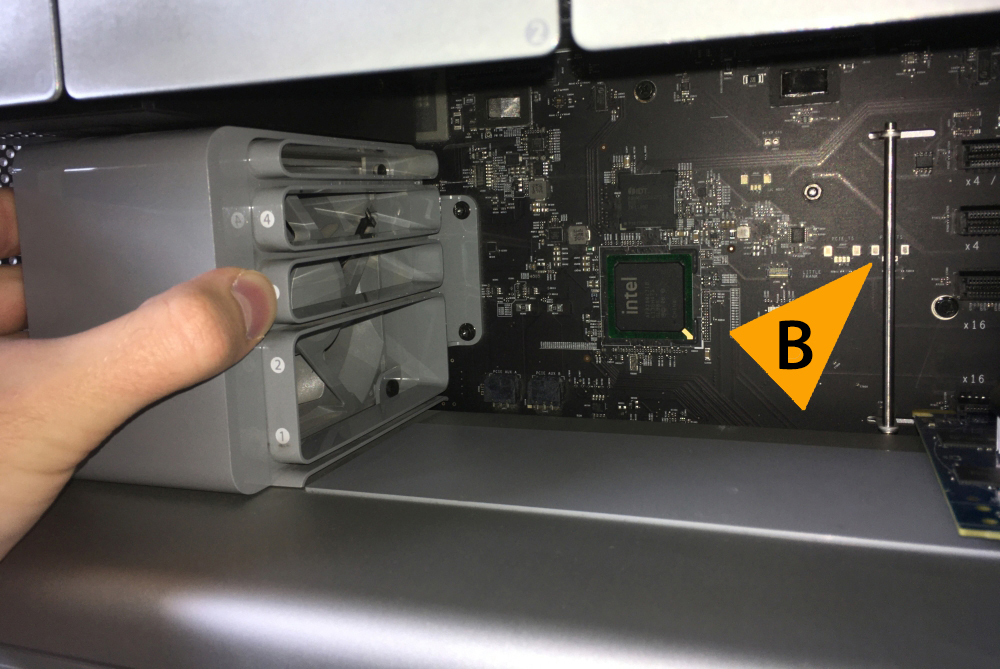
Step 4Press this button and slide the fan to the left. This will cause the metal bar (B) that holds the graphics card and other PCI-Express cards in place to also slide to the left. |
 |
|
|
|
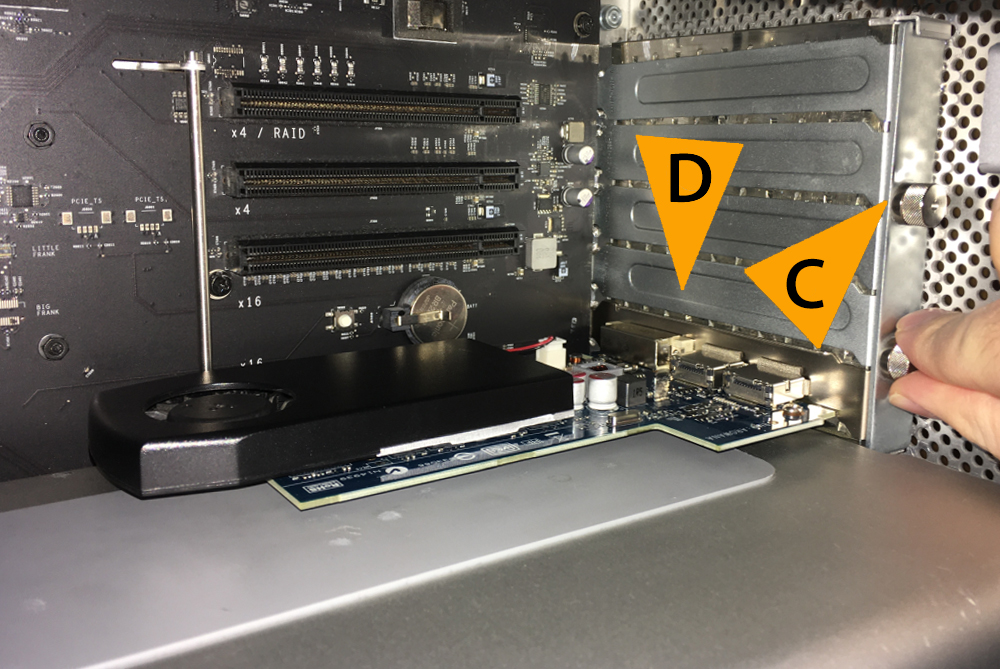
Step 5Loosen the two thumb screws by twisting them counterclockwise (C). Remove the retaining plate that they were holding.
Gently slide away your current graphics card from the computer. |
 |
|
|
|
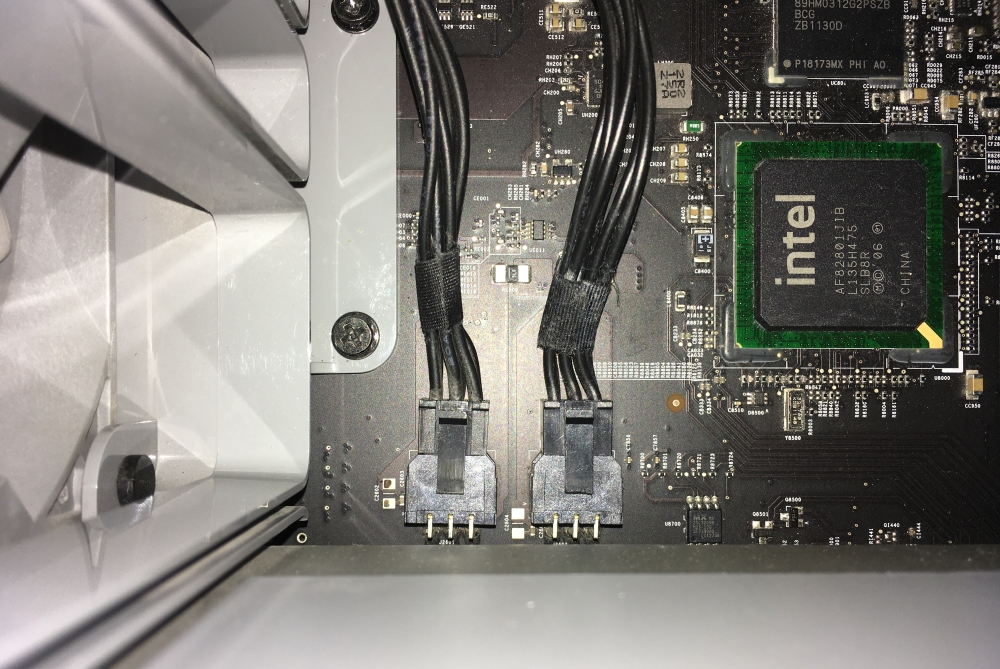
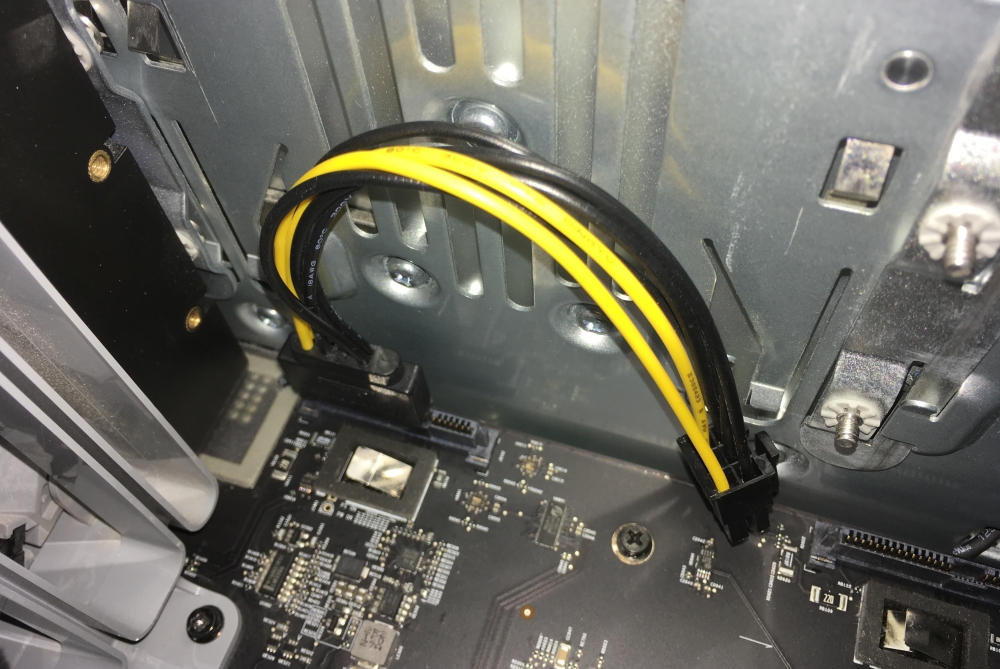
Step 6Connect two additional power cables to the motherboard PCI-Express power connectors located near the front fan. Insert the small 6-pin end of each power cable into the connector on the motherboard until it snaps into place. |
 |
|
|
|
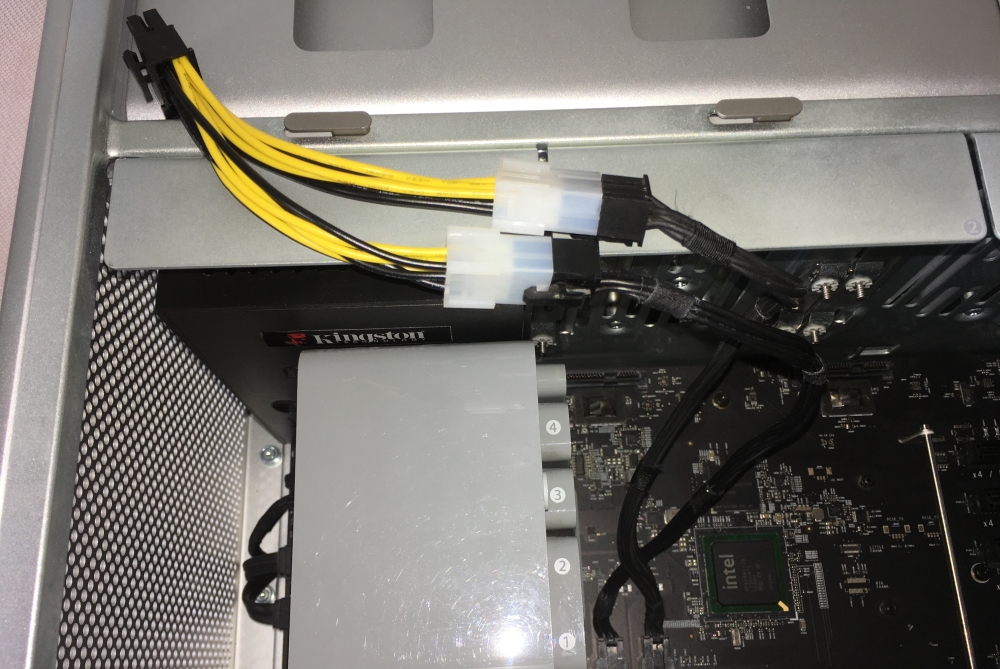
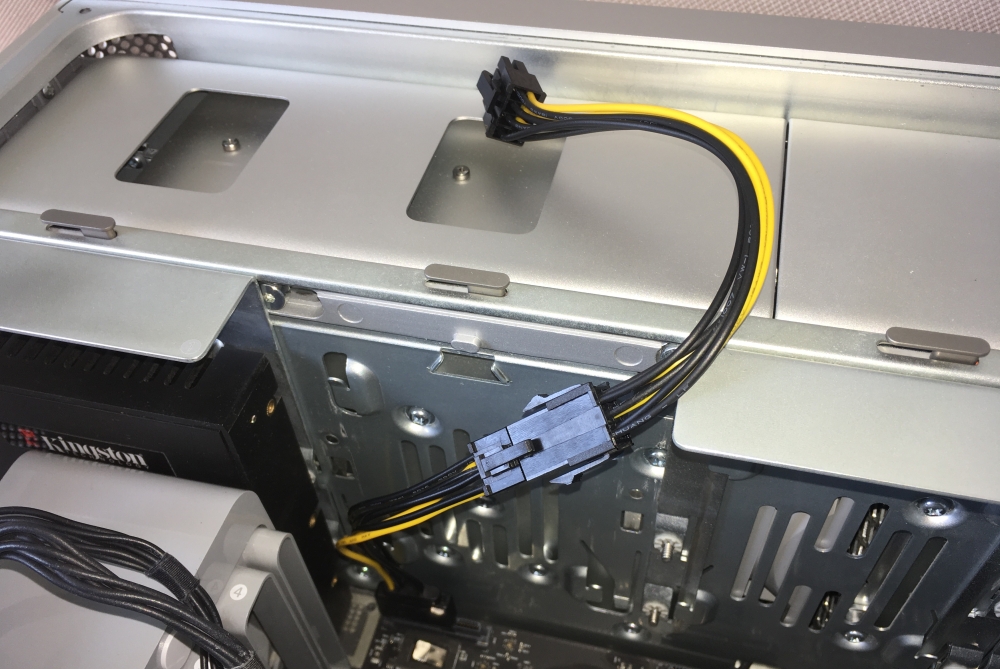
Step 7Connect 2x6-pin to 8-pin adapter to both of the large 6-pin ends. As result you will get a single 8-pin connector. |
 |
|
|
|
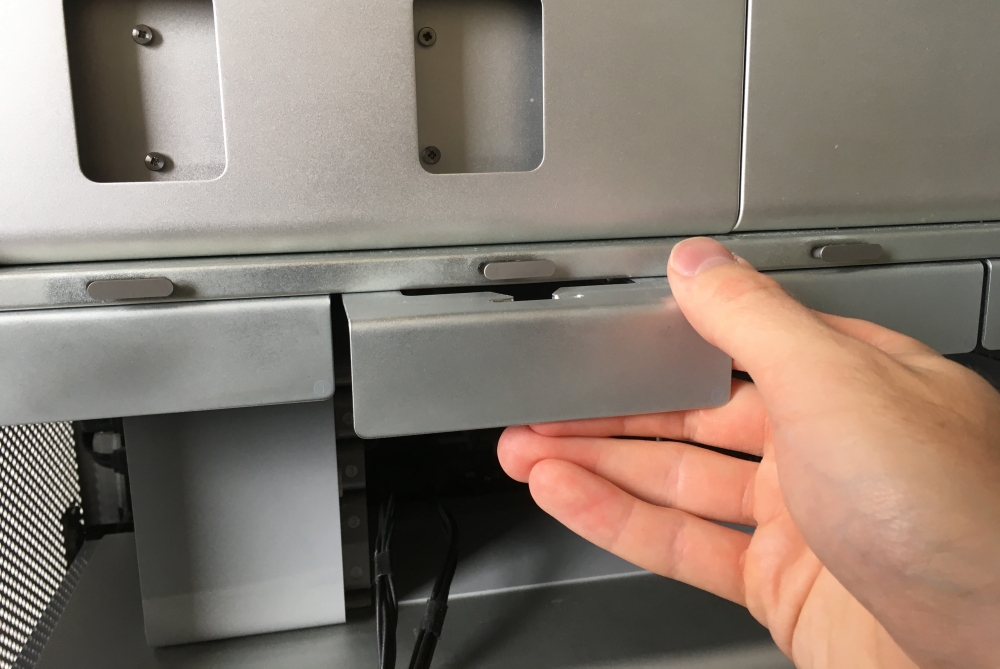
Step 8Pull out the second HDD bay to reveal SATA power connector. |
 |
|
|
|
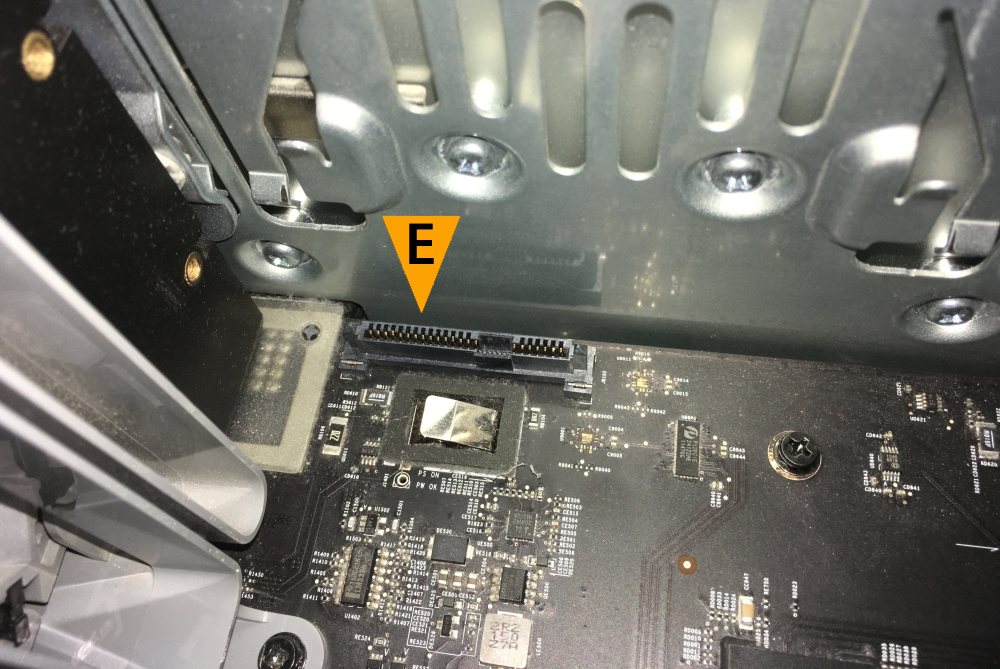
Step 9Locate SATA power connector on the left side of the SATA port (E). |
 |
|
|
|
Step 10Connect SATA to 6-pin PCI-Express power adapter to it. The adapter should already have one edge removed. As a result you will get a single 6-pin PCI-Express power connector. |
 |
|
|
|
Step 11Connect 6-pin to 8-pin PCI-Express power extension cable to make the cable long enough so it can reach the graphics card. |
 |
|
|
|
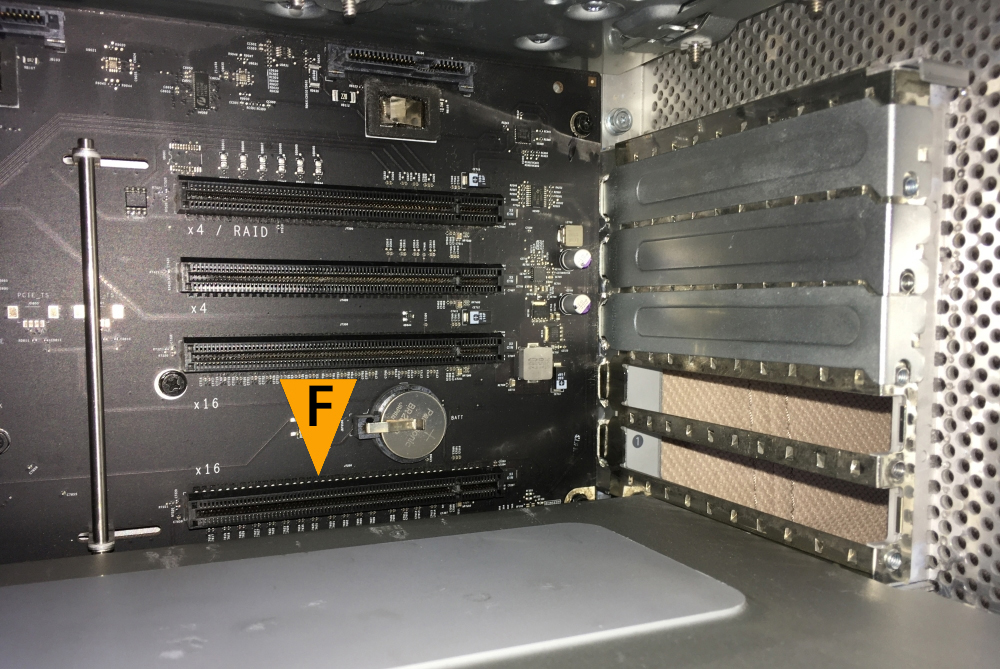
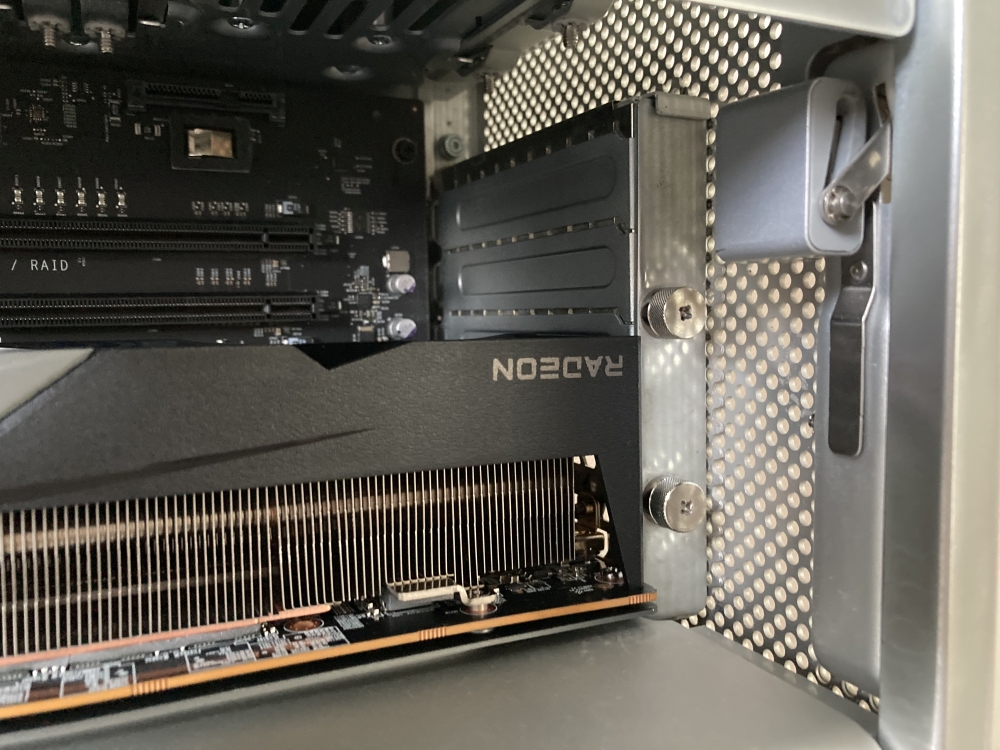
Step 12Before inserting your new graphics card make sure to remove all the protective films, PCI-Express slot connector cover and port covers if they still exist.
Locate the bottom-most PCI-Express slot (F). |
 |
|
|
|
Step 13Insert your new graphics card into PCI-Express slot. Just like your old graphics card, your new graphics card has a connector tab along its edge that will fit into this slot. Make sure to line up the connector tab and the PCI-Express slot correctly and insert it gently into the slot. Do not use excessive force. If the card does not seem to be inserting correctly remove it and check the alignment again.
Make sure to align the thumb screws holes with a bracket on the card so the retaining plate can be remounted. Sometimes you may need to lift the card a bit from the power connectors side. |
 |
|
|
|
Step 14Remount the retaining plate and secure it with a thumb screws. |
 |
|
|
|
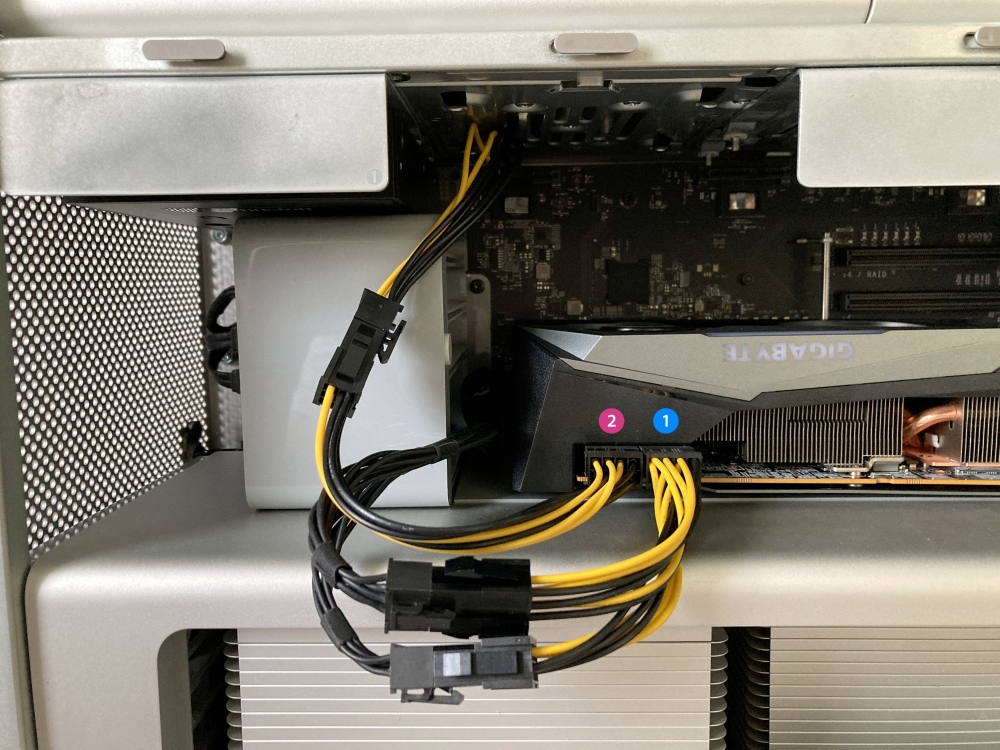
Step 15Insert the first large 8-pin power which uses motherboard power cables to the left 8-pin connector on the card (see number 1 on the picture).
|
 |